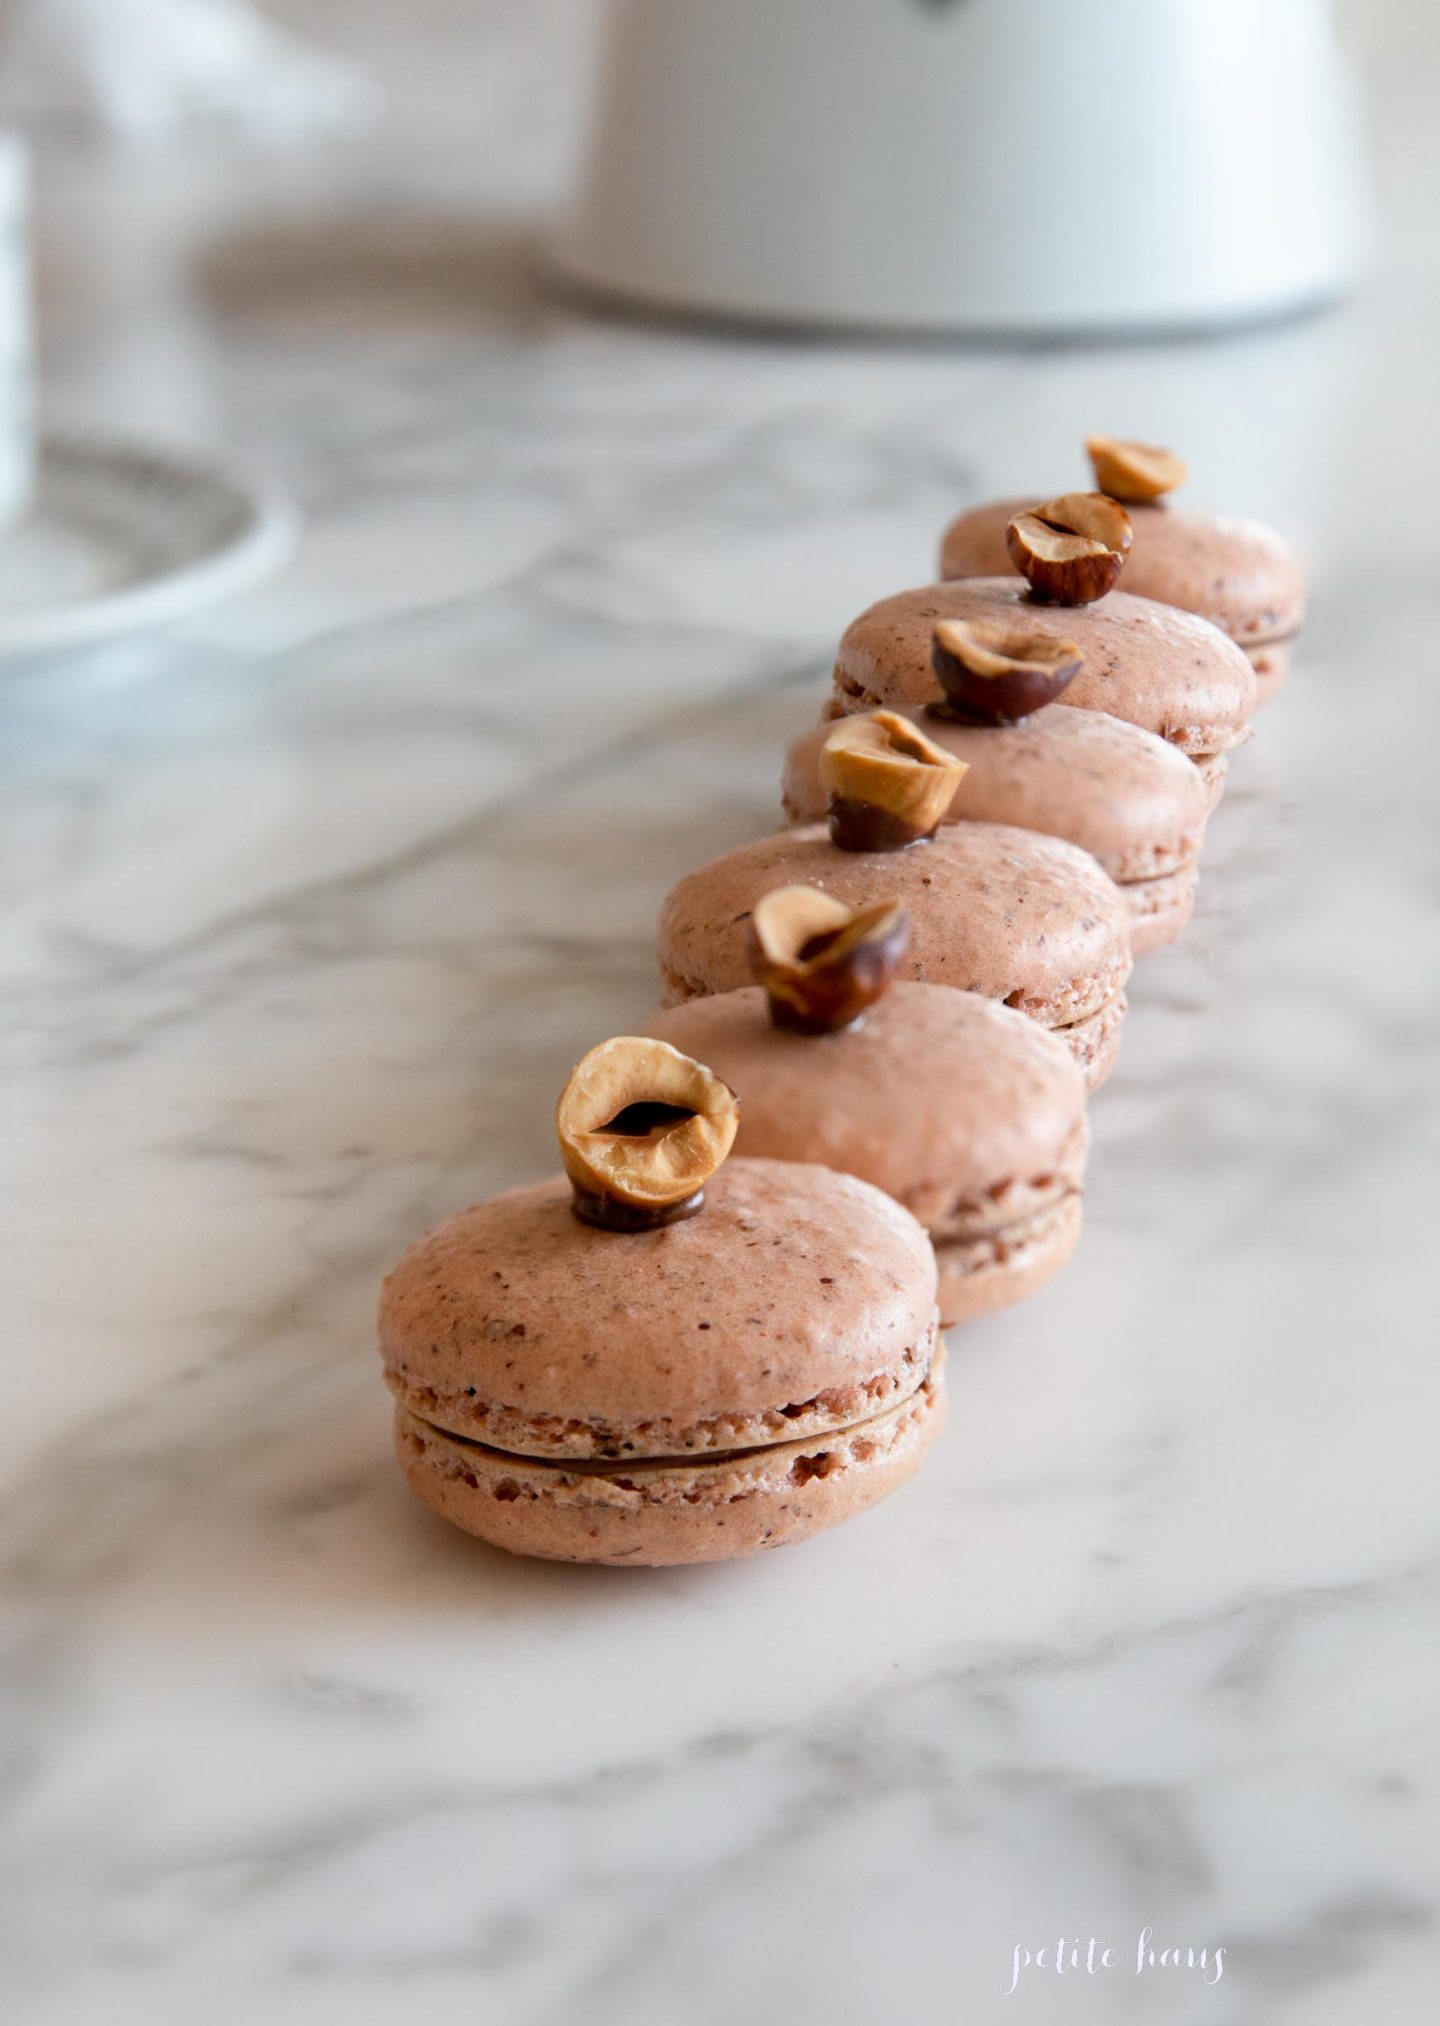
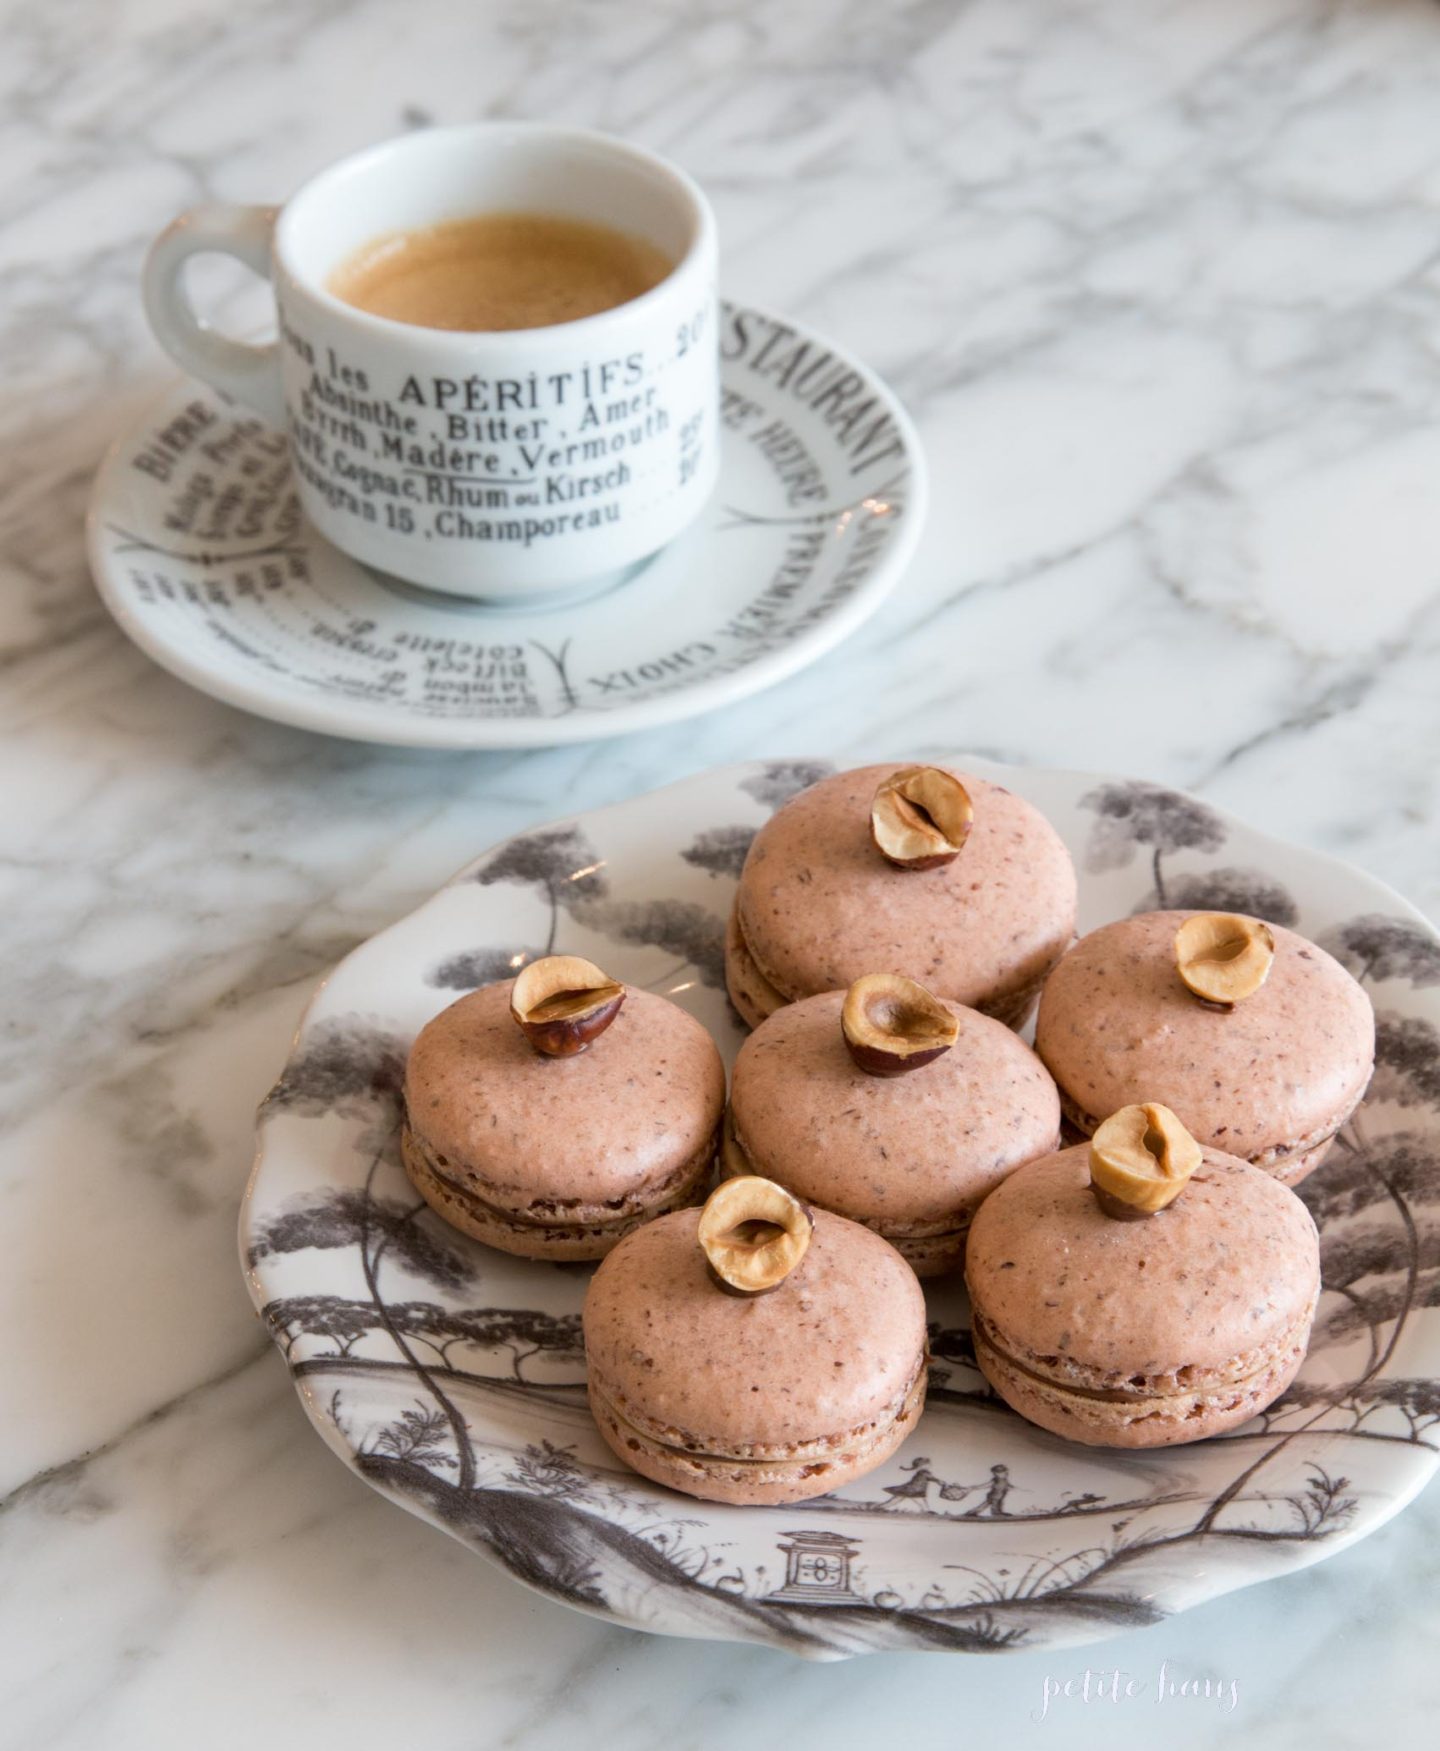
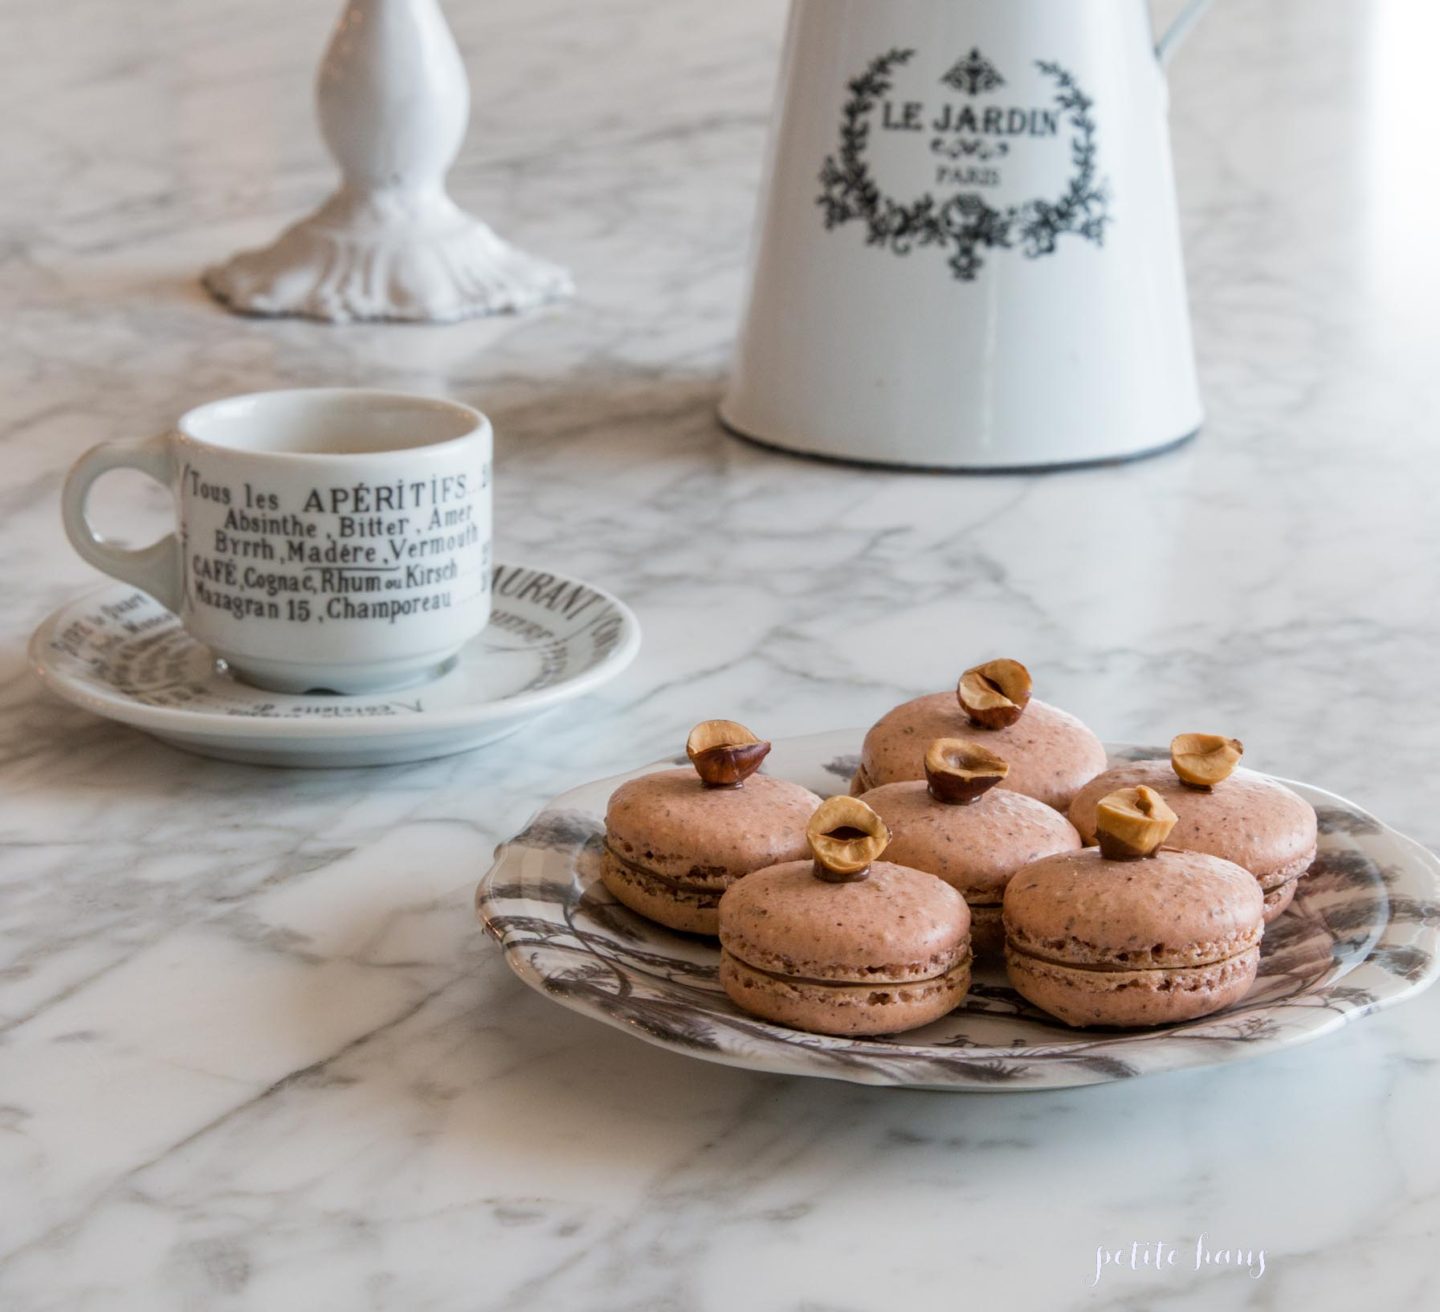
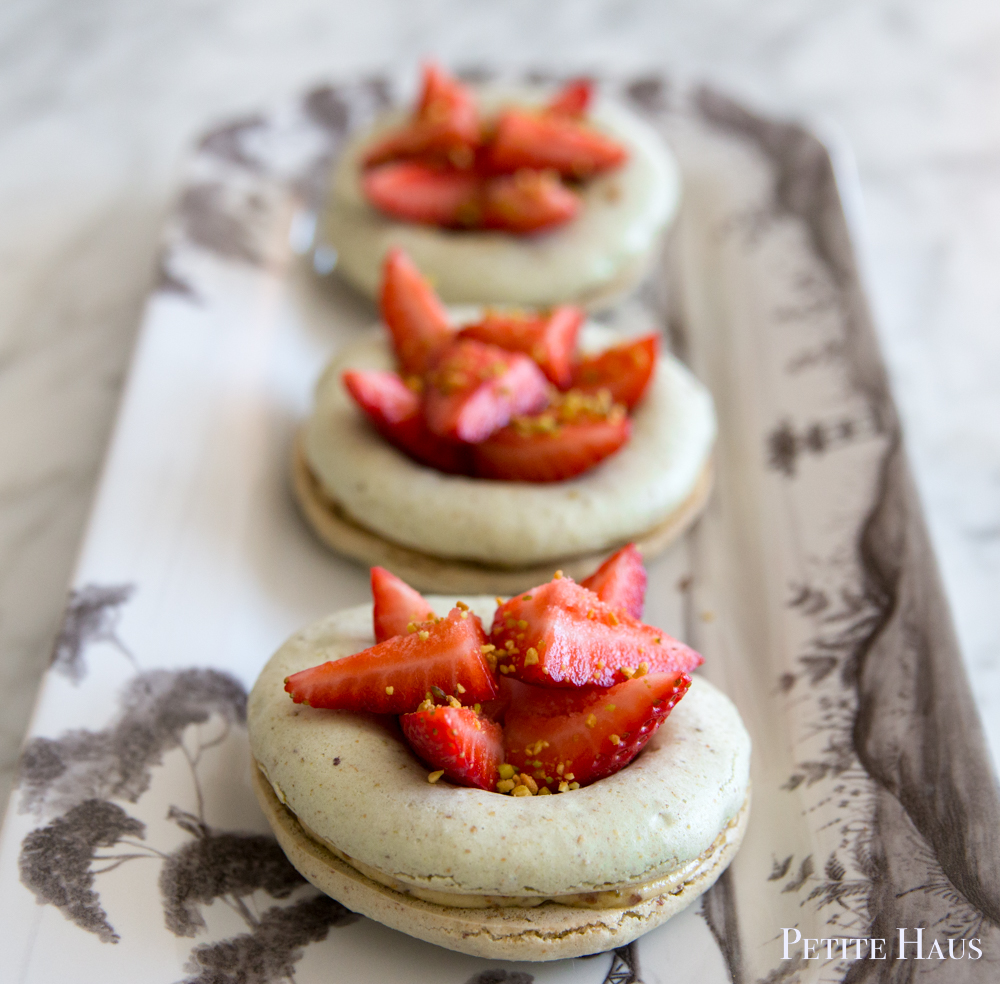
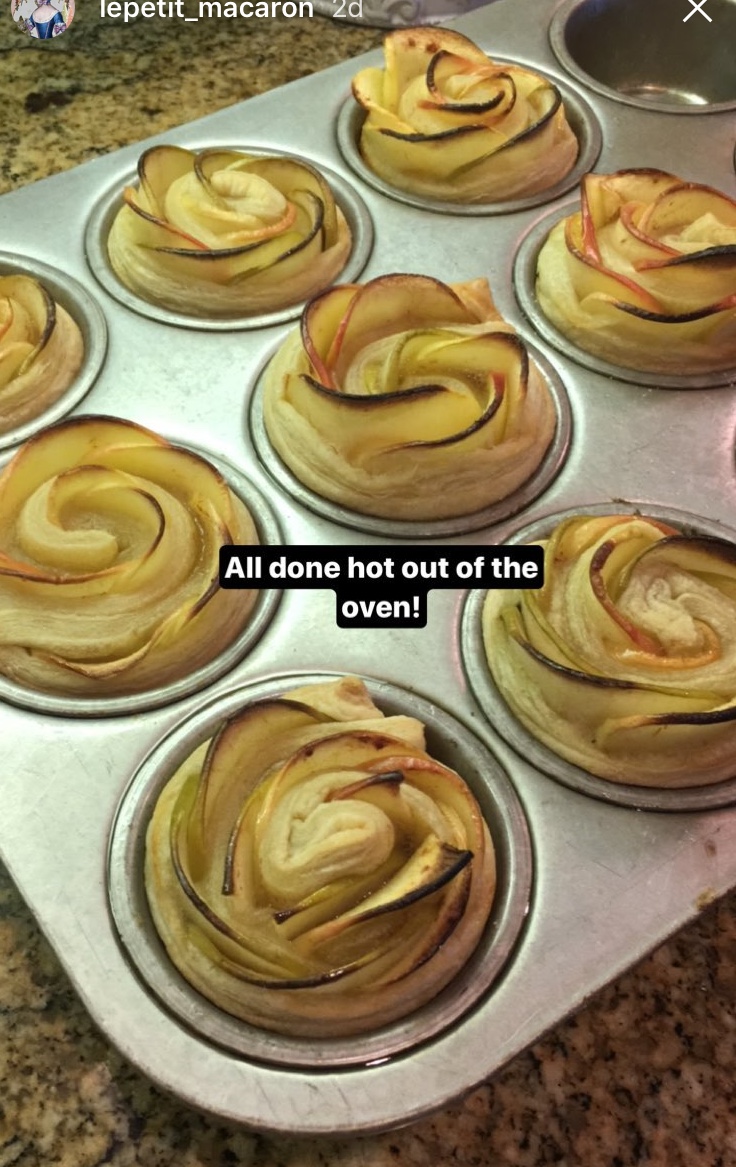
I was walking through the grocery store recently and I came across hazelnut flour made by Bob’s Red Mill (you can also get it here on Amazon). I thought to myself, HUH. I know *JUST* the thing I am going to make with this.
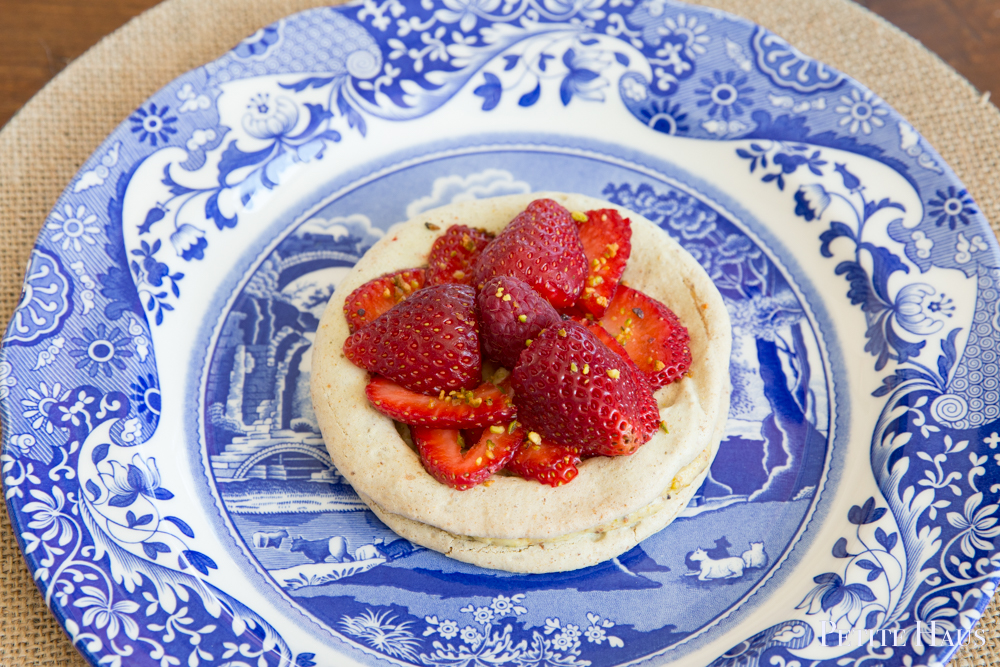
Traditional macarons call for almond flour, so I did not know how substituting for hazelnut flour would work. Turns out… works great!
Also, I did another thing new this time. While at Trader Joe’s, I found 100% liquid egg whites and gave them a try. Oh my! What a time saver!! The macarons turned out just the same! I am so pleased! If you are going to use a different brand other than Trader Joe’s, you need to make sure it is only 100% egg white and nothing else.
Materials needed: (affiliate links are used for your convenience)
-
- parchment paper or silpat (I like this silpat made in France)
- silicone spatula
- electric mixer (your hand will get tired whipping the meringue, I use this professional one in cherry red, but this model is wonderful too and perfect for those who don’t need THE BIG mixer! )
- a food scale (yes, you need this. I use this one)
- a piping tip and piping bag (I like the ateco #806, I use these tips and piping bag)
- Food coloring (the gels or dry powder works best, not the liquid store stuff)
- A macaron template
- food processor (I use this one)
Macarons Recipe
275g hazelnut flour
250g powdered sugar
210g egg whites
210g granulated sugar
1. Mix almond meal and the powdered sugar in a food processor. Be careful not to grind too long, otherwise it will form a paste.
2. Sift the almonds and powdered sugar. Set aside.
3. Weigh out granulated sugar.
4. Weigh the egg whites. Beat them slowly on a low speed until foamy. SLOWLY add the granulated sugar to the egg whites as you beat. Once all mixed, increase speed to medium and beat until a firm meringue forms. You want a firm meringue with glossy peaks but not stiff peaks. They should defy gravity and remain in the bowl if you turn it upside down. If you tilt your bowl to the side and they are sliding out, keep beating.
5. Add the food coloring gel and mix.
6. Then fold in 1/3rd of the almond/sugar mixture into the meringue with a silicone spatula. Once combined, add another third of the almond mixture. Add last bit. This batter requires more deflation during this step since it creates such a poofy meringue.
7. Add the batter to a piping bag. Pipe in rows using your template onto parchment paper.
8. Pick up the pan and beat until the counter. The cookies need to rest on the counter between 30-60 minutes. They are ready to go in the oven when they are dry to touch (the shell shouldn’t stick to your finger)
9. Set the oven to 300F.
10. Bake the cookies for 13-15 minutes, one sheet at a time. They are done when they look kind of matte and seem firm when you lightly tap on them. You can always rescue a slightly overcooked one with the maturation process that comes later, but you cannot rescue an undercooked one!!
11. Remove from paper once completely cool. If they stick to the paper, they aren’t cool yet. Or you undercooked them.
Toasted Hazelnuts
Preheat oven to 300F. Place hazelnuts on a baking sheet. Bake for about 15 minutes, or until browned. Half way during baking, stir them. Once they are cooling, use a towel and rub the skins off of them.
Filling
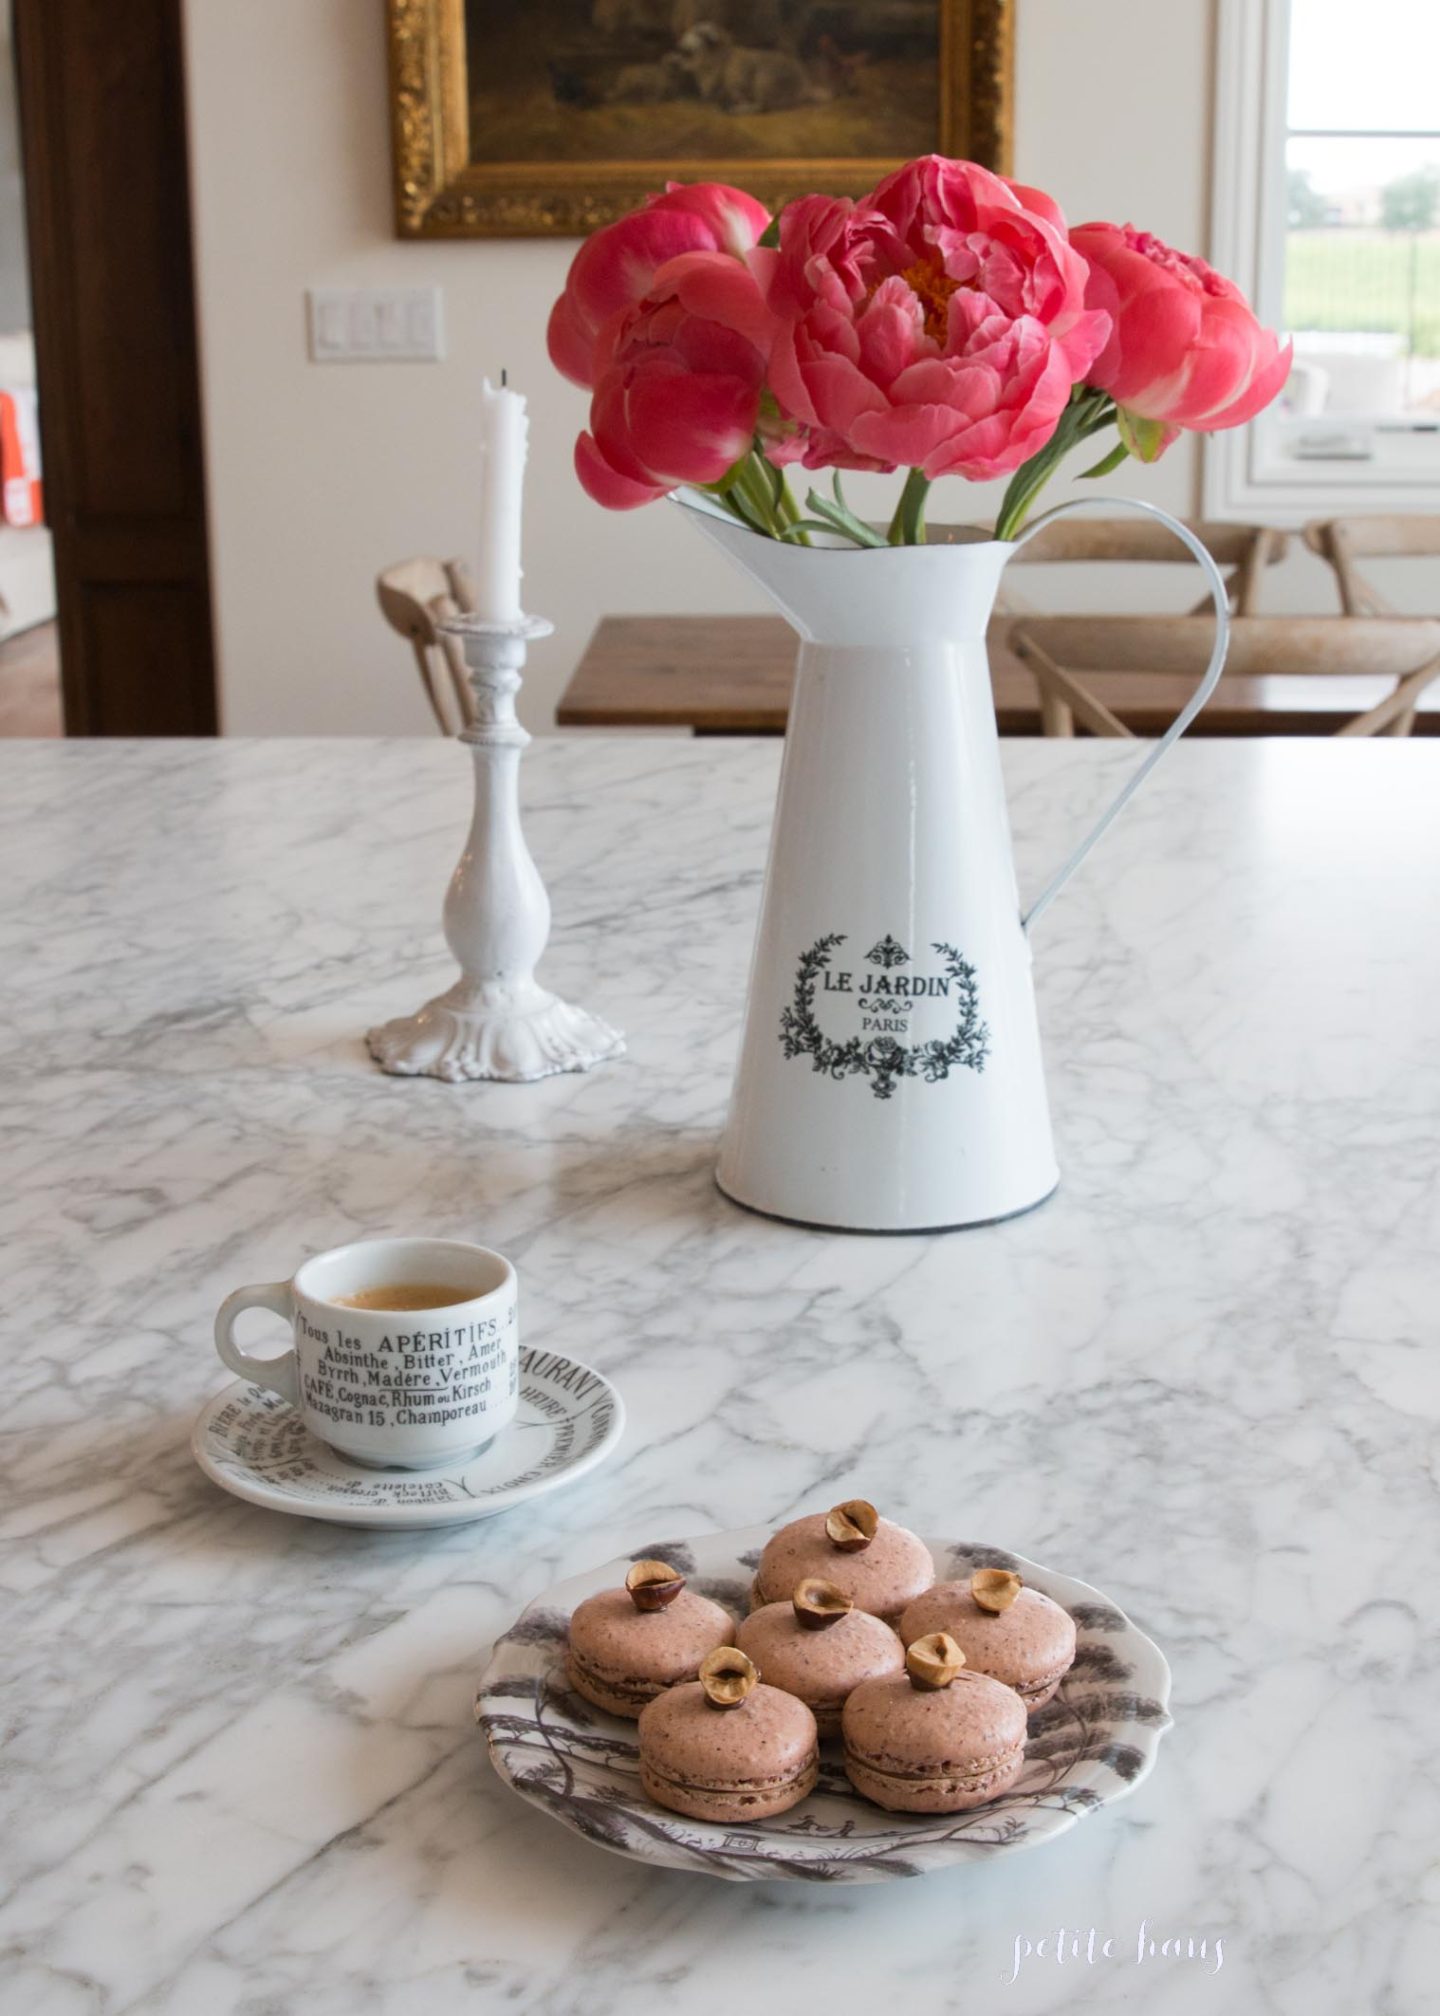
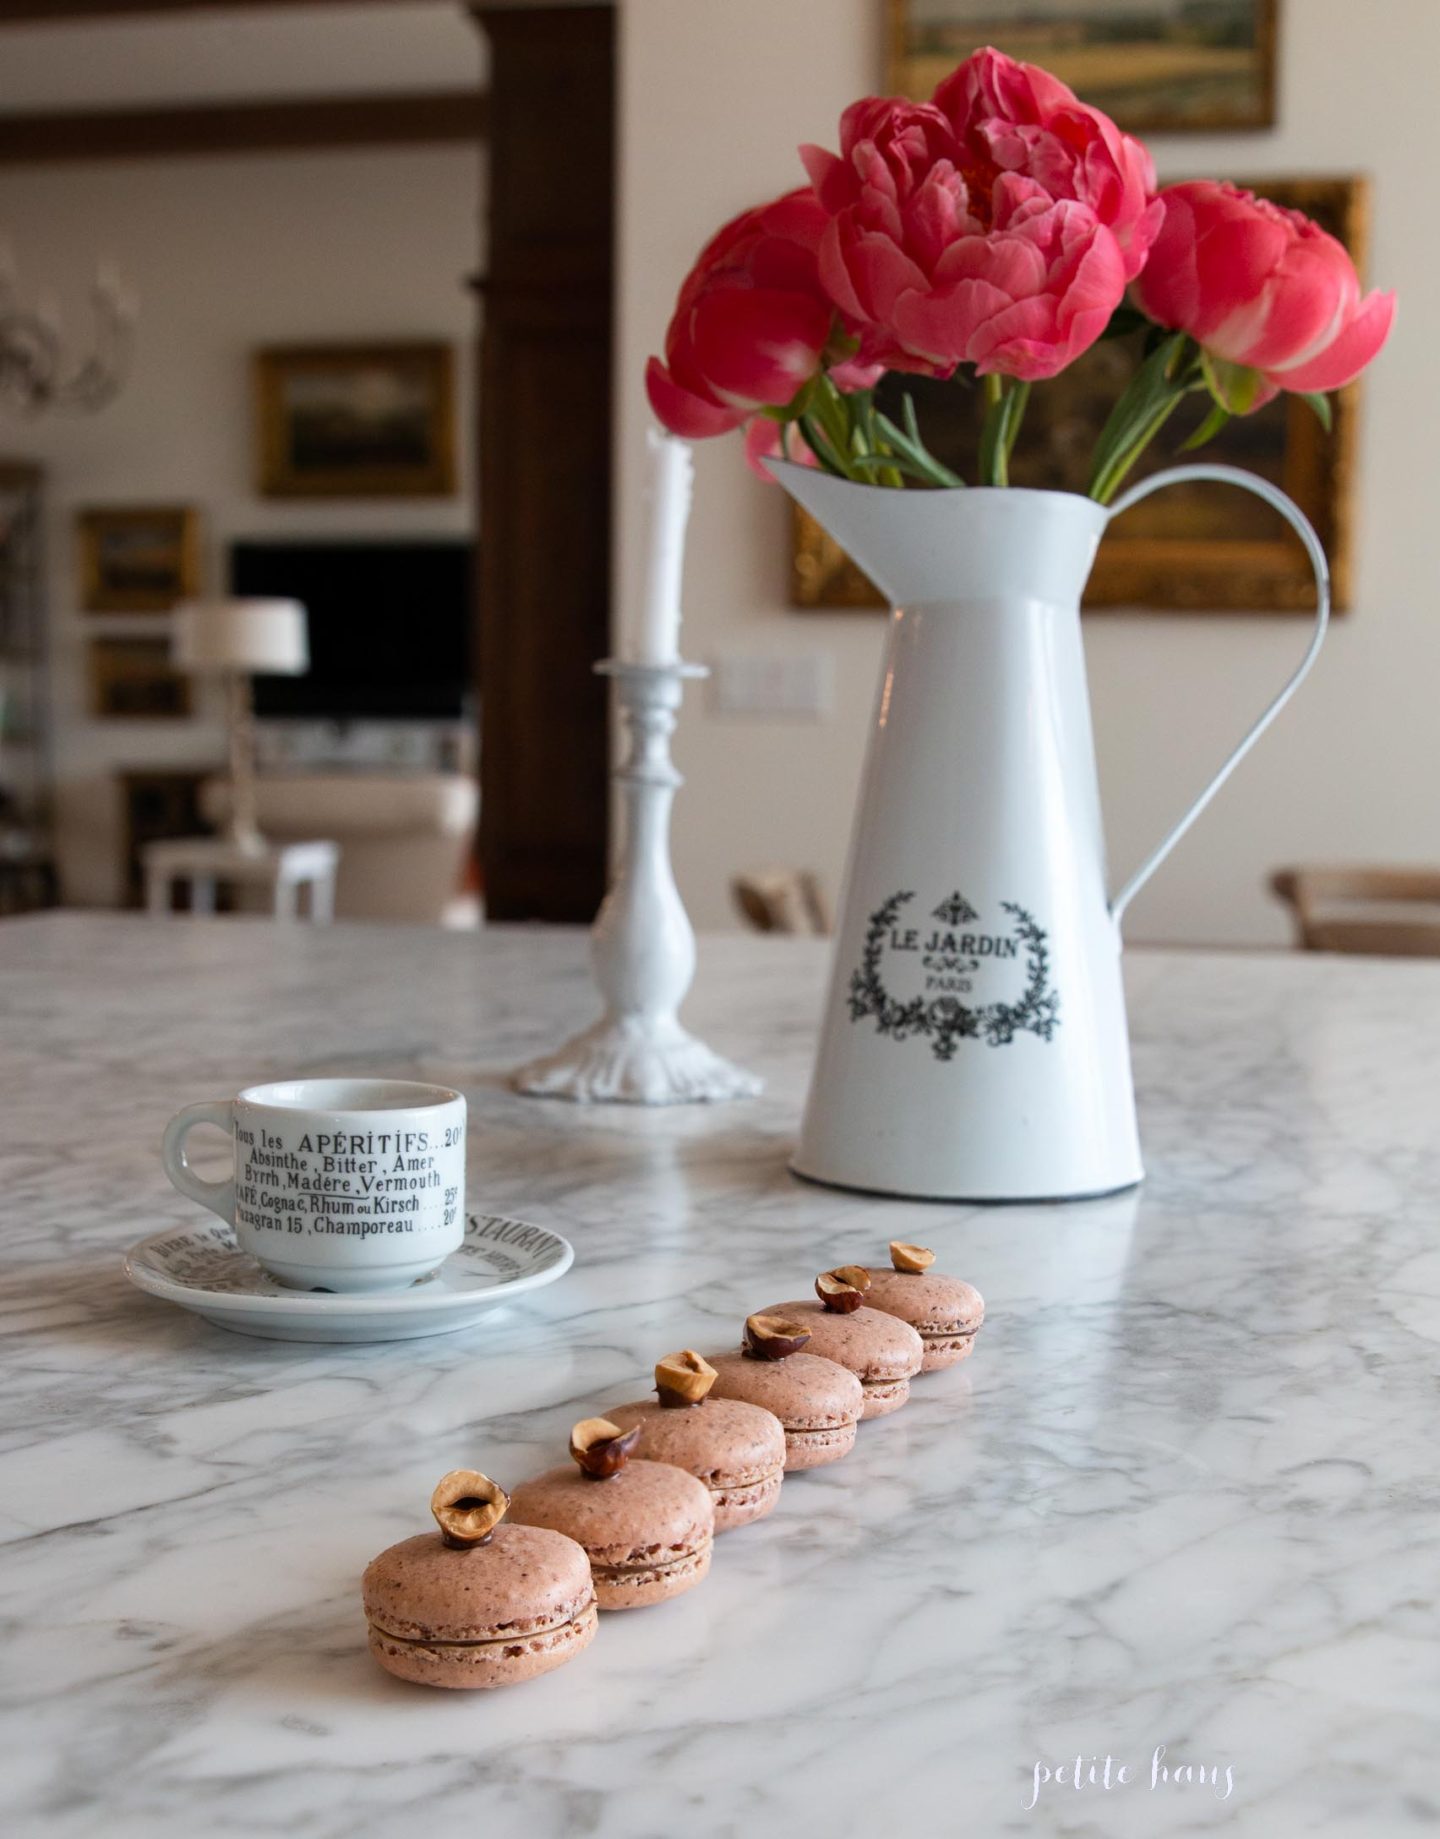
Use Nutella.
Assembly
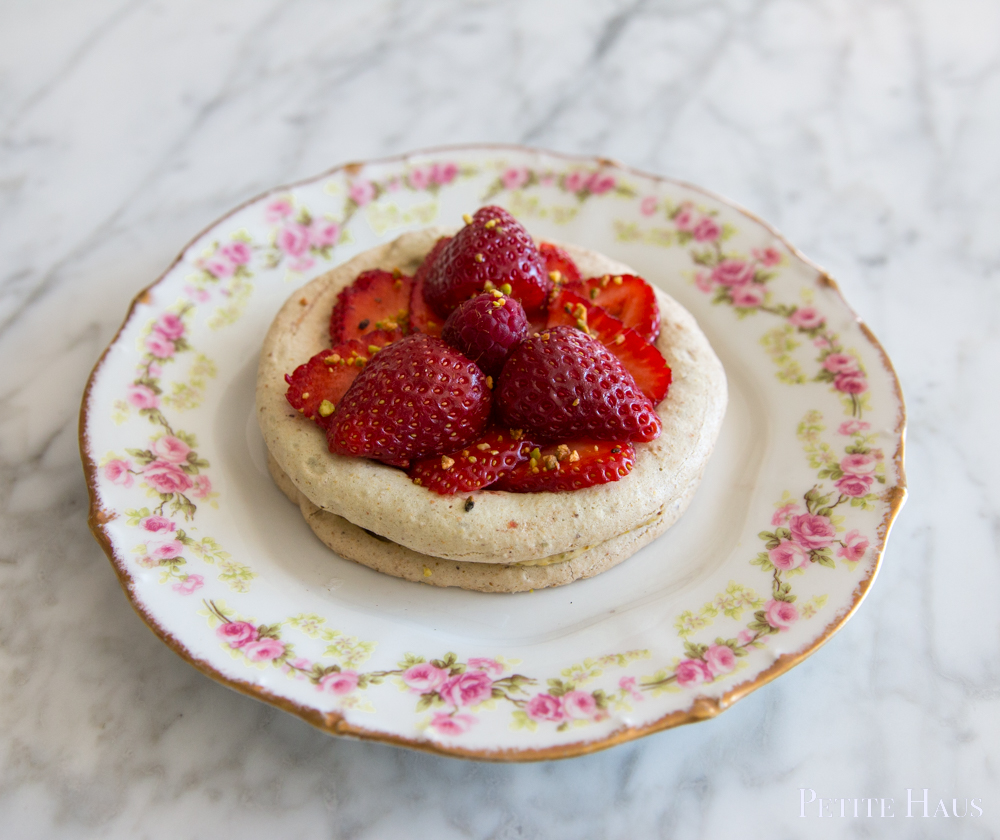
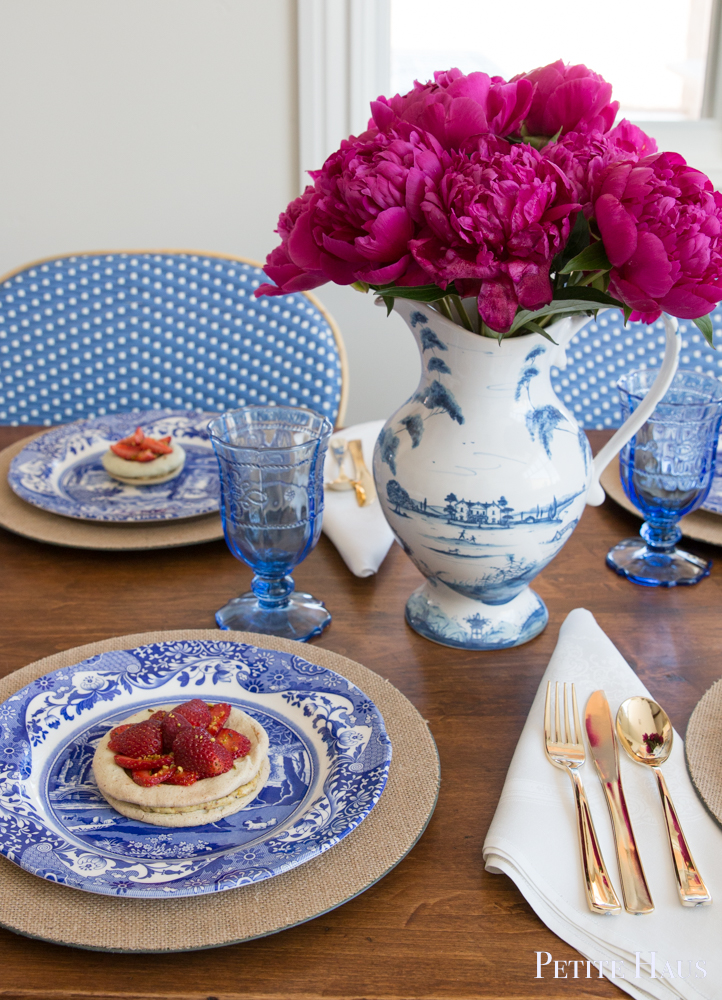
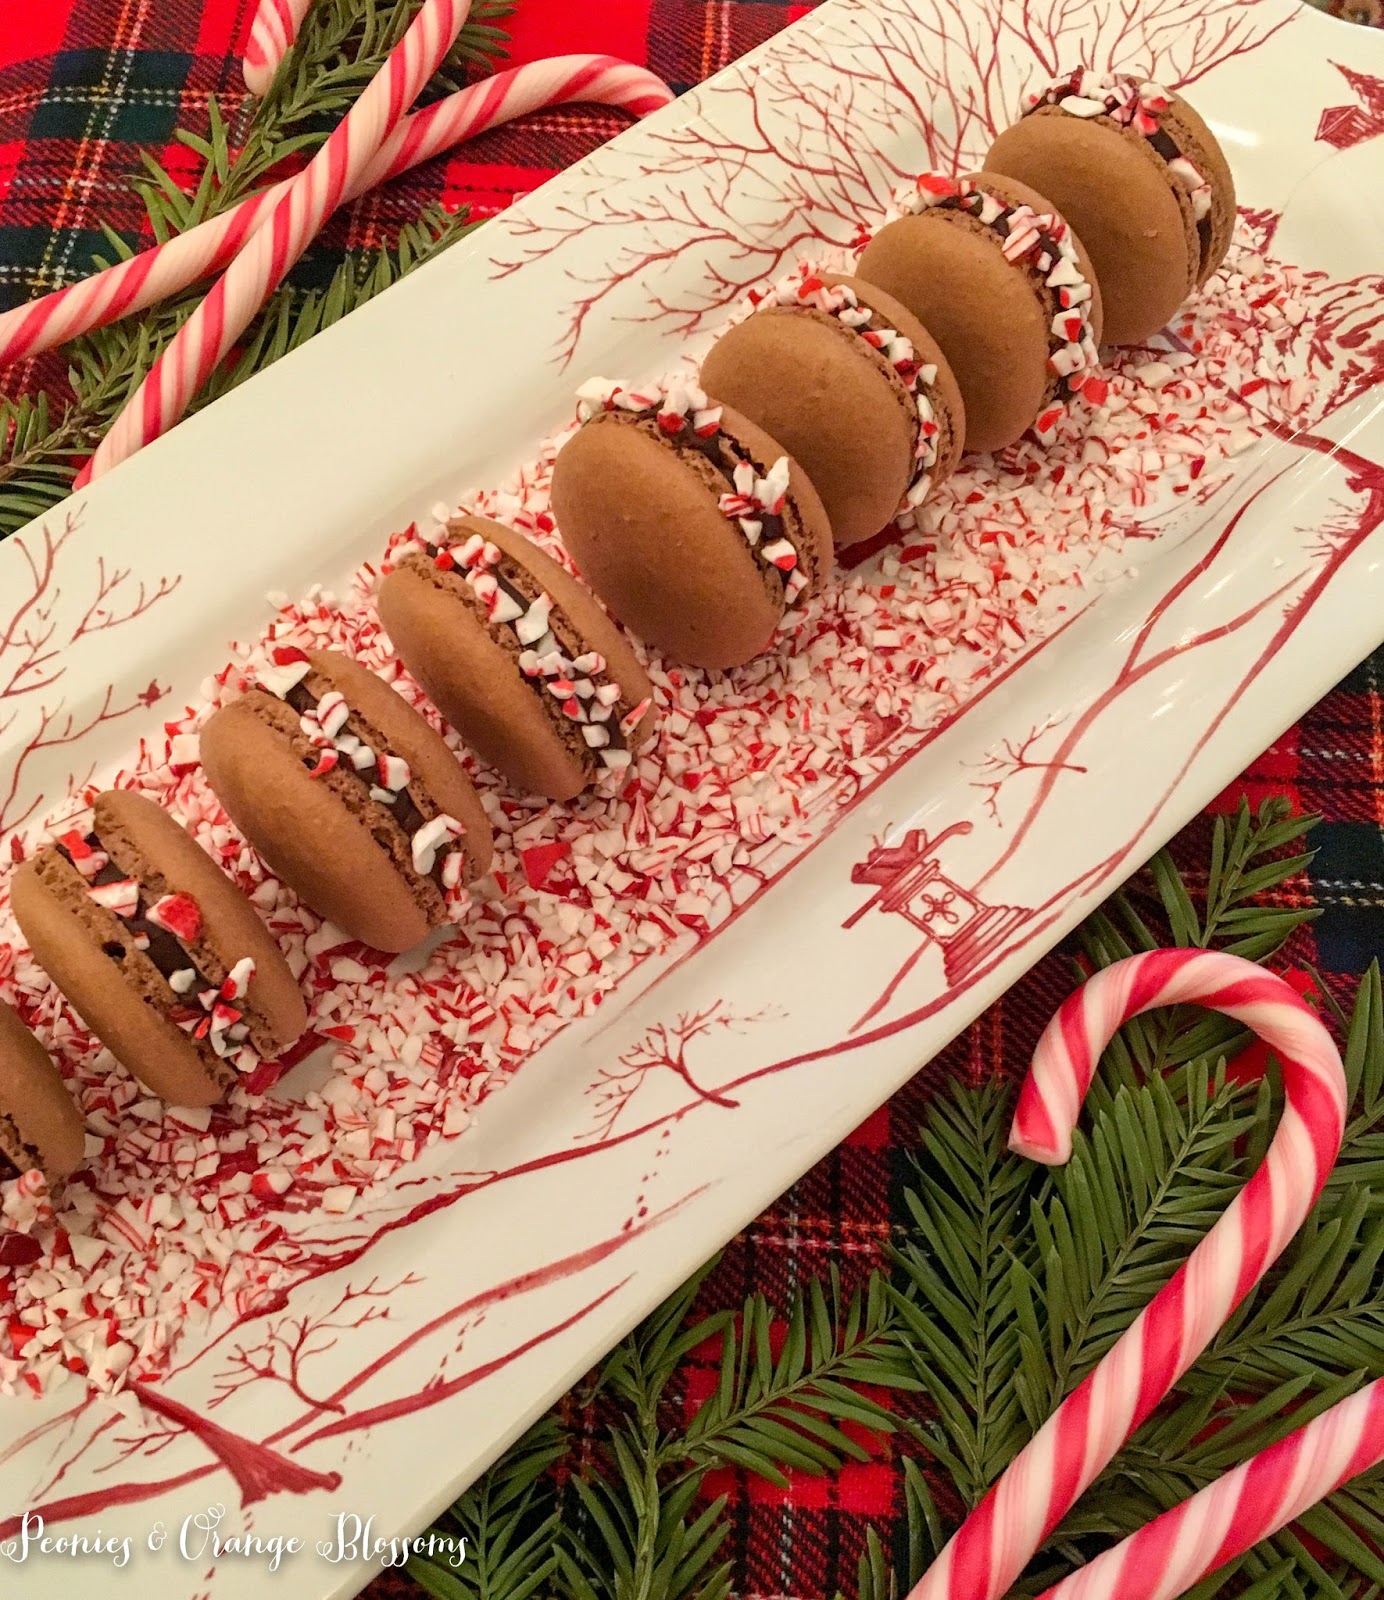
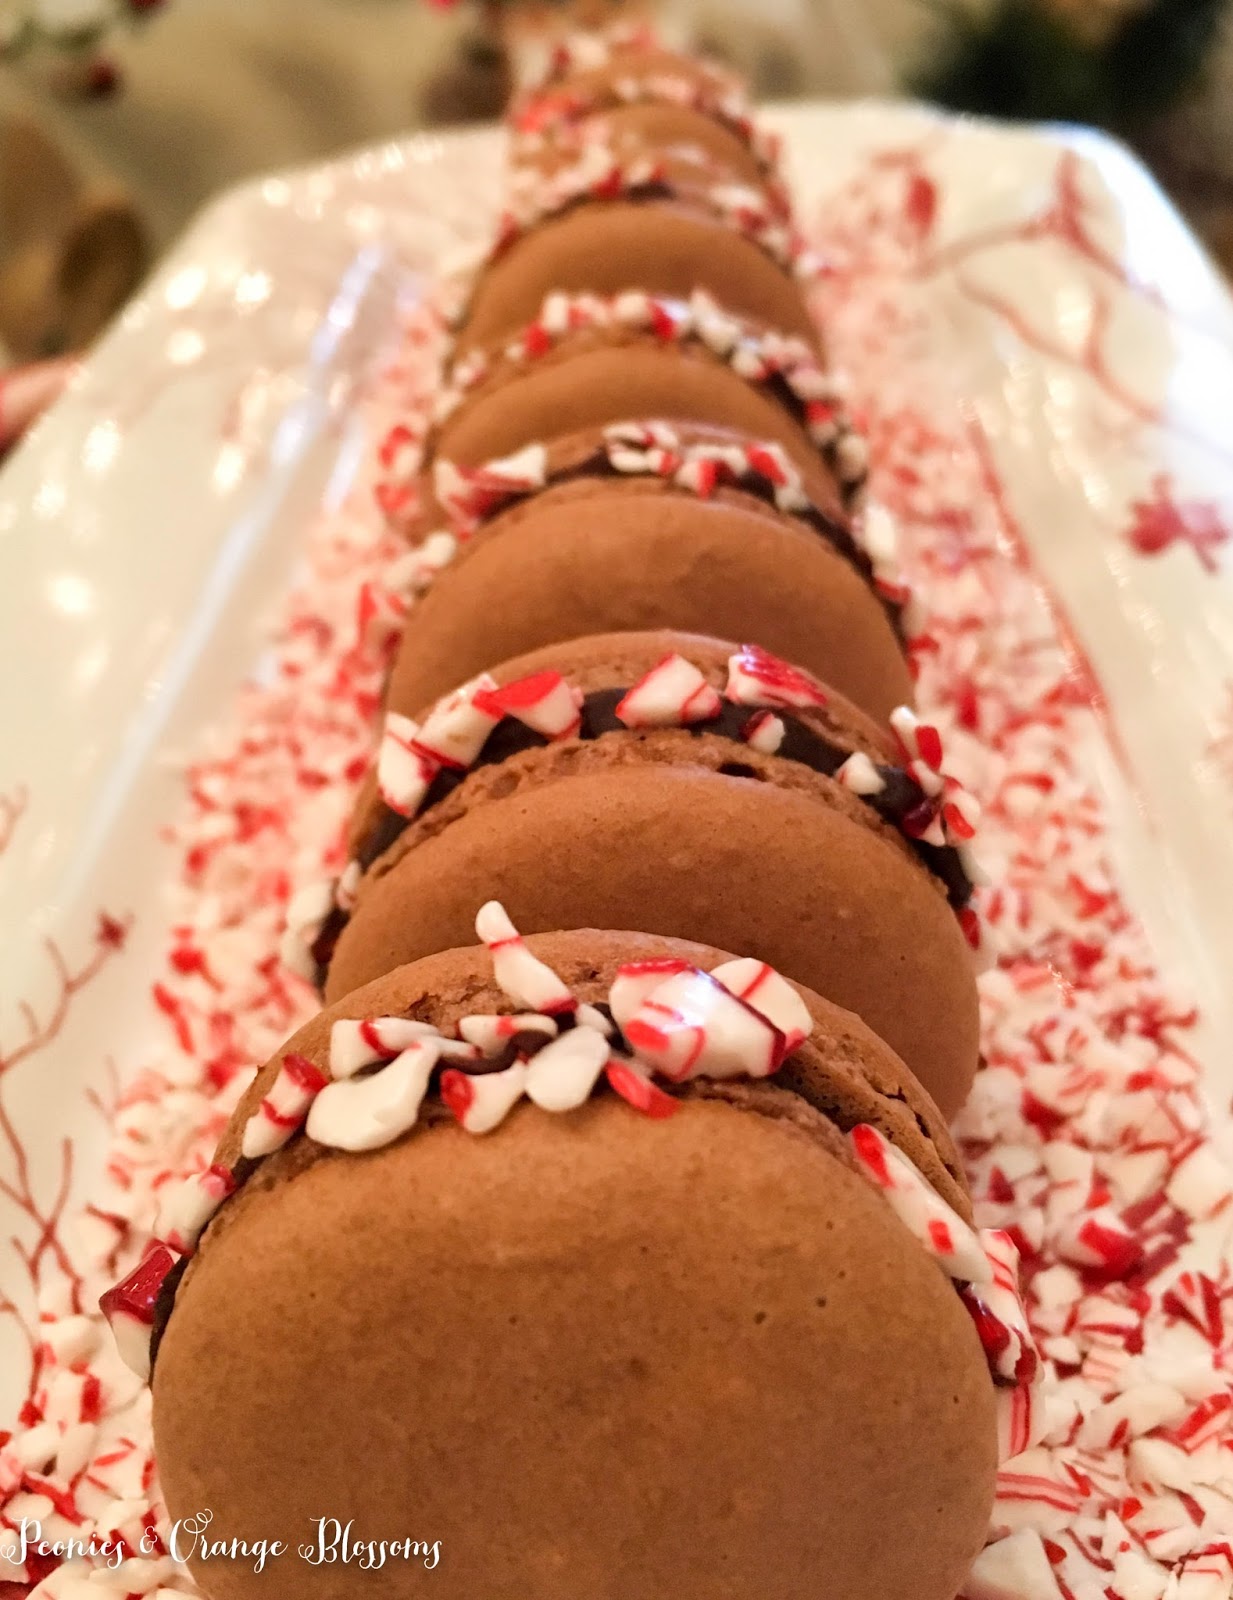
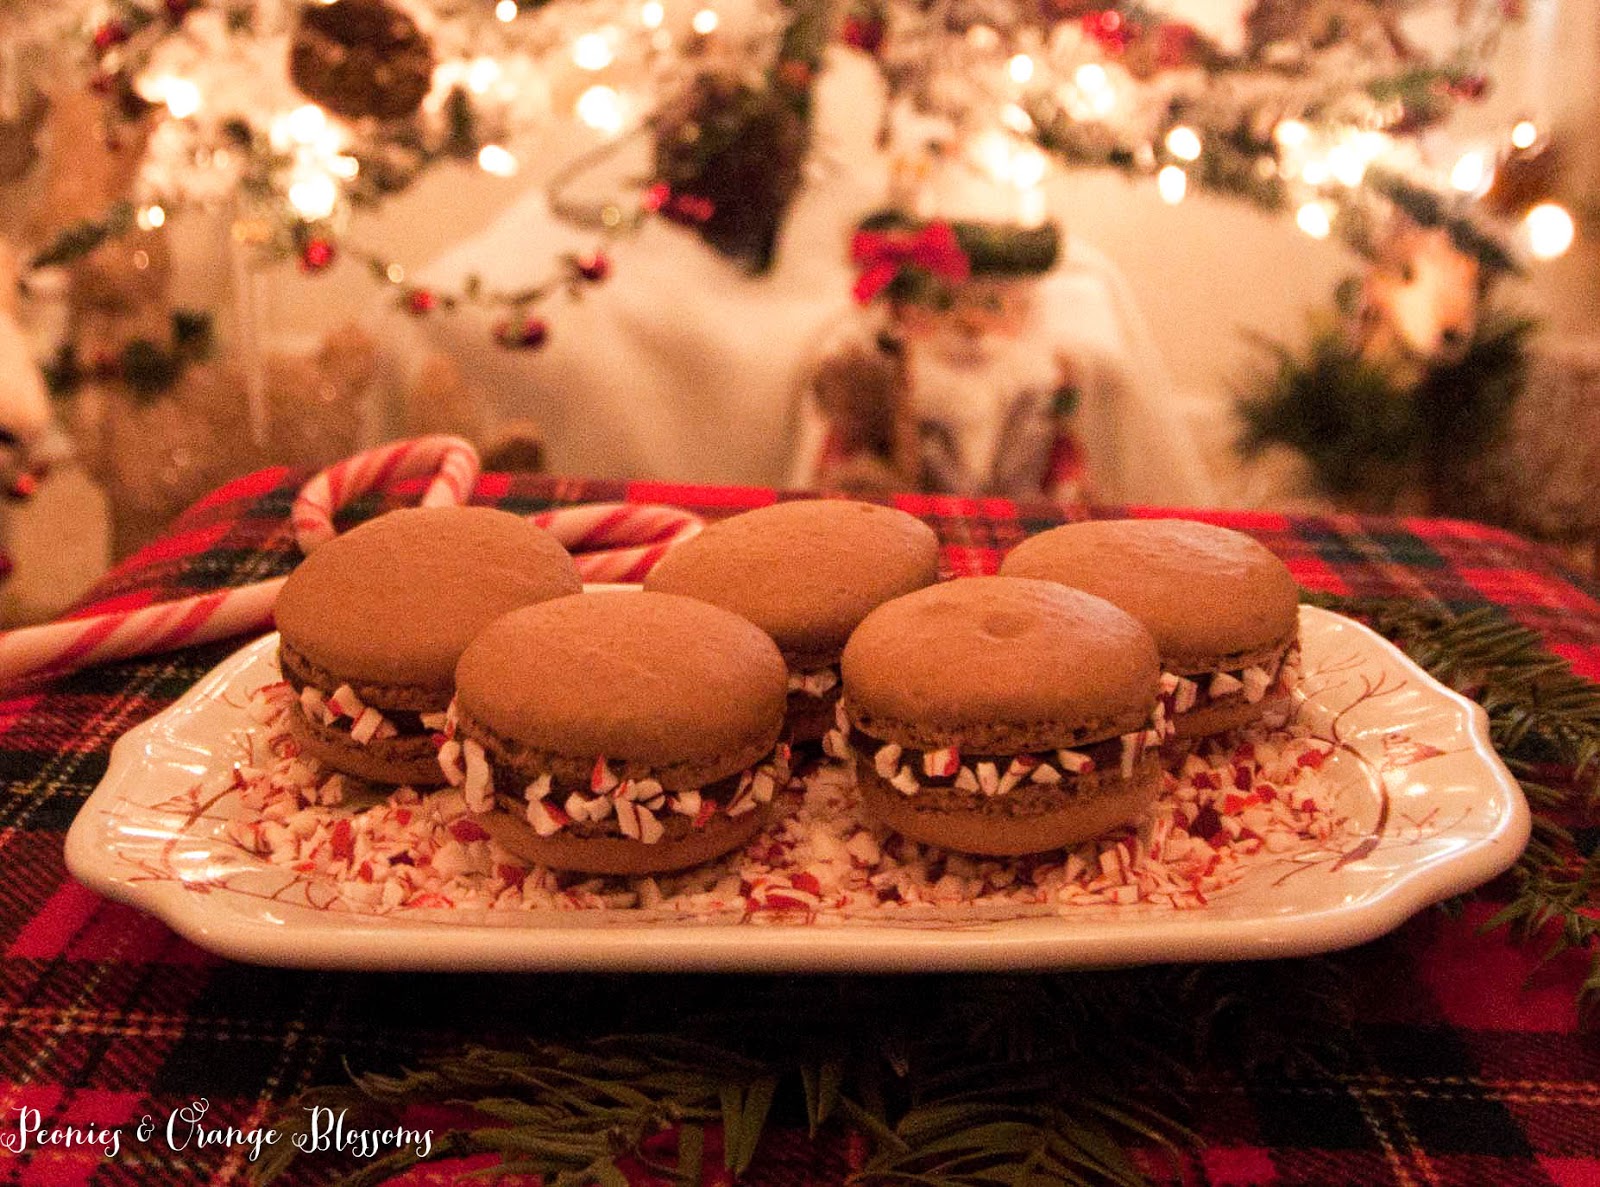
1. Once the cookies are cool, add a dollop of your nutella to one cookie and spread with a small knife, spoon, or icing spatula. Don’t push too hard when spreading, otherwise you will break them!
2. Place the other cookie to your filling, press gently, and slightly twist the two together. Then, dip a hazelnut in the Nutella and place on top.
3. Once all assembled, put them in an airtight container and let them mature (yes, that’s the scientific word for this process) in the refrigerator for 24-48 hours.
Now, these cookies won’t be bad if you eat them immediately, they will just be amazing if you wait a day. The theory is that the juices from the filling soak back into the cookie to make an AMAZING cookie.
 We use affiliate links in our posts and our site. This means if you make a purchase using these links, we may earn a small commission. You don’t pay a cent more than you would otherwise! Our full disclosure is available under About.

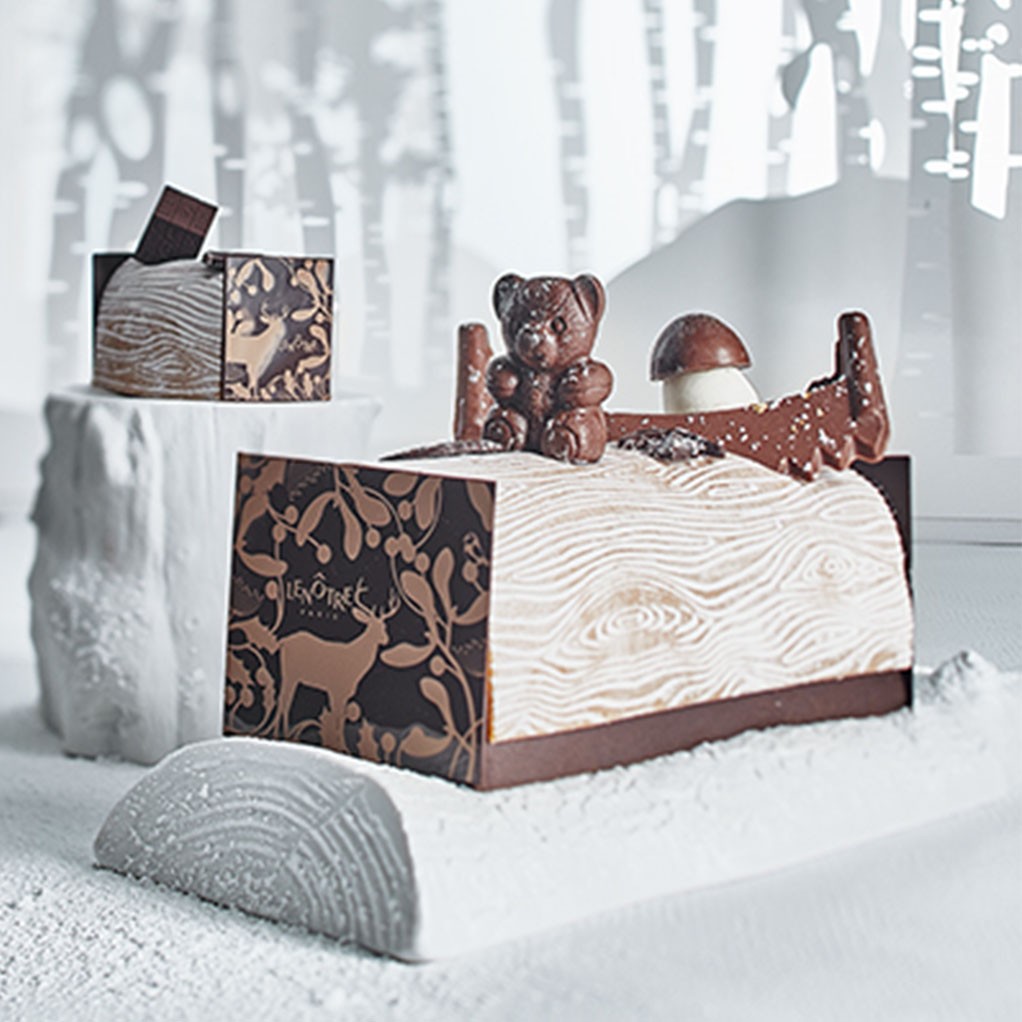
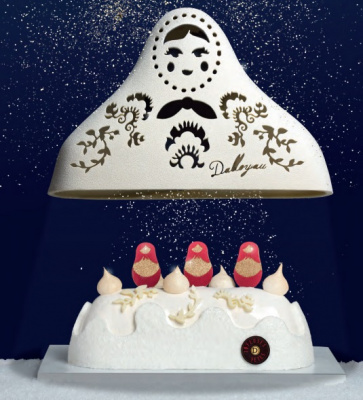
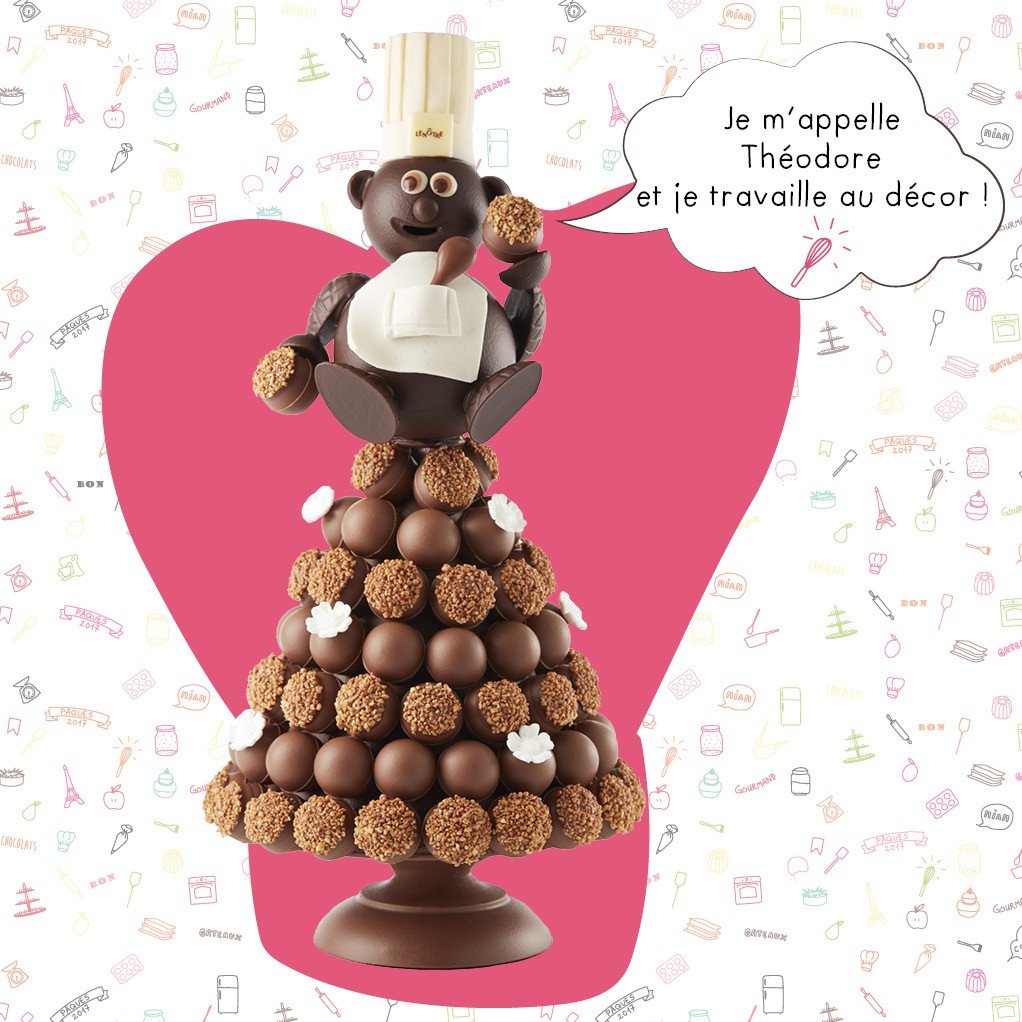
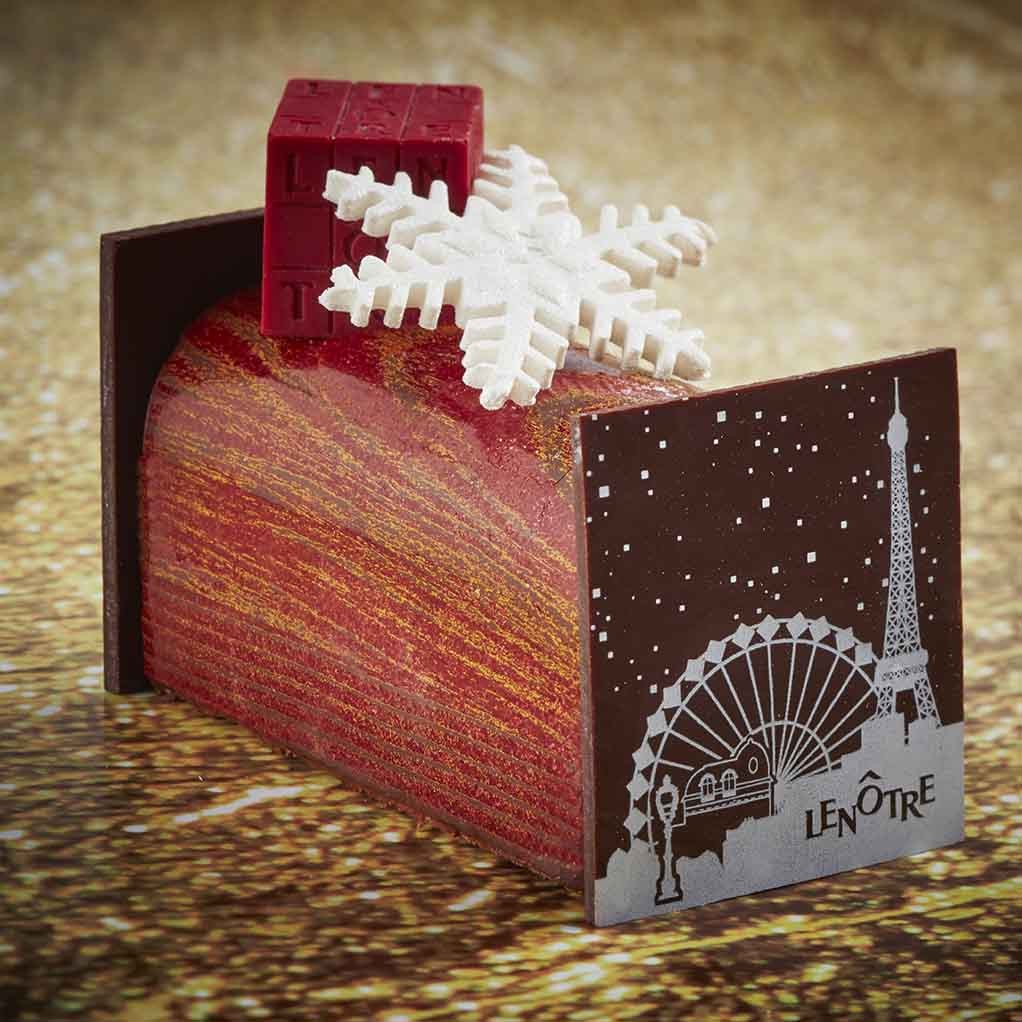
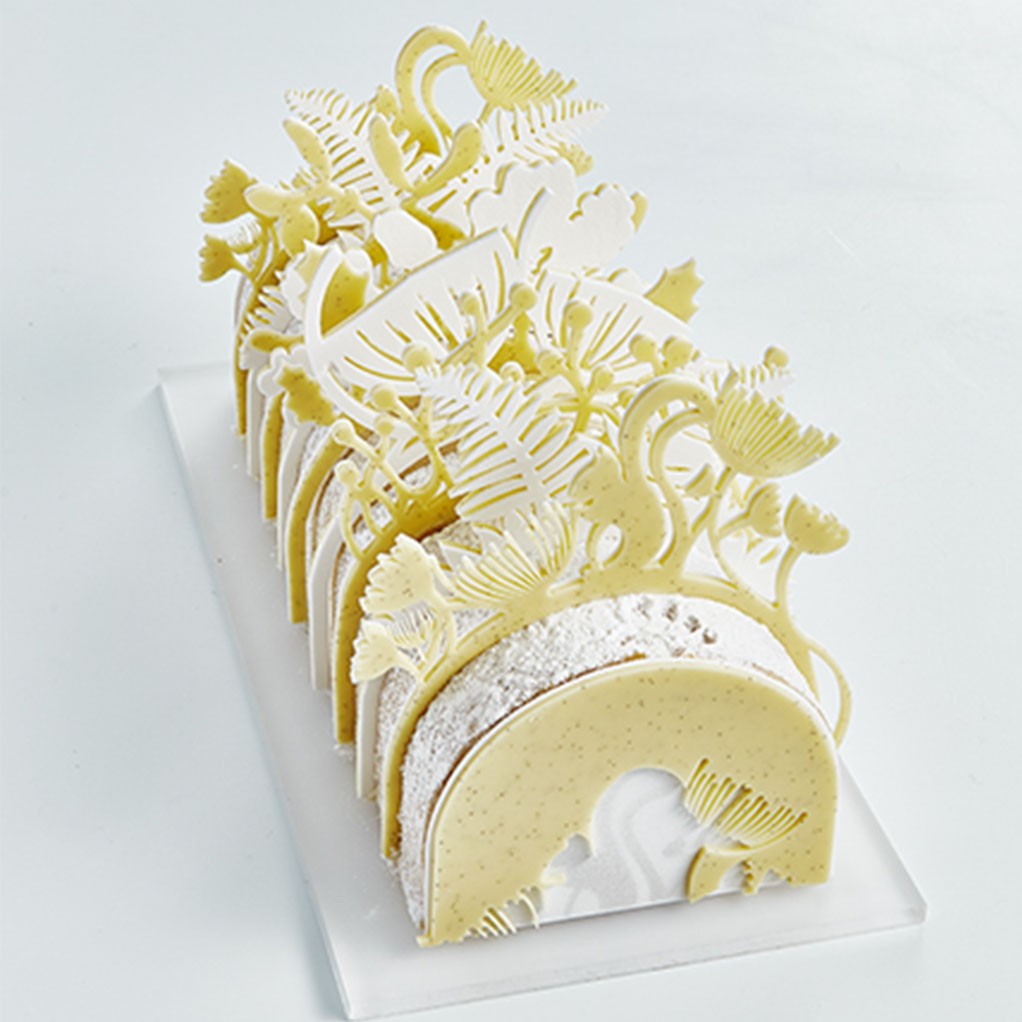 A pure creation of Chefs who celebrate in beauty and refinement the 60 years of the House: as a
tribute to the heritage of the pastry tradition put at the service of creativity and taste.
It is the image of an immaculate forest populated by graceful animals and imposes itself as an invitation
to greed and sharing. Its creators wanted it both magical and friendly, reconnecting with
the tastes of childhood in all modernity. No doubt it will arouse the wonder of children
as much as the visual pleasure and taste of adults.
A decor inspired by a paper-cut artist, Marianne Guély, who also signs the box that contains it. Made of nine diadems in white chocolate (with the image of the squirrel, the wolf, the deer, the tit, etc.), it required the exclusive development of a secret technique.
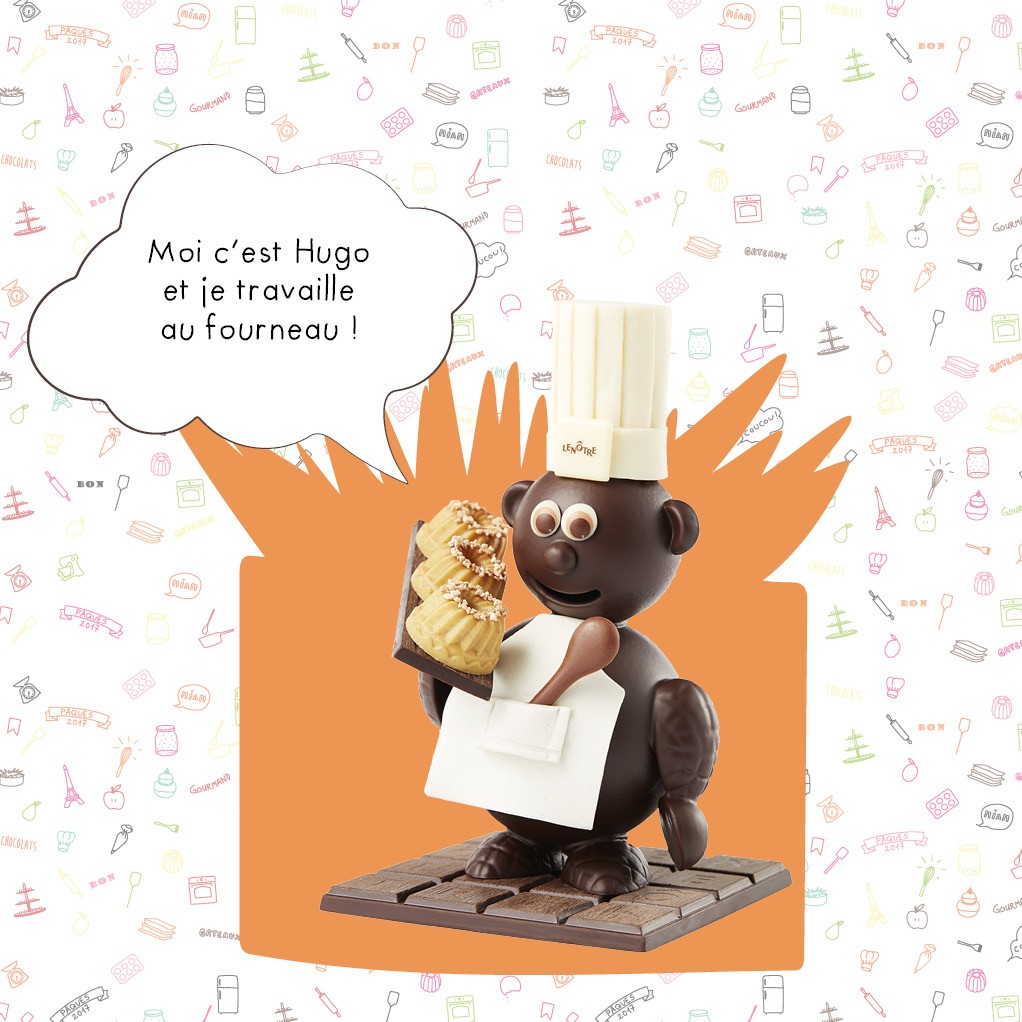
Then, thanks to the irresistible alliance of textures that she hides in a hazelnut muslin,
rolls of cigarette paste form the base. Covered with milk chocolate they envelop a
Hazelnut flaky praline, crushed to obtain a perfect crisp in contrast
with the cream. At the heart of the log, a dacquoise hazelnut roll, a vanilla bavaroise
Bourbon, a ribbon of hazelnut caramel with fleur de sel ...
Finally, pastry chefs had a happy idea to perfect the moment of dessert:
fans can choose to accompany their share of a rum cream served separately while the youngest (and all those who prefer!) will stay on the pure delicacy of the cake alone.
A pure creation of Chefs who celebrate in beauty and refinement the 60 years of the House: as a
tribute to the heritage of the pastry tradition put at the service of creativity and taste.
It is the image of an immaculate forest populated by graceful animals and imposes itself as an invitation
to greed and sharing. Its creators wanted it both magical and friendly, reconnecting with
the tastes of childhood in all modernity. No doubt it will arouse the wonder of children
as much as the visual pleasure and taste of adults.
A decor inspired by a paper-cut artist, Marianne Guély, who also signs the box that contains it. Made of nine diadems in white chocolate (with the image of the squirrel, the wolf, the deer, the tit, etc.), it required the exclusive development of a secret technique.
Then, thanks to the irresistible alliance of textures that she hides in a hazelnut muslin,
rolls of cigarette paste form the base. Covered with milk chocolate they envelop a
Hazelnut flaky praline, crushed to obtain a perfect crisp in contrast
with the cream. At the heart of the log, a dacquoise hazelnut roll, a vanilla bavaroise
Bourbon, a ribbon of hazelnut caramel with fleur de sel ...
Finally, pastry chefs had a happy idea to perfect the moment of dessert:
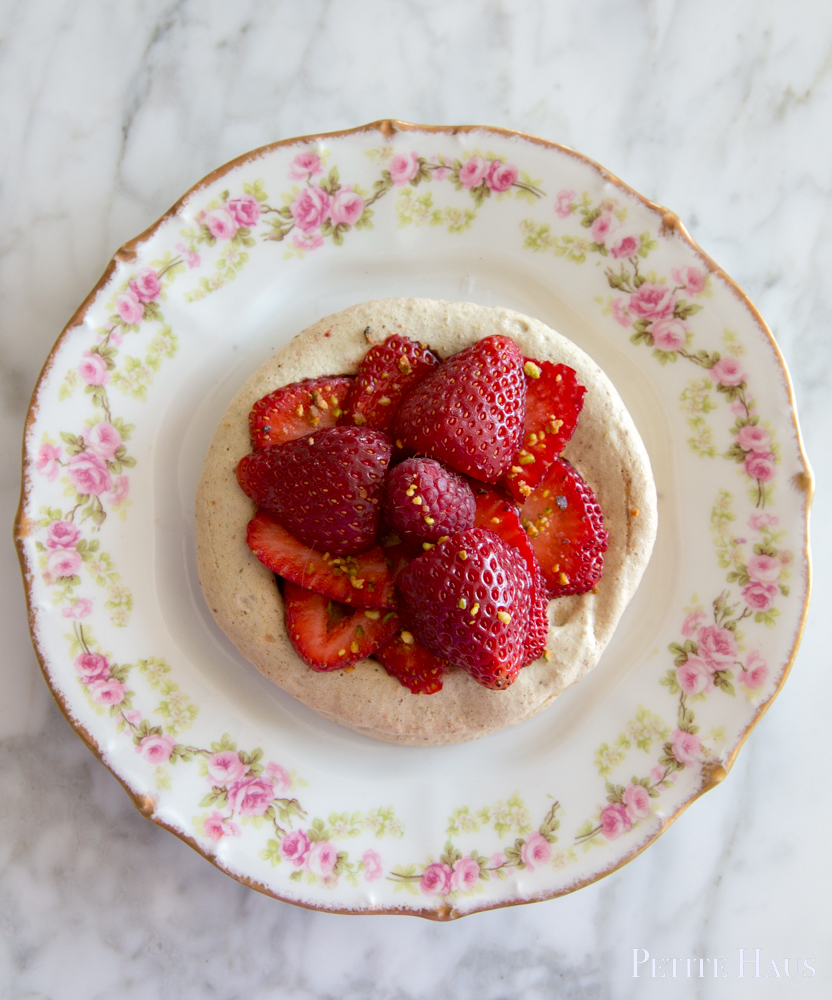
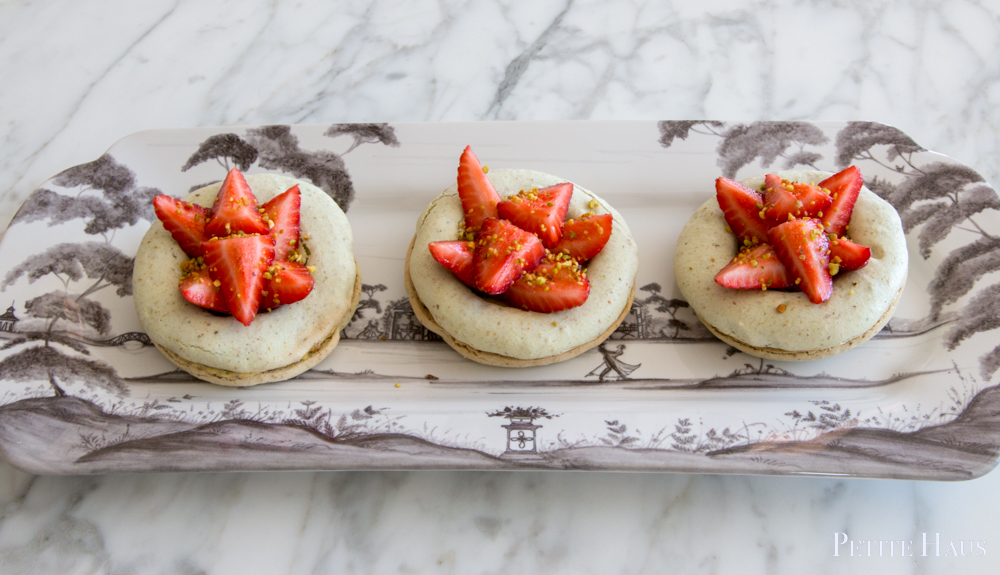
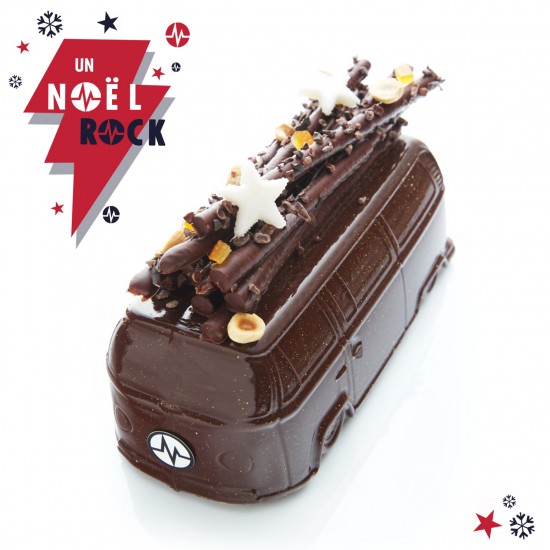
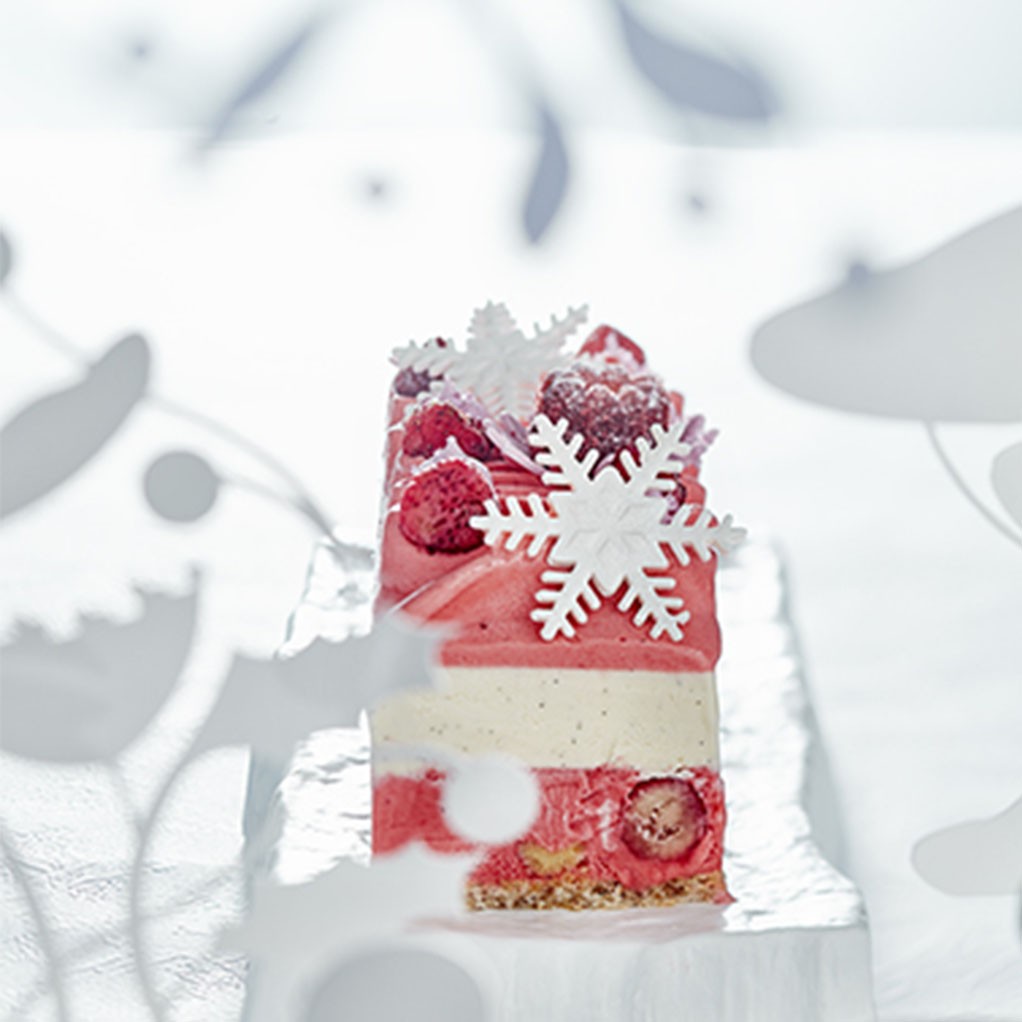
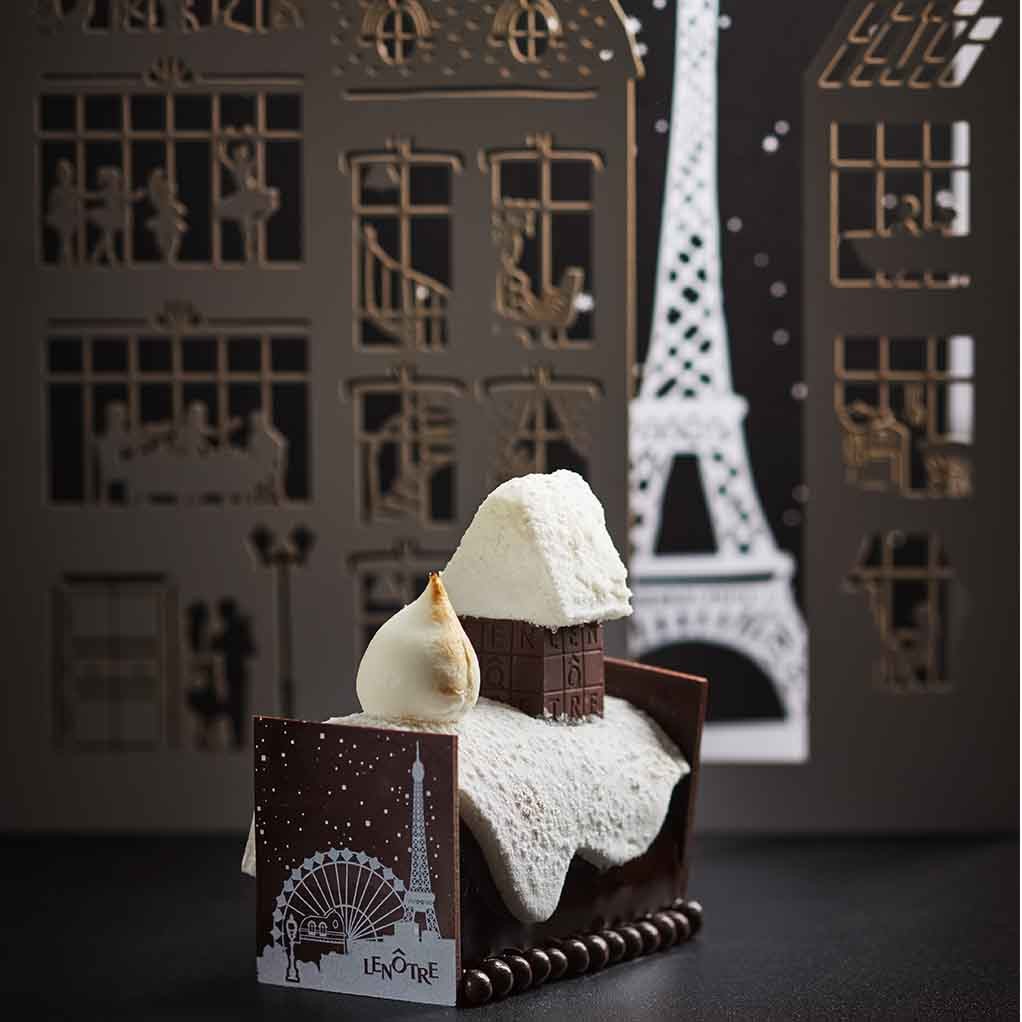
fans can choose to accompany their share of a rum cream served separately while the youngest (and all those who prefer!) will stay on the pure delicacy of the cake alone. 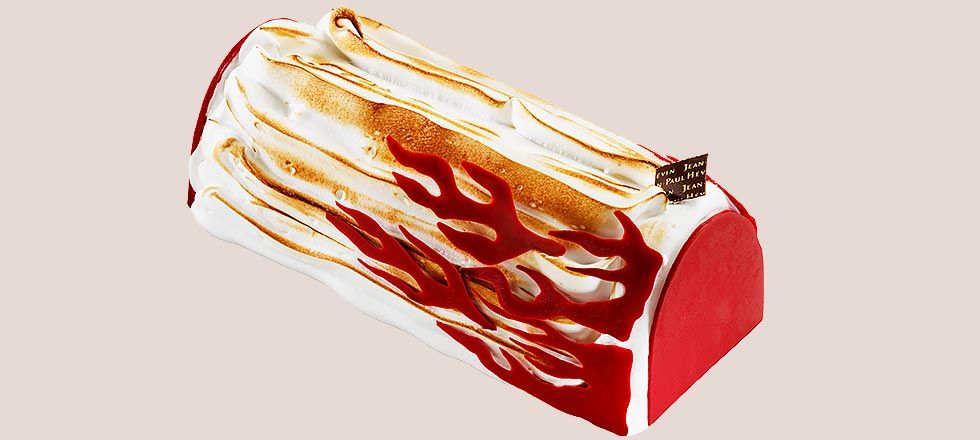 A sweet chestnut parfait combined with strawberries, caramelized Italian meringue decorated with chocolate flames.
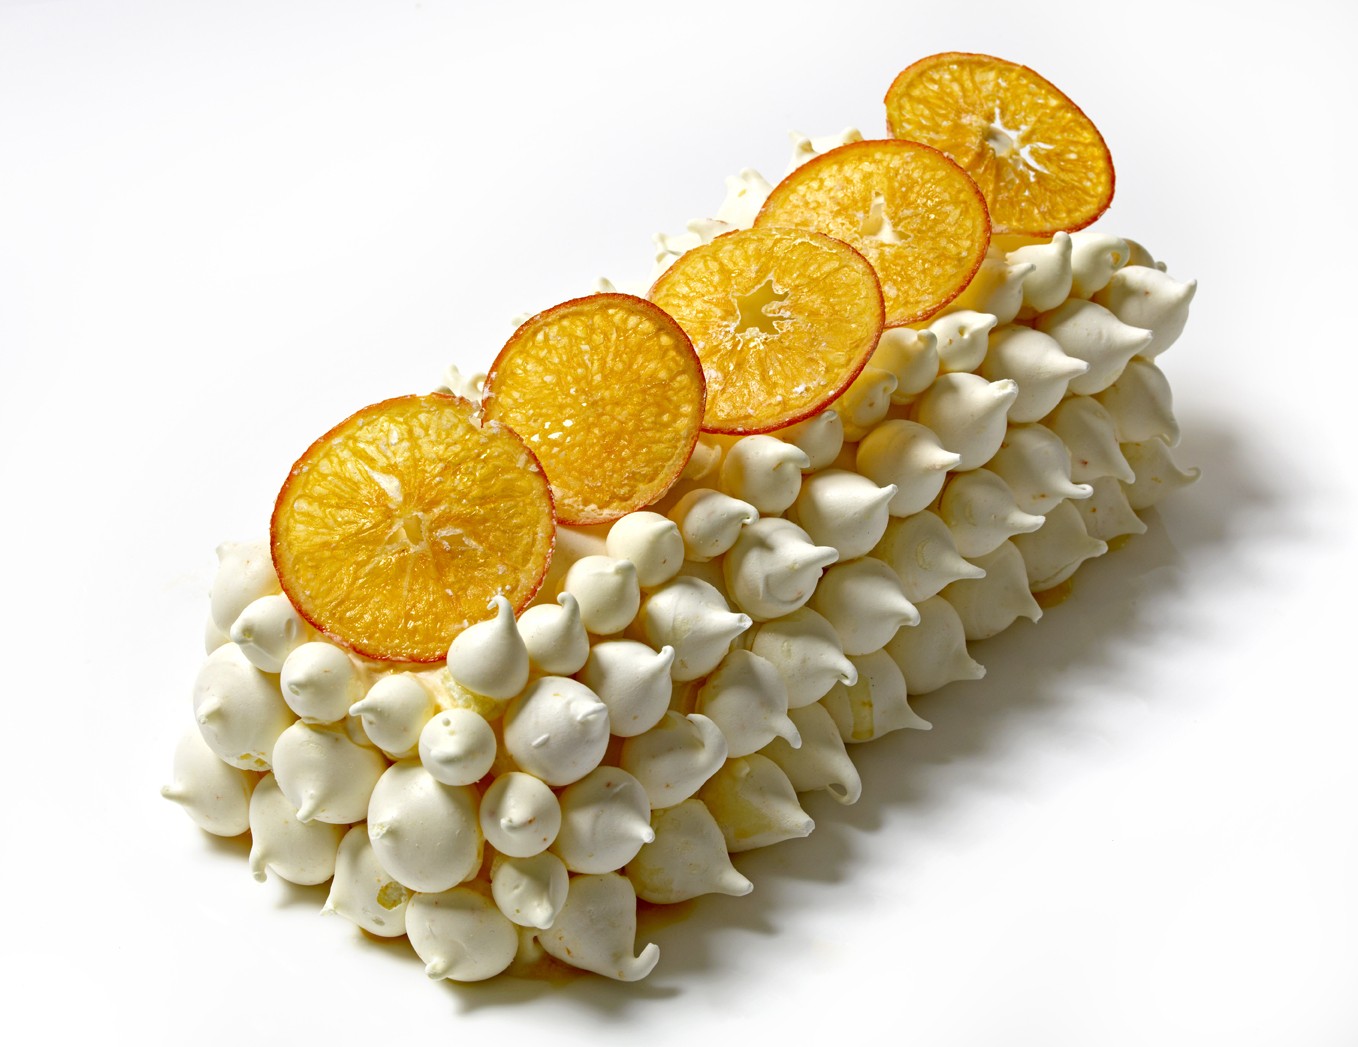
 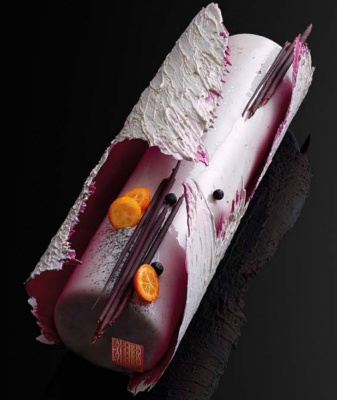 This log is made from vanilla, juniper berry cream, and genoa bread soaked with light lemon syrup, a kumquat compote and crispy almond biscuit. From Fauchon.
 This log from Dalloyau has a base of lime infused jam, almond meringue. A moist financier biscuit sits in the center with a mango passion fruit compote and Madagascar vanilla cream.
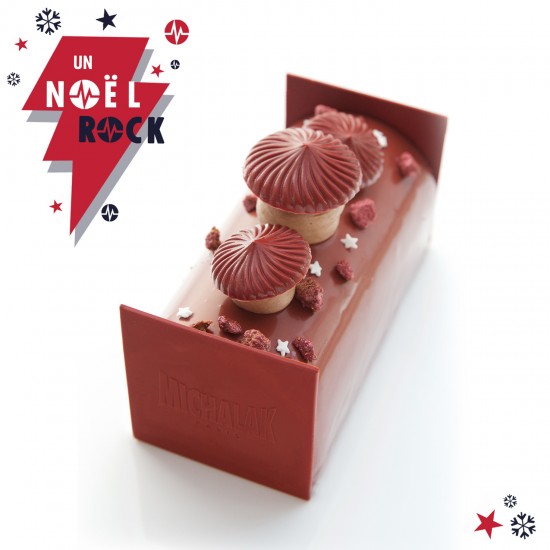
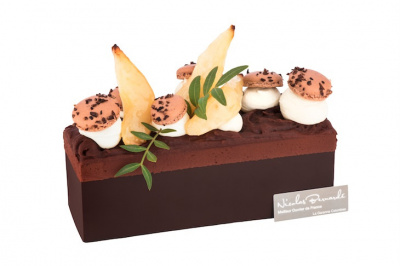 A pear sorbet with grand cru chocolate ice cream, topped with macaroon mushrooms, grounded cocoa and candied pear. From Nicholas Bernarde.
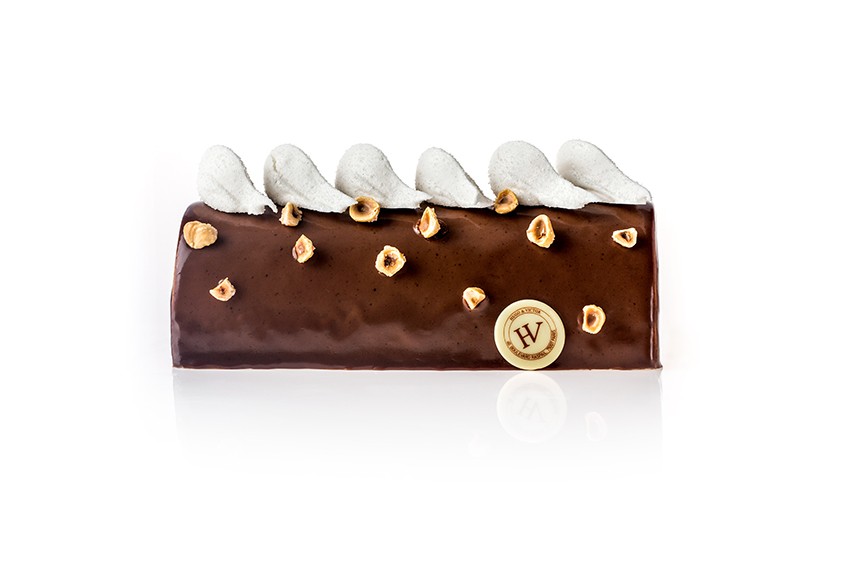
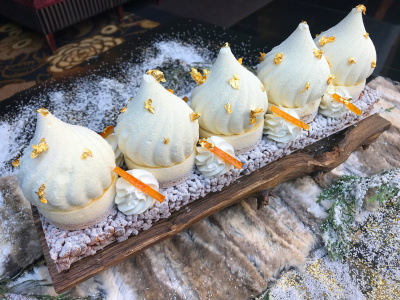 The onion domes of the Russian churches are turned into meringues filled with lemon curd. It sits atop an orange creme brûlée biscuit with crispy puffed rice. From L'hotel du Collectionneur.
If you have missed any of the 12 Days of Christmas,
The onion domes of the Russian churches are turned into meringues filled with lemon curd. It sits atop an orange creme brûlée biscuit with crispy puffed rice. From L'hotel du Collectionneur.
If you have missed any of the 12 Days of Christmas, 


