Easy Traditional Apple Strudel Recipe – German Apfelstrudel

We use affiliate links in our posts and our site. This means if you make a purchase using these links, we may earn a small commission. You don’t pay a cent more than you would otherwise! Our full disclosure is available under About.

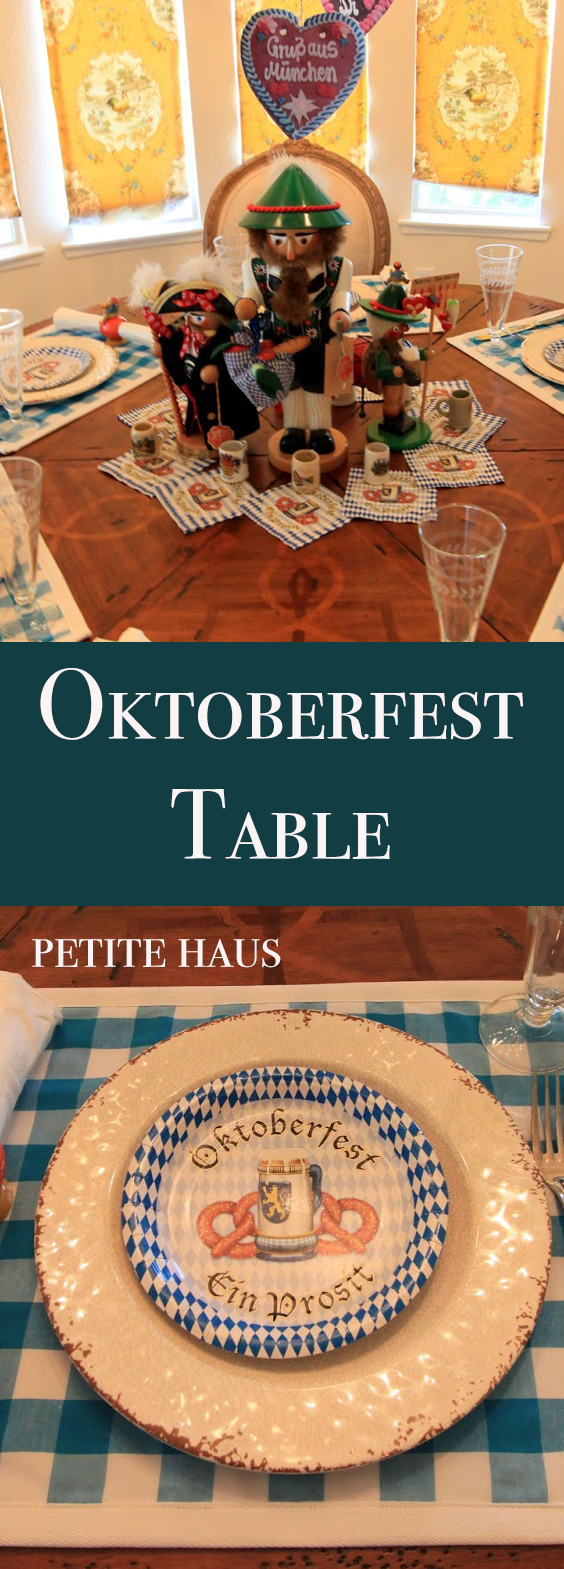
Last week during our Oktoberfest party I made apple strudel for the first time! I looked far and wide for an authentic German/Austrian apfelstrudel recipe. I felt like this recipe was really authentic! It was also really pretty easy to make – because I cheated and used frozen puff pastry dough as my strudel dough.  Making strudel dough from scratch is labor intensive.

Easy Traditional Apple Strudel  – Printable recipe here

makes 2 loaves, serving 10-14 people

  • 2 tablespoons apple juice or golden rum
  • 3 tablespoons raisins
  • 1/2 teaspoon ground cinnamon
  • 1/3 cup plus 1 tablespoon (80 g) granulated sugar
  • 3 tbsp unsalted butter, melted.
  • 5 tbsp unsalted butter, melted, for brushing
  • 1 1/2 cups bread crumbs
  • 2 sheets puff pastry, thawed
  • 1/2 cup (60 g) coarsely chopped walnuts
  • 2 pounds (900 g) tart cooking apples, peeled, cored and cut into ¼ inch thick slices (recommend granny smith and honey crisp varieties)
  • powdered sugar, for dusting
  • 1 egg with 1 tbsp water, for egg wash


Directions:

  1. Mix the apple juice or rum in a bowl with the raisins and set aside.
  2. In another bowl, mix together the sugar and cinnamon, set aside.
  3. In a large skillet over medium-high heat, melt 3 tbsp of butter in the skillet. Then add the breadcrumbs. Stir constantly until golden and toasted. Takes approximately 3 minutes. Let cool completely.
  4. While bread crumbs are cooling, chop up the apples.
  5. With a rolling pin, roll out each piece of thawed puff pastry dough on a floured surface to approximately 10×12 inches. You will be making 2 logs of strudel total.
  6. Preheat the oven to 375F.
  7. With the remaining melted butter, brush the melted butter over the entire pastry dough. Then, sprinkle the cooled toasted bread crumbs over the entire buttered puff pastry sheet in a thin layer. Repeat for second dough sheet.
  8. Spread half of the walnuts in a line about 3 inches back from the edge of the dough. Repeat with other pastry dough sheet.
  9. Now add the cinnamon sugar mixture, and raisin mixture to the cut apples. Stir together. Now you will immediately spread half of the apple mixture over the walnuts in a line. Repeat for the second strudel dough. NOTE: make sure your apple mixture doesn’t have any liquid in it when you pour it over the strudel. If you leave the apples with the sugar for a while, they will ooze out liquid. The liquid will make it harder to roll the strudel. 
  10. Now, slowly roll the dough lifting the front side to first cover the apples. Roll until it is a log shape. The seam side should be on the bottom of the log. Tuck the two ends of the log under the strudel by pinching the dough together.
  11. Place on a baking sheet lined with parchment paper or silpat, seam side down.
  12. Brush with the egg wash.
  13. Make several cuts across the top to allow the steam to escape.
  14. Bake at 375F for 40-45 minutes, until crust is golden brown.
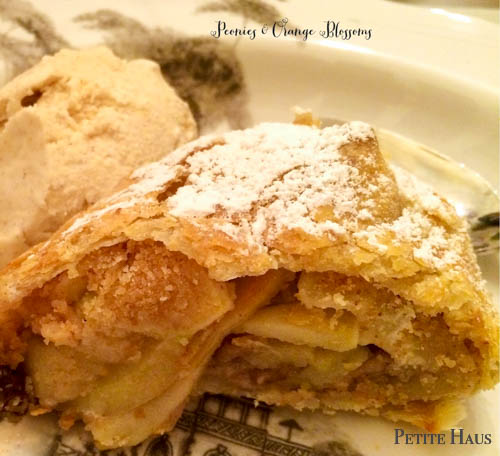
  15. One cool, dust with powdered sugar and serve. Serve with whipped cream, vanilla ice cream, or homemade cinnamon ice cream (recipe click here)! It is best served warm on the first day of baking!

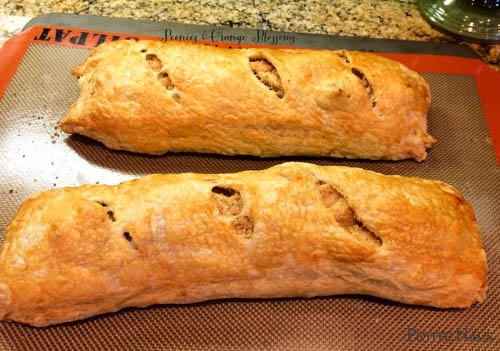
Below are the two strudels getting ready to go into the oven!

43 minutes later…. voila! It is now a nicely golden brown in color! Smells amazing, too!

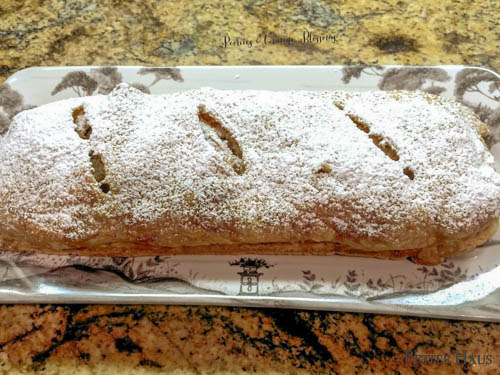
Once the strudel has cooled to when it is slightly warm, sprinkle powdered sugar on top!

I like to eat mine with ice cream!

I thought this recipe tasted exactly like the strudel I ate in Germany. Which means.. it isn’t overly sweet. If you love sweet desserts, I would recommend adding a bit more sugar to it. Traditional strudel isn’t super sweet like American apple pie. Or, you could always just sprinkle more powdered sugar on top. I think serving it with whipped cream or ice cream is essential. Also, it tastes better served warm. If your strudel cooled down to room temp, I would recommend just heating it up either in the oven or microwave.

SaveSave

SaveSave

SaveSave

Follow:

Decorating with Owls for Fall

We use affiliate links in our posts and our site. This means if you make a purchase using these links, we may earn a small commission. You don’t pay a cent more than you would otherwise! Our full disclosure is available under About.

Hoot-Hoot! Tweet-Tweet! The owls have landed this year in the large island in the kitchen! Aside from my velvet pumpkins, I think my owls are my next favorite Fall decoration! I always look forward to pulling them out of storage. 

The lighting in the kitchen isn’t very good – yellow tones from overhead lights. Oh well. I guess it puts a “sunset” color on them, right? I have my MK childs candlesticks and tray in the background which I think provides a nice contrast against all of the brown! My family hates this brown granite – it is just so boring to stare at, but I will say I think it goes nicely with the Fall colors!

 The squirrel was new last year, as were the mini owl and acorn candles!

The brownstone pitcher and brown staffordshire dog are hiding behind the owls.  I like the candle on the right as it reminds me of a pumpkin! 

New this year are these little owl ornaments – actually used for Christmas last year on the tree… but then I thought, wouldn’t they look cute nestled in the acorn wreath?? I think so!

Stay tuned in this week, I’ve got a new recipe that you can use with those deliciously crisp apples you picked (or will go pick, right?? Pick of the tree, pick out of a bin, pick out in the store…)

Written at http://peoniesandorangeblossoms.blogspot.com
linking up at: amaze me monday The Scoop!  Metamorphosis Monday’s Inspire Me Tuesday Wow us Wednesdays! Creative Ways  Share Your Style Thursday Favorite ThingsTablescape Thursday’s Home Sweet Home Feathered Nest Fridays Foodie Friday & Everything Else 

Follow:

The Pumpkin Batch Review – a Monthly Pumpkin Themed Subscription Box!!

We use affiliate links in our posts and our site. This means if you make a purchase using these links, we may earn a small commission. You don’t pay a cent more than you would otherwise! Our full disclosure is available under About.

Ok pumpkin lovers… I have news for you. We all know there’s monthly subscription boxes for everyone, I think everyone is familiar with birch box… but guess what? There is a new monthly subscription box called “The Pumpkin Batch”. Yes. It is a monthly box full of all pumpkin themed items!! If you are pumpkin lover you will most likely love this! Oh, PS, they did NOT pay me to write this review. FYI. I just, um, love pumpkins.

This is replacing my usual Friday Favorites post… because the whole box is a FAVORITE and it deserves a post on its own!  I received my box this week and I was soooo excited! #omg. 

*Squeal!* Pumpkin season is here! Wahoo! Now, if only it would COOL DOWN outside so I can put on a sweater and grab a big wool throw to tuck myself into. 

 Oh goody! Look at all of this wonderful stuff hiding inside this cute little box! Let’s take a closer look…

Oh my! So, let’s go over what was in the box:

1. #pumpkin mug – If you like pumpkin everything, you’ll like this mug. For me personally, I don’t like having a bunch of random mugs in my kitchen. I like them all to be the same.
2. Pumpkin Spice Coffee – 12 cup pouch. Yum yum. Be nice and brew it for the office!
3. Pumpkin Maple Scone – WHAT? They sent a freshly baked scone in this? Yes. Not cool to send just one. I need like 8. #notafatty #ilikecarbs
4. Pumpkin Spice Latte Candle – burning it right now. It smells pretty good. It’s a little sweet smelling for my usual candle smell preferences, but that’s okay. Still smells good!
5. Pumpkin Dark Chocolate Minute Muffin – see the thing with the bear on it? It’s a microwavable minute muffin! An instant pumpkin muffin for one! Love it. Haven’t tried it yet though. It needs to get COLD out please before I eat this.
6. Pumpkin Ornament- See the sweet little sign that says “carve pumpkins, etc.”? That’s a cute little ornament. I’ve already hung it up.
7. Pumpkin Spice Caramels– I instantly ate one of these when I opened the box. UM WHOA. They were so good I can’t believe they only sent this little tiny package of them. I NEED more. Then on the back of their pamphlet, they have a recipe for pumpkin spice caramel apples… so you take the pumpkin spice caramel they sent and melt it and dip apples in it! So, shall I continue to eat the caramels or hold off and make pumpkin caramel apples? What do you think?

All and all, I’m pretty happy with this box! It was $35 for 1 month; they have better prices per box with the more months you buy. I think $35 is a little steep for what is in this box, but I think it was worth it at least once.  It was worth the anticipation and excitement, plus those caramels are delicious. You can order your own Pumpkin Batch Subscription Box here.

Friday Favorites with A Little Bit of EverythingFive on friday at A Liz Adventures .Friday Favorites at the Diary of a Real HousewiveOh Hey, Friday! at September FARM

Follow:

Oktoberfest Party Decorations – a Table Setting Idea

We use affiliate links in our posts and our site. This means if you make a purchase using these links, we may earn a small commission. You don’t pay a cent more than you would otherwise! Our full disclosure is available under About.

This past weekend I had some family over and we had an Oktoberfest party – lots of great Oktoberfest party decorations here!! For the party, I set up this pretty Oktoberfest table!

Hanging from the chandelier are printouts of Lebkuchen hearts you see everywhere in Bavaria – especially during Oktoberfest time! I simply took the ones from last year and glued them to some cardboard. I then punched a hole in the center and hung them with string! You can print out your own here through my Oktoberfest 2014 table: Oktoberfest 2014 table

I found the printed plates and napkins at Cost plus. The napkin rings are vintage Erzgebirge from Germany that were found on eBay. Aren’t they cute? They are holding plates from the harvest.

For the placemats, I made my own. I couldn’t find any Bavarian looking placemats anywhere! And when I found German placemats, they were black, red, and yellow which are the colors of the German flag. Oktoberfest colors are blue and white – representing Bavaria.

Making them was pretty simple. I used a previous placemat to get the right size. Then added some flannel to the back make it thick. The fabric was a bright blue picnic table fabric!

To finish them, the white ribbon was later sewn around the edges.

A closer look at the individual table settings…

One last look! I just love the hearts hanging from the chandelier!

An Oktoberfest table… pin away!

SaveSave

SaveSave

Follow:

What to Wear to the Oktoberfest

We use affiliate links in our posts and our site. This means if you make a purchase using these links, we may earn a small commission. You don’t pay a cent more than you would otherwise! Our full disclosure is available under About.

You were invited to go to a Oktoberfest party and now you’re wondering what to wear to the Oktoberfest… well, I’ve got you covered with my guide.  The Oktoberfest runs for two whole weeks, so you still have time to get your party gear on! My guide is broken down into women’s (Damen) and men’s (Herrn) fashions. Let’s start with the Damen.

Dirndl

The most obvious choice would be to wear a dirndl (the name of the type of dress below).  The dirndl comes in three basic lengths: long, midi, and mini!  I chose the long dress because it was cold when I was in Germany during Oktoberfest.  What I do recommend avoiding though, is the super short ones that people wear as Halloween costumes. You know which ones I’m talking about. They’re too short, slutty, and tacky. Dirndls range in price from 80 dollars to 500 dollars. There is a wide variety of quality. If you choose to buy yours in Germany, there are *tons* of shops over there that sell them just for tourists.  Mine cost around 200 dollars. There are also a ton of websites online that sell them. I think it is way more fun to go into a store and have a fashion show!

What to Wear to the Oktoberfest

Blouse
The next step is choosing a blouse.  As you can see, they range from sexier cleavage baring to modest warmer ones. Up to you to decide what to wear! Remember, your stomach will be covered so don’t worry about the crop top!

Outfits for the Oktoberfest

Tying the Knot
Now, when you tie the knot on your apron for your dirndl, the side the bow lays on determines what it says about you:

The bow to the left: you are single
The bow to the right: you are married or taken
To the middle: for children
To the back: widowed

Shoes

My biggest question when I got my dirndl was, what shoes do I wear with this?!  Turns out, you can wear a variety of different shoes!  You can wear cute pair of flats, pumps, mary janes, clogs, boots! Anything goes! I wore boots with mine. I think if you are going to be walking around all day, a pair of flats, clogs, or boots would be your best bet!Dirndl Shoes for Oktoberfest

Accessories:
Now, to complete your look, let’s have a look at some accessories…

Hats
Some women like to wear hats with their outfits… Germany can get a bit chilly in the Fall!  These two hats are the most traditional Bavarian hats to wear… they are made of boiled wool. Yes, I have one too!

Necklaces

If you choose to wear a necklace, the most common necklaces to wear with your dirndl are edelweiss necklaces and heart shaped necklaces. The heart shaped necklaces are usually patterned after the gingerbread hearts and have terms of endearment on them.


Purses
Now you need something to put your ID, phone, and lipgloss in.  The most popular type of purse to wear with your dirndl is a heart-shaped purse.  Again, these echo the gingerbread hearts that are seen everywhere.

Now, if you aren’t into dresses, there is also female version of lederhosen. I think they are kind of cute! I am not sure if these are cheaper than a dirndl, as leather shorts and pants can get expensive!

Below, is a picture of my cousin and I wearing our dirndl and lederhosen in Austria. As you can see, my dirndl is long. I love the pink and green! I chose the longer one because it is not warm in the Alps!

I am including these editorial photos from some high end dirndl designers to show you how pretty dirndls can be!  Also, take note, the most popular way to wear your hair with a dirndl is in a braid! Click on each picture to see a larger version

Now, let’s say you are going to an Oktoberfest party here in the USA and don’t want to wear a dirndl or lederhosen, but want to have “the look”.  I have found some similar outfits that you can assemble to wear to your Oktoberfest party.

You can wear a pair of bermuda shorts or khaki capris with a gingham shirt, or a peasant off the shoulder blouse with a midi skirt. Pair it with clogs or boots. If it is cold, put on a boiled wool sweater or wool cardigan.  To accessorize, wear a heart shaped necklace and if you have a heart shaped purse, great!

Selections below, click to buy (affiliate link)


Menswear (Herrn)
Ok, the men wear lederhosen. It’s as simple as that. There are varying lengths: super short, then above the knee, below the knee, and pants. They come in a variety of colors – brown and black are the most common.  They are often sold in sets: the set includes a gingham plaid shirt, lederhosen, suspenders, socks, and shoes.  The sets are often around 150-250 Euros.  I recommend buying the set… if you purchase each item individually it will end up costing more!

men's outfits for the oktoberfest

Green lederhosen shorts with red socks on the left, and then hikers wear short lederhosen shorts with the traditional hat.

Here is Mr. Stylish below with his boiled wool coat, lederhosen, red socks, and a scarf that the Europeans love to wear. I feel like he’s going to start singing Edelweiss to someone!

Accessories

Here is the traditional hat to wear. Often feathers and pins are tucked into the side.

Now, I know a lot of guys don’t want to wear lederhosen (like my husband).  I put together a board showing you how to get “the look” without prancing around in leather pants.  A gingham shirt, corduroy pants, a wool cardigan (preferably boiled wool), boots, suspenders, and the alpine hat will get you the look!

Men's outfits for the oktoberfest

Click on the picture below to buy, contains affiliate links.


One last look at us two… a bunch of random people took our picture as we stood in front of these cows. I guess we certainly looked the part! In Germany, I *highly* suggest wearing the traditional outfit! At first I felt a little silly, but then I put it on, went to the festival, and got SO MANY compliments! The greatest part was, everyone kept talking to us in German. Granted, I can speak German pretty well, but it’s certainly not my native language.

I hope this guide helped you.  Have you been to the Oktoberfest in Germany? If not, do you go to local Oktoberfests in the USA?

Picture sources  other than my own (and also sources where you can buy your Oktoberfest outfits):
Bavaria Lederhosen (also sells dirndls)
Lena Hoschek
Ernst Licht
Deutsches Haus
Goessl
If I missed a credit for a picture, please let me know! I downloaded a whole bunch and forgot where I got some!

SaveSave

SaveSaveSaveSaveSaveSave

SaveSave

Follow:

Pumpkin Week Link Party 2015

We use affiliate links in our posts and our site. This means if you make a purchase using these links, we may earn a small commission. You don’t pay a cent more than you would otherwise! Our full disclosure is available under About.

As the big finale to Pumpkin Week 2015… we are ending in a big link party!  Link up all of your pumpkin themed posts here! I am so excited to see what you all have to share!!!

Here are some of my pumpkin-themed posts from the past: Pumpkin Soup Recipe // Starbucks Copycat Pumpkin Spice Latte Recipe // Pumpkin Chocolate Chip Cookies // a Pumpkin FESTIVAL in Germany! // Fall House Tour 2014  // Pumpkin Waffles // Pumpkin Spice Macarons  // 10 Ideas for Decorating with Pumpkins // Pumpkin Scone Recipe

I will be pinning EVERY SINGLE LINK to my “All Things Pumpkin” Pinterest board… meaning more social media exposure for you and your blog!  

Follow Peonies & Orange Blossoms’s board All Things Pumpkin! on Pinterest.

LINK PARTY RULES

  • Link must be pumpkin-themed 
  • By linking up you are agreeing that the photos are yours or that you have permission to use them and that I may use the photos to feature your project on a blog post and social networks. It will always include a link back to your blog.
  • Please go to the source of a photo to pin it to Pinterest – common Pinning etiquette!


An InLinkz Link-up


Follow:

Stylish Pumpkin Table Settings

We use affiliate links in our posts and our site. This means if you make a purchase using these links, we may earn a small commission. You don’t pay a cent more than you would otherwise! Our full disclosure is available under About.

You didn’t expect TWO posts in a day, did you?? Oh, you see, I told you I LOVE pumpkins. Like really love pumpkins.  As a bonus post, I rounded up a bunch of pretty pumpkin table settings! Enjoy this feast for your eyes… 

Williams Sonoma
Thoughts from Alice
Martha Stewart
source

724 South House 
Miss Mustard Seed
Peonies & Orange Blossoms
The Lettered Cottage
Shindig Parties to Go
Better homes & Gardens
Holly Mathis Interiors 
Colin Cowie Weddings
Home is Where the Boat is

Okay, don’t forget, tomorrow is the last day of Pumpkin Week! We’re ending with a link party, so prep your favorite pumpkin posts and link away! 

I’ll be pinning everything to my pumpkin board on Pinterest. I’m so excited to see what pumpkin-themed things you all have to share!!

Sources for the pictures for this post are displayed below each picture.

Written at http://peoniesandorangeblossoms.blogspot.com

linking up at: amaze me monday The Scoop!  2 Bees in a Pod,  Metamorphosis Monday’s Inspire Me Tuesday Wow us Wednesdays! Creative Ways  Share Your Style Thursday Favorite ThingsTablescape Thursday’s Your Turn to Shine The inspiration gallery Home Sweet Home Feathered Nest Fridays Foodie Friday & Everything Else Best of the Weekend Sunday’s Down Under

Follow:

Pumpkin Spice Bread Recipe

We use affiliate links in our posts and our site. This means if you make a purchase using these links, we may earn a small commission. You don’t pay a cent more than you would otherwise! Our full disclosure is available under About.

I’m back with another pumpkin recipe this week! Pumpkin bread. I realized I rather like to eat pumpkins.
This post may contain affiliate links. See my disclosure policy.

I’ll admit, this is kind of a “cheater” recipe. BUT it’s seriously the best pumpkin bread I’ve ever had.

pumpkin spice bread recipe

Why is this a “cheater” recipe? Well… *looks around*… I used a mix. Shh! Don’t tell my family and friends! They all love this bread! But yes, I’ve been using this mix for years! It’s from Williams-Sonoma. Every year I buy two mixes total as a splurge… I don’t drink alcohol, so it’s like the price of a fancy cocktail! (See how you can justify buying nice things by cutting other things out?)

What I like about this pumpkin bread mix is that it has more spice in it than other pumpkin breads. I guess if you read the mix though, it is called a pumpkin SPICE bread. I think it has a really nice flavor.  You could bake it in this cute bread pan.  You could also buy it was the pumpkin butter as it is super good with the pumpkin butter… bread mix and pecan pumpkin butter.  Here is the gluten-free version of the bread mix!

Pumpkin Spice Bread Recipe

makes 1 loaf

Ingredients

  • 1 bag Pumpkin Spice Bread Mix from Williams Sonoma (get it here)
  • 1 cup water
  • 1 stick unsalted butter
  • 2 eggs

Directions

  1. Preheat oven to 350F. 
  2. Mix all of the ingredients together in a bowl
  3. Pour into a greased bread pan
  4. Bake for 55-65 minutes, or until sticking a fork on the top comes out dry
  5. Let cool on rack for 15 minutes, then enjoy!

I like eating mine with my homemade pumpkin spice latte or with a homemade cinnamon dolce latte! So, go ahead, make your own pumpkin spice latte (recipe here) this week and use the money saved on your $12 bread mix. See how we saved money for this splurge??

pumpkin spice bread recipe

linking up at: amaze me monday The Scoop! Metamorphosis Monday’s Inspire Me Tuesday Wow us Wednesdays! Creative Ways  Share Your Style Thursday Favorite Things Home Sweet Home Feathered Nest Fridays Foodie Friday & Everything Else Sunday’s Down Under

Post may contain affiliate links.

Follow:

Pumpkin Spice Macaron Recipe

We use affiliate links in our posts and our site. This means if you make a purchase using these links, we may earn a small commission. You don’t pay a cent more than you would otherwise! Our full disclosure is available under About.

If you are a usual follower on my blog, then you’ll know that I love to bake (and eat) macarons.  If you are just arriving here for pumpkin week, I’ll explain my love for macarons: I discovered that I needed to learn how to bake these treats when I found out the cost of them in the store – normally about $2 each. When you love macarons like I do, it can be quite the costly investment to satiate your hunger for them!

This post may contain affiliate links. 

pumpkin spice macarons

I was inspired by the pumpkin macarons in the Williams Sonoma catalog:

But at $40 for a box of 12, I thought to myself… I can make those! So I did. They obviously used a black airbrush to get the pumpkin faces onto their macarons; I used a black food marker.

Materials needed: (affiliate links are used for your convenience)

    • a food scale (yes, you need this. I use this one)
    • a piping tip and piping bag (I like the ateco #806, I use these tips and piping bag)
    • Food coloring (the gels or dry powder works best, not the liquid store stuff)
    • A macaron template
    • food processor (I use this one)

PRINTABLE RECIPE HERE

Macarons Recipe – adapted from Laduree

275g ground almonds

250g powdered sugar

210g egg whites

210g granulated sugar

1/2 tsp pumpkin pie spice


1.  Mix almond meal and the powdered sugar in a food processor. Be careful not to grind too long, otherwise it will form a paste.

2. Sift the almonds, pumpkin pie spice, and powdered sugar. Set aside. (I admit I did not do this step this time and that is why mine are a little bumpy!)

3. Weigh out granulated sugar.

4. Weigh the egg whites.  Beat them slowly on a low speed until foamy. SLOWLY add the granulated sugar to the egg whites as you beat.  Once all mixed, increase speed to medium and beat until a firm meringue forms.  You want a firm meringue with glossy peaks but not stiff peaks.  They should defy gravity and remain in the bowl if you turn it upside down.  If you tilt your bowl to the side and they are sliding out, keep beating.

5. Add the food coloring gel and mix.

6. Then fold in 1/3rd of the almond/sugar mixture into the meringue with a silicone spatula.  Once combined, add another third of the almond mixture. Add last bit.  This batter requires more deflation during this step since it creates such a poofy meringue.

7. Add the batter to a piping bag.  Pipe in rows using your template onto parchment paper.

8. Pick up the pan and beat until the counter.  The cookies need to rest on the counter between 30-60 minutes.  They are ready to go in the oven when they are dry to touch (the shell shouldn’t stick to your finger)

9.  Set the oven to 300F.

10. Bake the cookies for 13-15 minutes, one sheet at a time. They are done when they look kind of matte and seem firm when you lightly tap on them.  You can always rescue a slightly overcooked one with the maturation process that comes later, but you cannot rescue an undercooked one!!

11. Remove from paper once completely cool. If they stick to the paper, they aren’t cool yet. Or you undercooked them.

Pumpkin Spice Filling – adapted from Sweet and Savory by Shinee

•3 tbsp unsalted butter, softened

•1 cup powdered sugar

•1 tbsp pure pumpkin puree (not pumpkin pie filling!)

•1 tsp heavy cream

•1/8 tsp salt

•1/8 tsp ground cinnamon

•1/8 tsp pumpkin pie spice


1Cream the butter using a wire mixer on your mixing machine. Cream until light and fluffy.

2Add all of the other ingredients. Beat until well combined.

3Pipe or spread your filling onto the macaron shells!


HINTS! The macarons taste better if enjoyed the next day. Spread your filling onto the shells, then store in an air tight container in the fridge overnight. You can store in an airtight container in the fridge for up to 4 days. You can store in an airtight container in the freezer for several months (HINT HINT bake some now for Thanksgiving later!)

Have you tried the Williams Sonoma pumpkin macarons?


SaveSave

Follow:

10 Ideas for Decorating with Pumpkins

We use affiliate links in our posts and our site. This means if you make a purchase using these links, we may earn a small commission. You don’t pay a cent more than you would otherwise! Our full disclosure is available under About.

Pumpkin week continues with 10 decorating ideas with pumpkins.  For these 10 decorating ideas, only REAL pumpkins were used.  I like real pumpkins as I find the plastic ones often look, well, plastic. But, there are some nice plastic ones if you keep your eye out for them. The other thing is that once Fall is over we throw them in the compost pile and don’t have to store them in our house!

1. Stack ’em up!

I just love this look! You need 3 different size pumpkins. They will need to be of the flatter variety so you can stack them up! You can imagine the round jack o’ lanterns won’t work because they are too round. You could do all white, all red-orange, all blue, or mix it up! I added some faux Fall foliage to the bottom and stacked them on top of the anduze vase!

Ideas for decorating with pumpkins

2. Put them inside a lantern
I’m sure most of us have lanterns… remove the candle from inside and stack them inside!! Doesn’t it look super cute??

3. Arrange them in a bowl
I *just* got this antique dough bowl yesterday (!!) and filled it up with pumpkins. I will have a full post on it later… but this dough bowl is BIG. So I stacked a whole bunch in it! If you don’t have a dough bowl, you could always just take the largest bowl in your house and arrange pumpkins in it too!

4. Use them in your table setting
Place individual mini pumpkins on your table setting… you can use them for name card holders too. You could just add a little ribbon with someones name or lean the place card up against the little pumpkin!

5. Line them in a hallway
We happen to have our hallway with a ledge separating the rooms… but you could always line them on the floor too!

6. Stack them outside in and around garden statues!
Now this picture is actually from a garden shop, but I thought it was super cute! You could put them in your bird bath!

7. Place them in a tiered cake stand or rack
This is really easy to do… just place them on a tiered rack. You don’t need that many to get a Fall look!

8. Put one in a tea cup!

I am sure you have some teacups displayed somewhere in your house… take a mini pumpkin and rest it carefully inside! Instant Fall!

9. Stack them in boxes!
To make it look more full, put a filler under them like pine cones or crumpled newspaper… that way it looks like you filled the whole box but in reality it’s only a small layer on top!

10. Put them ANYWHERE!
The great thing about these mini-pumpkins is this: you can really put them anywhere. These are in my bathroom in the poor quality picture below (as you can imagine, the bathroom doesn’t have the best lighting in the house). If you take 3 pumpkins and put them in a corner it really adds Fall to any room.  This for vignette for me is free as I grew these pumpkins. But if you didn’t grow your own, they cost between 50 cents to $1 in the store, so this really is your cheapest option for Fall decorating!

Written at http://peoniesandorangeblossoms.blogspot.com

linking up at: amaze me monday The Scoop! Metamorphosis Monday’s Inspire Me Tuesday Wow us Wednesdays! Creative Ways  Share Your Style Thursday Favorite ThingsTablescape Thursday’s Your Turn to Shine The inspiration gallery Home Sweet Home Feathered Nest Fridays Foodie Friday & Everything Else Sunday’s Down Under

Follow:

Pumpkin Scone Recipe – Starbucks Copycat

We use affiliate links in our posts and our site. This means if you make a purchase using these links, we may earn a small commission. You don’t pay a cent more than you would otherwise! Our full disclosure is available under About.

It’s pumpkin season time.  I LOVE pumpkin scones. I tried the pumpkin scones from Starbucks this year (last year I couldn’t, you can read about their snafu here) and it was a bit too sweet for me… there was just SO MUCH frosting.  I finally found a recipe that I love… it’s a copycat Starbucks pumpkin scone recipe! What I like about this recipe is that it calls for a bit less butter and oil compared to other scone recipes.

A delicious and healthier Starbucks copycat Pumpkin Scone recipe!
Pumpkin Scones printable recipe here

  • 2 cups all-purpose flour
  • 7 tbsp granulated sugar
  • 1 tbsp baking powder
  • 1/2 tsp salt
  • 1/2 tsp ground cinnamon
  • 1/2 tsp ground nutmeg
  • 1/4 tsp ground cloves
  • 1/4 tsp ground ginger
  • 6 tbsp cold butter
  • 1/2 cup canned pumpkin
  • 3 tbsp milk (or half-half, or whole milk, non-fat, 2%, whatever)
  • 1 large egg

Glaze

  • 1 cup powdered sugar
  • 2 tbsp milk

Spiced Drizzle

  • 1 cup powdered sugar
  • 3tbsp powdered sugar
  • 2 tbsp milk 
  • 1/2 tsp ground cinnamon
  • 1/8 tsp pumpkin pie spice
pumpkin scones

Scone Directions

  1. Preheat oven to 425F and line a cookie sheet with silpat or parchment paper
  2. Combine flour, sugar, baking powder, salt, and spices into a large bowl.  Then cut butter into the dry ingredients until mixed and crumbly. Set aside
  3. In another bowl, whisk pumpkin, milk, and egg together. Then fold these ingredients into the dry ingredients above.
  4. Form dough into a ball, then pat it out on a lightly flower surface to form into a 1 inch thick rectangle (or circle). Slice into 6 triangles.
  5. Place triangles onto baking sheet an bake at 425F for 14-16 minutes.  Scones will be lightly browned when done. Cool on wire rack.

Glaze Directions

  1. Mix powdered sugar and 2tbsp milk until smooth. Once scones are cool, brush glaze on to cover tops. (If you put it on when hot, the glaze will melt off)

Spiced Drizzle Directions

  1. Mix all ingredients together. Then lightly drizzle on top. You can skip this step, but it adds some nice flavor and it looks neat!

If you want to save some calories, you don’t have to put the glaze or drizzle on top.  I think they still taste good plain! What’s your favorite pumpkin treat? Do you love pumpkin season like I do??

Recipe was adapted from here

Pumpkin Scone recipe - a copycat of Starbucks
healthy pumpkin scones

See you tomorrow with another pumpkin themed post!!

Written at http://peoniesandorangeblossoms.blogspot.com
linking up at: amaze me monday The Scoop! Metamorphosis Monday’s Inspire Me Tuesday Wow us Wednesdays! Creative Ways  Share Your Style Thursday Favorite ThingsTablescape Thursday’s Your Turn to Shine The inspiration gallery Home Sweet Home Feathered Nest Fridays Foodie Friday & Everything Else Sunday’s Down Under

Follow:

Friday Favorites #14

We use affiliate links in our posts and our site. This means if you make a purchase using these links, we may earn a small commission. You don’t pay a cent more than you would otherwise! Our full disclosure is available under About.

I’m back again this week for Friday Favorites! I’ve been putting up my Fall decorations this week but it has been SO HOT here (108 was the top temp) that it kind of ruins the Fall mood a bit!  The last time I even saw rain was July 7! (and that was in Oregon)

Salted Caramel Cheesecake
We went to the Cheesecake Factory not too long ago and we ordered cheesecake (We don’t normally order cheesecake so it’s kind of a big deal). We split this salted caramel cheesecake and it was SO GOOD!!!  It was rich, of course. In fact, we couldn’t finish it all. The cheesecake defeated us!  If you haven’t tried it and you like caramel, I’d give it a taste!

New Apple Products
This week Apple announced new products that won’t probably be available until Christmas.  I have been iffy about the apple watch, my husband loves his and he thinks I’ll like one, but now they came out with new colors that I like. They have a gold colored apple sport and a rose gold apple sport. Apparently now third parties are also designing bands for the watch because the apple bands I find to be boring and aren’t really doing it for me. I like the gold and navy combo on the left though.
Do you have an apple watch? What do you think???

More importantly though, they released their new iPhone which is awesome for me because it’s my year to get a new phone! woot! There are lots of options… the bigger or smaller iPhone 6s, and then you have to choose the color too!  Right now I have the gold one. Maybe I’ll stick with the gold one. I think I’ll get the smaller phone because I have an iPad mini and the other phone is so huge it won’t fit in my pockets or in my designated purse slot for it!

Long Live the Queen

As you may or may not know, Queen Elizabeth is now the longest reigning British Monarch! She surpassed Queen Victoria this week. It’s really quite remarkable. I’m including some pictures of her in this post… I do like the royal family but it could just be because we simply don’t have one!

She is a little girl holding her beloved corgis… then as a teenager.

Here she is on her coronation day, pictured below.Did you know the diamond in the scepter is 530 carats?! And the giant one inside of the imperial state crown is 320? They were made from the same diamond, the Cullinan diamond, which in its uncut form was 3000 carats! Read about it here!

Every year at the opening of parliament she wears her big giant crown. She’s like, yes, my pions, kneel before me… okay, maybe she doesn’t think that. Maybe she thinks, okay, I will come put on the show and remind you all who’s boss around here… ok I’ll stop now.

 I can’t believe how many US Presidents she has outlasted.

She loves her horses and rides them even in her 80s without a riding helmet. Apparently her security sources don’t like that. But a Queen does what a Queen wants to do.

 Remember in the Olympics 2012 when she was with James Bond. May be most American’s favorite moment of the Queen, isn’t that what we think of England? James Bond, Royalty, and Tea?

I leave you with this picture of her in Scotland wearing all of her Scottish garb, literally, as the Queen of Scots.

Pumpkin Week is next week!

Are you ready for pumpkin week next week? I’ve been busy baking up a storm and decorating like a fiend getting ready for pumpkin week. On Friday, I’ll end with a link party where YOU can link up your pumpkin-related posts and we can just have a pumpkin party together! I’ll pin all the links to my All Things Pumpkin Pinterest board!

Friday Favorites with A Little Bit of EverythingFive on friday at A Liz Adventures .Friday Favorites at the Diary of a Real HousewiveOh Hey, Friday! at September FARM

Follow:

Potato Enchilada Recipe – Potato Enchiladas Verdes de Papa

We use affiliate links in our posts and our site. This means if you make a purchase using these links, we may earn a small commission. You don’t pay a cent more than you would otherwise! Our full disclosure is available under About.

Have you ever had a potato enchilada? Likely not! Well guess what!? It’s good.  One of my favorite dishes from a local Mexican restaurant in the town I grew up used to serve them.  I tried to copy their recipe, but their sauces are made from family-secret recipes… so I naturally I couldn’t exactly replicate it. But, what I came up tastes really good! 

enchiladas verdes de papa

The insides of the enchiladas consist of potatoes, green chiles, and sautéed onions all cooked in an ancho-chile sauce (salsa). They are then covered with a tomatillo green sauce, Mexican blend cheese, and baked!

They taste really good served with black beans, Mexican rice, and topped with avocado! This is an excellent dish to serve vegetarians at a Mexican food themed party!

Potato Enchilada Recipe

makes 8 enchiladas

Ingredients

  • 16 baby potatoes (see picture below). Approx 2 baby potatoes go into each enchilada
  • 8 soft-taco size tortillas. You can use flour or corn tortillas
  • 1 small can green chiles
  • 1/2 yellow onion, diced
  • tomatillo enchilada sauce for topping (*see comments below)
  • 3 tbsp chili sauce (*see comments below)
  • 3/4 cup Mexican blend cheese
  • 1 sliced avocado, for garnish
  • 1 can black beans to serve on the side (optional)
  • 1 tsp Mexican blend spice (optional)
  • grated cotija or queso fresco, shredded, for garnish (optional)
  • Mexican rice, to serve on the side (optional)

Directions

  1. Boil the potatoes until cooked through. Allow to cool slightly, then cut into little cubes.
  2. Saute the diced onion
  3. Add the diced potatoes and green chiles to the onion pan.  Add approx 3 tbsp or so of chili sauce and allow to marinate for approx 5-10 minutes. You aren’t frying the potatoes here, only adding flavor.
  4. Preheat oven to 400F. Now fill the tortillas with several scoops of potato filling. Roll into an enchilada.
  5. Once your enchiladas are in the pan as above, pour the enchilada sauce, making sure the enchiladas are all covered.
  6. Sprinkle with Mexican blend cheese, adding more or less as you desire.
  7. Bake in oven for 15-20 minutes, until cheese is completely melted and just starting to brown.
  8. Serve on plate with several pieces of sliced avocado
  9. OPTIONAL: you can simmer your black beans on the stove while the enchiladas are cooking with approx 1tsp of Mexican blend spices (or taco spice).  Serve on the side. You can also serve with Mexican rice, I used Uncle Ben’s Spanish rice, but Rice-a-roni makes a nice Mexican rice too.

*Comments on the sauces: I used Frontera Grill Green chili enchilada sauce with roasted tomatillo and garlic in it. It is a really good sauce.  You can use red enchilada sauce too, but the green enchilada sauce tastes better with potatoes.  If you want to make your own enchilada sauce, this one here looks good. Now, for the filling on the potatoes, I used Frontera’s “New Mexico Red Chile” salsa.  I added a few tbsp to the potatoes and let it simmer down.  If you have ancho or arbol chiles, you can add that to the potatoes. If you don’t have the salsa, I would add some chili powder, garlic, and a dash of cayenne pepper. 

the enchilada sauce, green chiles, beans, and rice I used
I used several tbsp of this salsa to put on the potatoes and let it simmer
the potatoes I used… they are quite small!

My family gobbled this up! It was really good.  Buying the enchilada sauce made the whole process so much easier! 

potato enchilada recipe

Think you’ll give it a try? Tell me what you think!

Written at http://peoniesandorangeblossoms.blogspot.com

linking up at: amaze me monday The Scoop!  2 Bees in a Pod,  Metamorphosis Monday’s Inspire Me Tuesday Wow us Wednesdays! Creative Ways  Share Your Style Thursday Favorite ThingsTablescape Thursday’s Your Turn to Shine The inspiration gallery Home Sweet Home Feathered Nest Fridays Foodie Friday & Everything Else Best of the Weekend Sunday’s Down Under

Follow:

Pistachio Salted Caramel Macaron Recipe

We use affiliate links in our posts and our site. This means if you make a purchase using these links, we may earn a small commission. You don’t pay a cent more than you would otherwise! Our full disclosure is available under About.

I have been busying baking macarons and I thought, why don’t I combine two of my favorites: Pistachio & Salted Caramel?  So I did.  And it was good.
This post may contain affiliate links. 

Pistachio Salted Caramel Macarons

Don’t they look good??  The caramel is oozing out of the cookies and just begging to be eaten!

Pistachio Salted Caramel Macarons

Pistachio Salted Caramel Macarons (Get the printable recipe here)

Materials needed: (affiliate links are used for your convenience)

    • a food scale (yes, you need this. I use this one)
    • a piping tip and piping bag (I like the ateco #806, I use these tips and piping bag)
    • Food coloring (the gels or dry powder works best, not the liquid store stuff)
    • A macaron template
    • food processor (I use this one)

Pistachio Macaron Shell Recipe

• 200g almond flour

• 75g pistachio flour (step 1)

• 250g powdered sugar

• 210g granulated sugar

• 6 egg whites (room-temperature)

• 1/8 cup chopped pistachios

• food coloring (green is traditional color for this cookie)


1 Grind your unshelled pistachios (salted or unsalted, I prefer the salted) using a food processor. Be careful not to turn it into a paste.

2 Sift almond flour, pistachio flour, and powdered sugar through a fine mesh screen into a bowl.

3 Whisk or using a beater, turn 6 egg whites to a foam.  Slowly add the granulated sugar to the egg whites as you beat.  Whip until the meringue has firm glossy peaks but not super stiff peaks. They should defy gravity and remain in the bowl if you turn it upside down.  If you tilt your bowl to the side and the meringue started to slide, keep beating.

4 Add your food coloring.

5 Then fold in 1/3rd of the almond/pistachio/sugar mixture into the meringue with a silicone spatula.  Once combined, add another third of the almond mixture. Then the last third.

6 Add the batter to the piping bag.  Pipe in rows using your template onto parchment paper.

7 Pick up the pan and beat onto the counter.  Now sprinkle pistachio nuts on half of the cookies as a garnishment.

8 Preheat oven to 300 degrees.  The cookies need to rest on the counter between 30-60 minutes. They are ready to go into the oven when they are dry to the touch.  The shell shouldn’t stick to your fingers.

9 Bake the cookies for 13-15 minutes, one sheet at a time.  They are done when they look kind of matte and seem firm if you tap on them.  You can always rescue an overcooked cookie with the maturation process that comes later, but you cannot rescue an undercooked one!

10 Remove from the paper once completely cool.  If they stick to the paper, they either aren’t cool yet or you undercooked them.

11 Fill the cookies when cool with the filling below.

12 Refrigerate overnight for best results.


Pistachio Salted Caramel Macarons

Salted Caramel Filling Recipe

(makes 1.5 cups of caramel)

1 cup of cream

1.5 cups of granulated sugar

2 tsp coarse salt (or 1tsp for a less salty flavor)

1 cup unsalted butter


Instructions:

1. Chop butter into small cubes and set aside.

2. Pour cream into the pan and add the salt. Bring to a low boil while stirring and remove immediately. Do not scald the cream.

3. Place the sugar into a new pan. Cook over medium hit while stirring constantly.

4. Stir until sugar is melted and has caramelized into a rich color. Remove from heat.  Do not burn the sugar.  If your caramel starts to burn, throw it away. You cannot rescue it.

5. Pour and stir the hot cream into the caramel mixture. BE CAREFUL!!! Add the cream VERY SLOWLY.  The caramel will spit and boil up, so stir while incorporating the cream into the caramel.

6. Let the caramel cool to 115 degrees (about 5 minutes later).

7. Whisk in the cubes of butter into the mixture until melted and mixed.

8. Pour caramel into a shatter proof bowl and refrigerate until cold.


To use the caramel:

1. Remove from the fridge.

2. Whisk the caramel mixture to stiffen to more of a butter/cream consistency. Do not over-whisk as the caramel will separate.  Add the caramel to a shell and twist shell shut to close them together.

3. Once all assembled, put them in an airtight container and let them mature (yes, that’s the scientific word for this process) in the refrigerator for 24-48 hours.


Pistachio Salted Caramel Macarons

Om nom nom! These were good!

Pistachio Salted Caramel Macarons


SaveSave

SaveSave

Follow:

Fall Scenes

We use affiliate links in our posts and our site. This means if you make a purchase using these links, we may earn a small commission. You don’t pay a cent more than you would otherwise! Our full disclosure is available under About.

I’m not doing a Friday Favorites today mainly because I’ve been at work 9 of the past 10 days (with one more day to go excluding today!)… so I don’t have much to “favorite” if you know what I mean.

Instead, I leave you with some scenes of Fall to get you in the mood for this season while you sip on your first Pumpkin Spice Latte! 

source
source
source 
source
source

Did you get your Pumpkin Spice Latte today??? Because it’s in stores starting today!

Follow:

From the Shop

I may earn a small commission if you purchase with these links

Caning Natural Tote Handbag - Universal Thread™
The Hustler High Waist Fray Hem Ankle Bootcut Jeans
Le Panier Pliage Raffia Crossbody Bag
Extra Large Le Pliage Panier Tresse Straw Tote
The Bennet Buttondown Shirt by Maeve
T Monogram Perforated Leather Bucket Bag
Mellow Stud Mule
Le Pliage Marinière Recycled Nylon Canvas Travel Bag
Unseen Sunscreen Broad Spectrum SPF 40 PA+++
Maxine Stripe Cotton Button-Up Shirt
Citizens of Humanity Charlotte High Rise Straight Jeans
Navy Equestrian Traversee M Linen Tote
Cream Carrie Blouse
Ellison Natural
Jolene High Rise Vintage Slim
Citizens of Humanity Blue Jolene Jeans
Charlotte High Rise Straight Jeans
Le Pliage Filet Top Handle Bag
Vintage cotton crewneck T-shirt
Air Heart Sunglasses
Le Pliage Torchon XS Top Handle Bag With Strap
Santorini Raffia Basket Bag
Chuck Taylor® All Star® Lift High Top Platform Sneaker
Please note that I use ShopSense, LIKETOKNOW.it, Shareasale and Amazon affiliate links on this site. This means using them for purchases won’t cost you extra but may earn me a small commission.  Our full disclosure is available for viewing under About in the disclosure policy.
All rights reserved. Our graphics, images and text are all subject to copyright protection.