Choosing the Perfect China for French Country Style

We use affiliate links in our posts and our site. This means if you make a purchase using these links, we may earn a small commission. You don’t pay a cent more than you would otherwise! Our full disclosure is available under About.

Today is a round-up of french country farmhouse plates!

Choosing the perfect china for your French Country Farmhouse style!

I created this round up of dinner plates that are new and on the market today that I felt best reflected the French country style!

I put this together and found many more plates I would like to someday add to my collection!

There are so many more then I pictured in the graphic above!

Juliska Le Panier Dinner Plate

French Garden Dinner plate


Juliska Country Estate Delft Blue Dinner Plate

Juliska Country Estate “Main House” Dinner Plate, Each


Villeroy & Boch Dinnerware, French Garden Dinner Plate and Salad Plate 


Villeroy & Boch Audun Assorted Dinner Plates and also Assorted Salad Plates


Juliska “Jardins du Monde” Dinner Plate


Lenox French Perle Scalloped


Gien Filet Bleu Indigo Salad Plate


Vietri Bellezza White Dinner Plate


Raynaud Alle Royale Porcelain Dinner Plate


Villeroy & Boch Switch 3 Assorted Salad Plates


Did you know that Juliska also makes a melamine plate – perfect for your al fresco French dining! It is here Juliska Berry & Thread Melamine Whitewash Dinner Plate and also here

Scroll the widget below for even MORE options:


SaveSave

SaveSave

Follow:

Beautiful Tables and Travel Destinations -TFT

We use affiliate links in our posts and our site. This means if you make a purchase using these links, we may earn a small commission. You don’t pay a cent more than you would otherwise! Our full disclosure is available under About.

In this post – beautiful table setting ideas and travel destinations

I was inspired by these beautiful tables which are perfect for Mother’s Day this weekend and also some very beautiful travel destinations!

Janet from Rosemary and Thyme shared this beautiful Mother’s Day Brunch. I love the salad cups!

Timeless Creations shared this beautiful Al Fresco Spring Table. 


Christina from Organic Garden Dreams shared a trip report about Blockley, a storybook town in the Cotswolds in England.


Fotogeograf shared a trip report to Kutna Hora, a beautiful Czech town outside of Prague.


Shannon from Sunny Coastlines shared a trip report to Nara in Japan. The buildings are beautiful are a UNESCO world heritage site!


We love all of your posts and enjoy visiting you – there is something for everyone at this party!

Don’t forget to check out our Thursday Favorite Things Pinterest Board!

I pin my features for the week to our board as well as many others! Make sure your posts have a high quality pin that screams “pin me!”

The party is now on THURSDAYS at 6AM PST! 

Please take the time to stop by ALL of your hostesses!

Thursday favorite things hostess

nina CollageThursday Favorite Things Blog Hop

angelina collage

Thursday Favorite Things blog hop co-hostess

If the link party doesn’t load right away, just click “An InLinkz Link-up” Below.

SaveSave

An InLinkz Link-up


SaveSave

Follow:

10 Bridal Shower Ideas -Thursday Favorite Things

We use affiliate links in our posts and our site. This means if you make a purchase using these links, we may earn a small commission. You don’t pay a cent more than you would otherwise! Our full disclosure is available under About.

In this post: Bridal Shower Ideas – Recipes & Decor

This week was one of my cousin’s bridal shower and so I have weddings on the brain.

When I was looking through the posts I realized there are some great ideas here that would be perfect for a bridal shower!

First, let’s set up the party:

The Turquoise Home has this fabulous wooden box tutorial which would serve as a great centerpiece for the table or a buffet/serving table!

Old Time Pottery has a pretty lemon centerpiece with moss table number tutorial. Great for parties with multiple tables!

Simple Nature Decor threw a Moroccan inspired tea party – I thought it was a fun spin on the traditional tea party and so perfect for the nicer weather!

Now for the Menu…

Blood Orange Gin and Tonics from The Kittchen.

And a non-alcoholic option of a fruit frappe from Live Like You’re Rich.

Next, for side dishes…

A beautiful spinach and citrus salad from  Pink Peppermint Design.

Orzo with black olives and asparagus from Home Cooking Memories.

For your main dish, how about a spinach quiche with artichokes and red peppers from a Dish of Daily Life.


And for dessert…

A blueberry tart with lemon marscapone cream from DelightfulEMade.


and to finish, a lemon raspberry cheesecake from All That Jas.


Also, this week I shared a tutorial on how to make a bloom box which is PERFECT for a bridal shower or birthdays!

bridal shower centerpiece and flower idea

We love all of your posts and enjoy visiting you – there is something for everyone at this party!

Don’t forget to check out our Thursday Favorite Things Pinterest Board!

I pin my features for the week to our board as well as many others! Make sure your posts have a high quality pin that screams “pin me!”

The part is now on THURSDAYS at 6AM PST! 

Please take the time to stop by ALL of your hostesses!

Thursday favorite things hostess

nina CollageThursday Favorite Things Blog Hop

olivia 1 Collageangelina collage

Thursday Favorite Things blog hop co-hostess

If the link party doesn’t load right away, just click “An InLinkz Link-up” Below.

An InLinkz Link-up


Written at http://peoniesandorangeblossoms.blogspot.com

Follow Peonies and Orange Blossoms on social media:
Follow me behind-the-scenes on my favorite social media, Instagram!
See my latest pins on my most popular social media account, Pinterest.
Follow all of my posts in my favorite blog reader feed Bloglovin.

SaveSaveSaveSaveSaveSave

SaveSave

Follow:

How to Make a Flower Bloom Box

We use affiliate links in our posts and our site. This means if you make a purchase using these links, we may earn a small commission. You don’t pay a cent more than you would otherwise! Our full disclosure is available under About.

In this post: A DIY tutorial on how to make a flower bloom box.

Recently I have been obsessing over the flower bloom boxes.

They are floral arrangements in boxes as opposed to vases.

I think I have been drawn to them because I love boxes (seriously, I can’t seem to be able to throw away a box. I even collect cute boxes just because they are just that – cute boxes).

I have been spying on these bloom boxes all over the internet.

They are loved by the rich and the famous – the bottom left hot pink roses are from the Kardashians.

But since they cater to the rich and the famous – they come with a price.

So I thought, I could make one myself!

I bought this pink and gold Sugar Paper box at Target during the Christmas season that was all over the internet.  I knew I had to have it – but then I didn’t quite know what to do with it.

I had a light bulb moment and thought oh! I’ll make a bloom box with it!

Materials Needed

Pretty box of your choice

Oasis Floral Foam

A container liner of your choice so your box doesn’t get wet

Flowers (*a note about flowers later)


Directions

1. Here I used a round box and placed a glass bowl inside of it.

 2. Cut the floral foam to fit inside and wet it with water. You may need to add more water because the foam will soak it up.

 3. Start poking in your filler flower if using several different types of flowers.  Here I used a hydrangea and cut the blooms off into smaller pieces like below.  I then worked my way around the edges making sure to cover up the edge of the box/bowl.

 4. Next, I poked in one full hydrangea to cover up the center, but you could use whatever flowers you would like nice to cover the center.

 5. Just keep adding until a majority of the green is hidden.

 6. Next start adding in your other flowers until you are satisfied with the overall look!

6. Arrange and take a picture because you are all done!

I told you it was easy!

*A note on flowers: if you are using the same type of flowers, just make sure on the edges you have the flowers cover up the edge of the box.  I chose to do a mixture of flowers.

Having three types of flowers is ideal: filler (hydrangea), focal flower (ranunculus), secondary flower (sweet peas).

Generally flower arrangements have a base of greenery too but most of the bloom boxes do not have greenery.

Choosing flowers of similar hues makes for a nice statement – or you could always choose your statement flower in a bold complimentary color.

I think I like the bloom box so much is because it is like you are opening a present but then the present is actually flowers!

See what a I mean! Looks like a present!

What do you think of the bloom box?

I’m in love with them.

How to make a flower bloom box - flower arranging tips

Flower Arranging Tips and Tutorial

SaveSave

Follow:

Easter Entertaining Sweets and Treats

We use affiliate links in our posts and our site. This means if you make a purchase using these links, we may earn a small commission. You don’t pay a cent more than you would otherwise! Our full disclosure is available under About.

In this post: Easter Entertaining Ideas – a Sweets and Treats Bar.

Easter Entertaining Ideas

Easter is just around the corner and I know that many of us enjoy Easter sweets and treats!

So I came up with this cute little Easter entertaining bar.

It is so easy for you to replicate at home.

All you need is some lemonade or drink of your choice, a variety of sweets and some Easter decorations!

I used a cake stand and a hat box to display some of my treats.

A chocolate bunny (although he is faux) sits at the top, but Lindt sheep and rabbits are dancing below him!

I made some raspberry and orange blossom macarons.  Click for their respective recipes.

I set them on an Easter plate.  An antique French plate serves as a dramatic back drop.

The glasses are on the table, but you can have some tasty pink citrus lemonade.  Some vintage linens in Easter colors are here to catch your dribbles!

More Easter treats sprinkle the table…

I just love how cute Easter chocolate is! Every year I buy Lindt chocolate.

Here are a few of my favorite Easter candies (affiliate links used)

Medici Almonds

Mini Lindt GOLD BUNNY – Milk Chocolate,(pictured above)

Lindt Milk Chocolate Mini Lambs (picture above)

Lindt Chocolate Carrots, 4-Count, (these are so good!!)

Lindt Large Chocolate Carrot Box – a mixture of many different types!

Lindt GOLD BUNNY – Milk Chocolate  one larger bunny!

Lindt Easter Chocolate Novelty Pack contains sheep, chicks, rabbits and carrots! SaveSave

SaveSaveSaveSaveSaveSaveSaveSave

Follow:

Have Last Minute Guests This Afternoon? Here’s What to Serve!

We use affiliate links in our posts and our site. This means if you make a purchase using these links, we may earn a small commission. You don’t pay a cent more than you would otherwise! Our full disclosure is available under About.

Do you have company coming over at the last minute this afternoon?

I’ve got a simple afternoon party idea for you!

This post contains affiliate links.

A simple afternoon party idea
Do you have last minute guests coming over this afternoon? Here’s something simple to serve!


Throw together some coffee and cookies on pretty serving ware!

I told you the idea was simple!

If you take something ordinary (cookies and coffee) and have a pretty presentation… suddenly they become something a little more!

This party though is just for two – and consists of homemade madeleine cakes!

These ones were pistachio and copied from the Bouchon Bakery cookbook.  Here is a recipe for plain madeleines. Or you could just buy some – Costco, Starbucks, and Trader Joe’s carry them.

Really you could serve it with any cookies, but these ones are one of my favorites and are technically little French cakes (side question… do the French even have a cookie? Wait, yes, Sables Bretons).

It is a party after all – so having something a little fancier than Oreos is required!

Fresh flowers are always a must for any party!   I love this time of year with all of the pretty ranunculus!

So I always suggest keeping some sort of sweets on hand with you at all times – just in case someone pops on by!

Here is a selection of cute mugs:

Here is a selection of cute plates as well:


SaveSave

SaveSaveSaveSaveSaveSave

Follow:

How to Make a Macaron Tower

We use affiliate links in our posts and our site. This means if you make a purchase using these links, we may earn a small commission. You don’t pay a cent more than you would otherwise! Our full disclosure is available under About.

I have been wanting to make a macaron tower for a little while, so I set out to create one. It was surprisingly easy!

I was delighted when I saw my finished product – how pretty!

I thought this pretty pink tower was perfect for a Valentine’s Day post.

Finding a cone to as a base for this was not super easy.

I first went to a specialty cake supply store – but they did not have any.  I thought, great, I will just have to make it so they stack up on top of each other without a base. *rolls eyes* like I am skilled enough to do that. Nope I am not.

Then my Mom had the idea to get one of the floral foam cones – so off to Michael’s we went.

And we found one! Or two actually. I bought two sizes but decided to use the smaller one in this post.

Materials Needed

Foam floral cone

parchment paper

toothpicks

macarons

First, pictured below is the foam floral cone that I used.

I wrapped parchment paper around the cone because the foam flakes off.  If you do not intend to eat the macarons off the tower, then you do not need to wrap the cone in parchment paper.

 Here, I cut the paper and taped it to the cone. The paper didn’t hold very well with tape, so eventually I just put a few toothpicks in it to hold it in place.


Next, cut your toothpicks in half.

Then poke one hole into the cone where you want your macaron.  It needs to stick out about halfway – you need enough toothpick sticking out so that it can fully support the macaron otherwise it will fall off.

Then, gently stick the macaron onto the toothpick. *gently*. It does not take much pressure to place it onto the toothpick!

Then, row by row, work your way up until you reach the top!

This tower was approximately 4 inches wide at the base by 9 inches tall.

 It took approximately 50 filled cookies to fill this size of cone in the pictures. I estimate, depending in the size of your cookie, it could take 50 +/- 2 cookies.

I used several different sizes of cookies – the largest ones are on the bottom and the smallest ones are at the top. You don’t have to do that… it just had to do with my inconsistent piping and it worked out well in the end!

You could also using frosting to attach the cookies to the foam if you do not have toothpicks. Or you could do both.

I would recommend making this the day of and just before any party you bring it to!

This is *perfect* for bridal showers, tea parties, birthday parties, or fun celebrations! It is a pretty centerpiece! I would love it if you pinned this image.

How to Make a Macaron Tower - a DIY tutorial for French Macaron Towers!
How to Make a Macaron Tower – a DIY tutorial for French Macaron Towers!

Also, if you are not up to making your ownmacarons, you could just get some store bought ones – for instance, the ones from Trader Joe’s in the freezer aisle would be perfect! It would take several boxes but you could do it!

How to Make a Macaron Tower

You might also enjoy these Valentine’s Heart Macarons


SaveSave

Follow:

Christmas Present Wrapping Ideas

We use affiliate links in our posts and our site. This means if you make a purchase using these links, we may earn a small commission. You don’t pay a cent more than you would otherwise! Our full disclosure is available under About.

As I know we have all been busy shopping, the next step is to wrap your presents!

Usually I just pick whatever paper I find in the store, but for several years now I have been wanting to wrap my presents up in a theme.

This post may contain affiliate links. See my disclosure policy.

This year’s theme is “brown paper packages tied up with strings.” Which, of course, is from the song “My Favorite Things” in The Sound of Music.

I used various ribbons for the packages.  Some are also adorned with ornaments, bells, and candy.

I love the idea of attaching greenery to the presents, but I wrap mine in advance the greenery would long be dead before they would be given away!

Here are some great ideas to attach to the ribbons on your packages:

bells

candy canes

greenery

cinnamon sticks

chocolate

gift tag

ornaments

gingerbread

bows

Let’s look at some inspiration for wrapping paper themes…

Beautiful pink and gold…

Jennelise Rose

Gingerbread tags adorn brown paper packages…

Decorators Notebook

For a more modern look, black and white paper with green ribbons!

House & Home

 Tartan or plaid gift wrap… here is red and gold and another pretty tartan paper.

via

White paper with colorful ribbons

Good housekeeping

Neutral colors…

Becky Luigart-Stayner

Blue and silver

C.Roehm


 Purple and gold theme…

Music sheets or antique texts as paper…

Dear Lillie

Not all packages are for adults! How about these little snowmen for the kids, idea from Owe craft.

Or, if you are into printed paper, this is a pretty fun print!

If you want more prints, you could just choose printed paper and stick to a color theme.

Or you could stick to a theme, like all snowmen printed paper for instance.

I wrapped the presents for the kids in an Elf on the Shelf wrapping paper this year… thought they might find the brown “boring”!


Follow Peonies and Orange Blossoms on social media:

Follow me behind-the-scenes on my favorite social media, Instagram!

See my latest pins on Pinterest.

Become a Facebook fan!

Follow all of my posts in my favorite blog reader feed Bloglovin.


linking up at: amaze me monday The Scoop! Make it Pretty Monday BNOTP Mon Inspire Me Tuesday  Wow us Wednesdays!Share Your Style Thursday Favorite ThingsCreative CircleHome Sweet Home Feathered Nest Fridays Craftberry Bush Foodie Friday & Everything Else Best of the Weekend Dishing and Digging It


Written at http://peoniesandorangeblossoms.blogspot.com

This post may contain affiliate links.

Save

Follow:

Christmas China – Plates and Dinnerware

We use affiliate links in our posts and our site. This means if you make a purchase using these links, we may earn a small commission. You don’t pay a cent more than you would otherwise! Our full disclosure is available under About.

I *love* Christmas dinnerware so I thought today we could look at some Christmas china!

This post may contain affiliate links.

I wrote about Christmas china several years ago, however new patterns have been released!

Prouna Nutcracker Plates – aren’t they fun?

Vietri  – hip and modern!


Christmas Tree Grove by Spode – very old world feeling!


Villeroy and Boch Toy’s Delight – I love the edge on this plate, don’t you?


Metallic Merry Plates – perfect and simple.


Fiesta Dinnerware Twelve Day of Christmas plates – love 12 days of Christmas!!


Juliska Country Estate Winter Frolic Scalloped Edge Plates – These are what I own!


Villeroy And Boch Christmas Tree Plate – I have always loved this pattern.


Spode Christmas in Gold – perfect for a formal setting!


Christmas Foliage Collection – wouldn’t these look nice in a stack of plates with tartan??


Winter Ball Collection – these remind me of old transferware plates!


Vietri Christmas tree plates – love the trees!

Holiday icon plates – I can see these appetizer plates at a “hip” party.


Snowman Plates – perfect for snowman lovers!


Juliska Winter Games appetizer plates – there are 12 and they are all different!


Vietri Snowman Salad Plate


Deerly Loved Plates – perfect for a Scandinavian Christmas theme!


Nutcracker Plates – aren’t these fun and colorful?

Follow:

How to Get Your Coffee Bar Ready for the Holidays

We use affiliate links in our posts and our site. This means if you make a purchase using these links, we may earn a small commission. You don’t pay a cent more than you would otherwise! Our full disclosure is available under About.

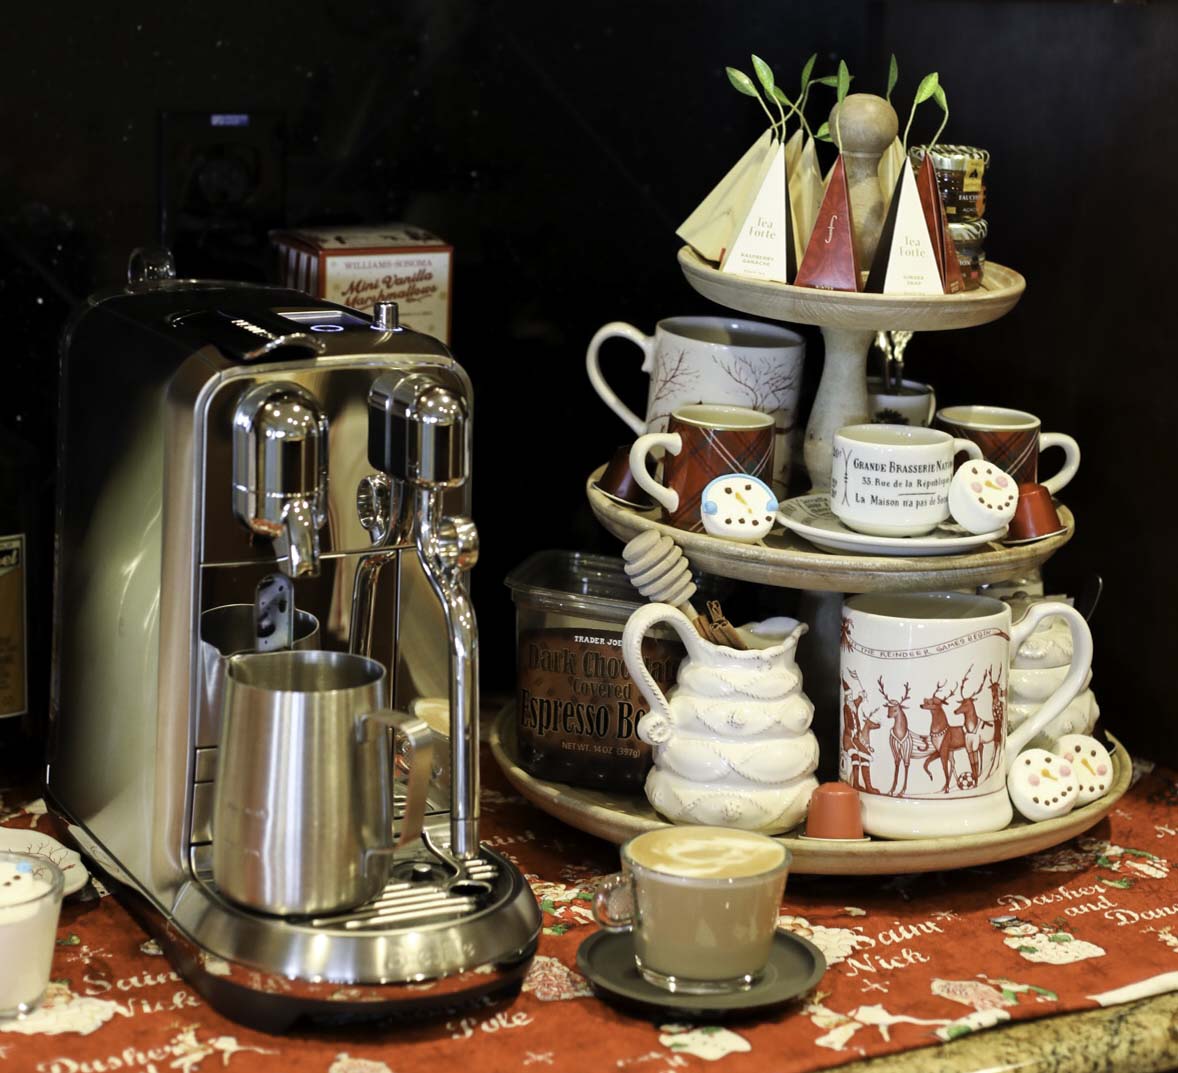
I thought I would share with you today on how to get your coffee bar ready for the Holidays! Now, the coffee bar doesn’t serve just coffee.  It serves up tea and hot chocolate too! There is something to please every guest here!

This post may contain affiliate links. See my disclosure policy.

How to Get Your Coffee Bar Ready for the Holidays

Clean it Up

The first thing you need to do to prepare your coffee bar for the holidays is to clean it up!  Clean your coffee machine, clean your counters, add your Christmas cheer!  

Provide a Variety of Teas, Coffees, and Hot Chocolate!

The next thing to do is to stock up on everything!  

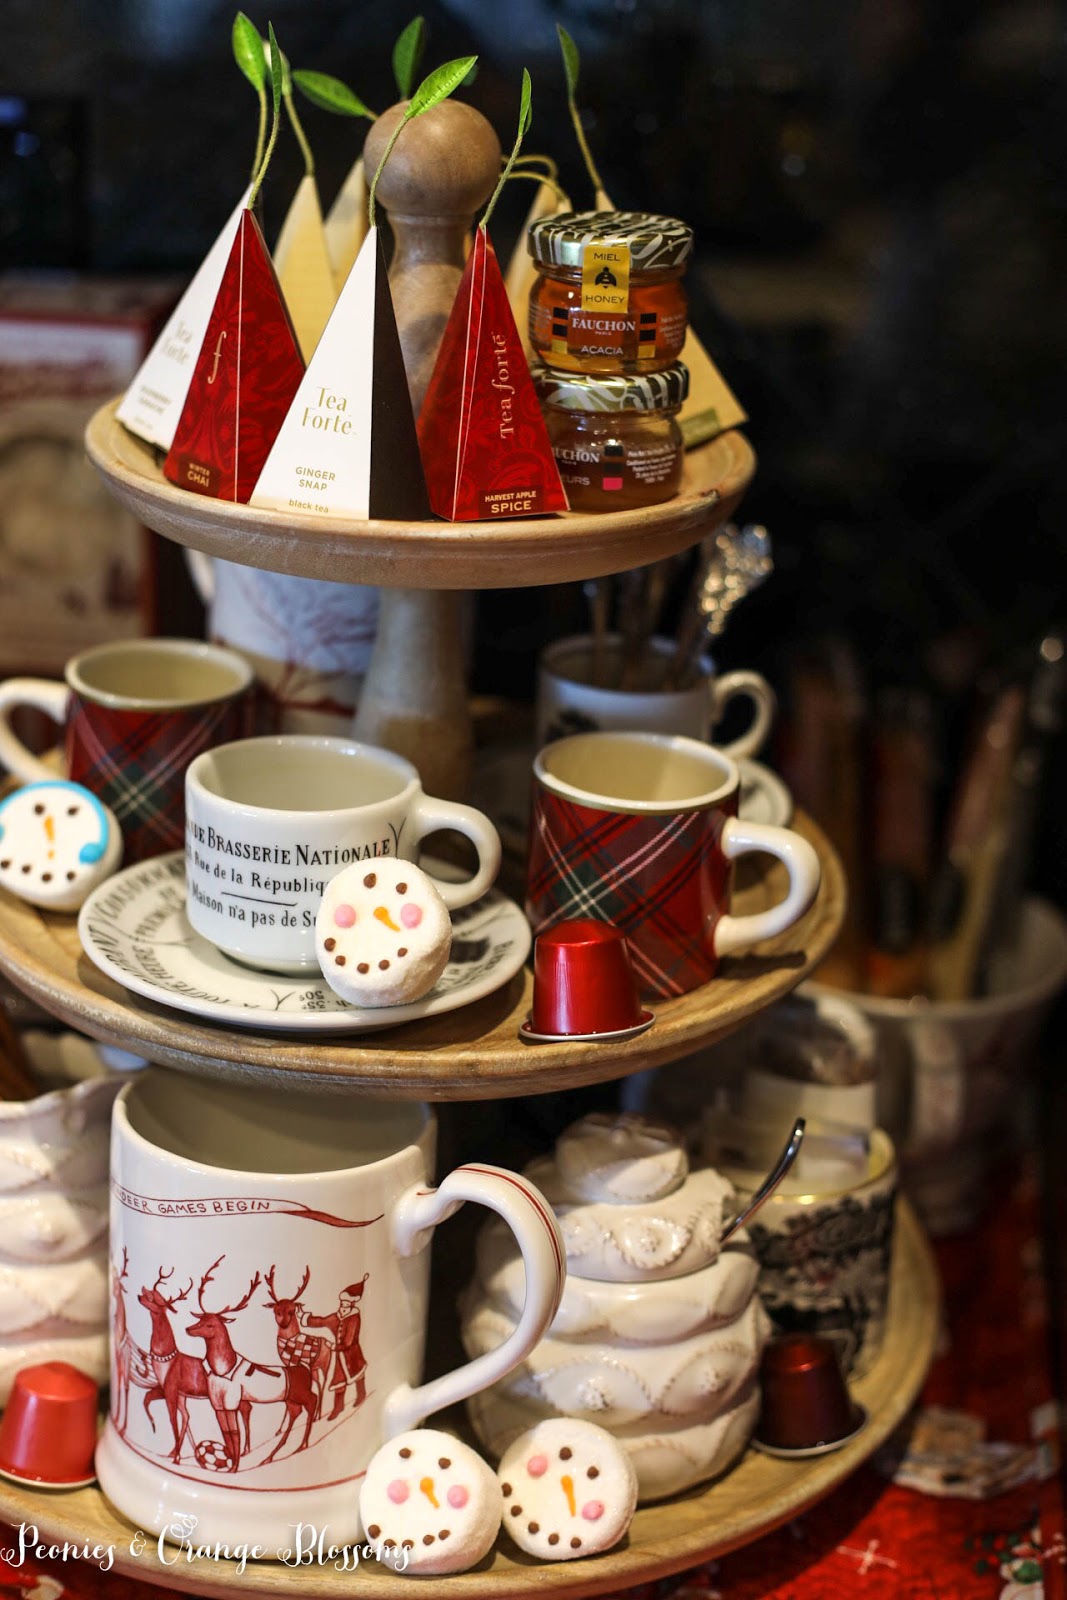
First, I have a selection of various teas, including Christmas themed teas.  I love Tea Forte and they make the cutest tea bags, but really any selection of teas will work.

Second, I have a selection of hot chocolates – a peppermint hot chocolate and a regular milk hot chocolate.

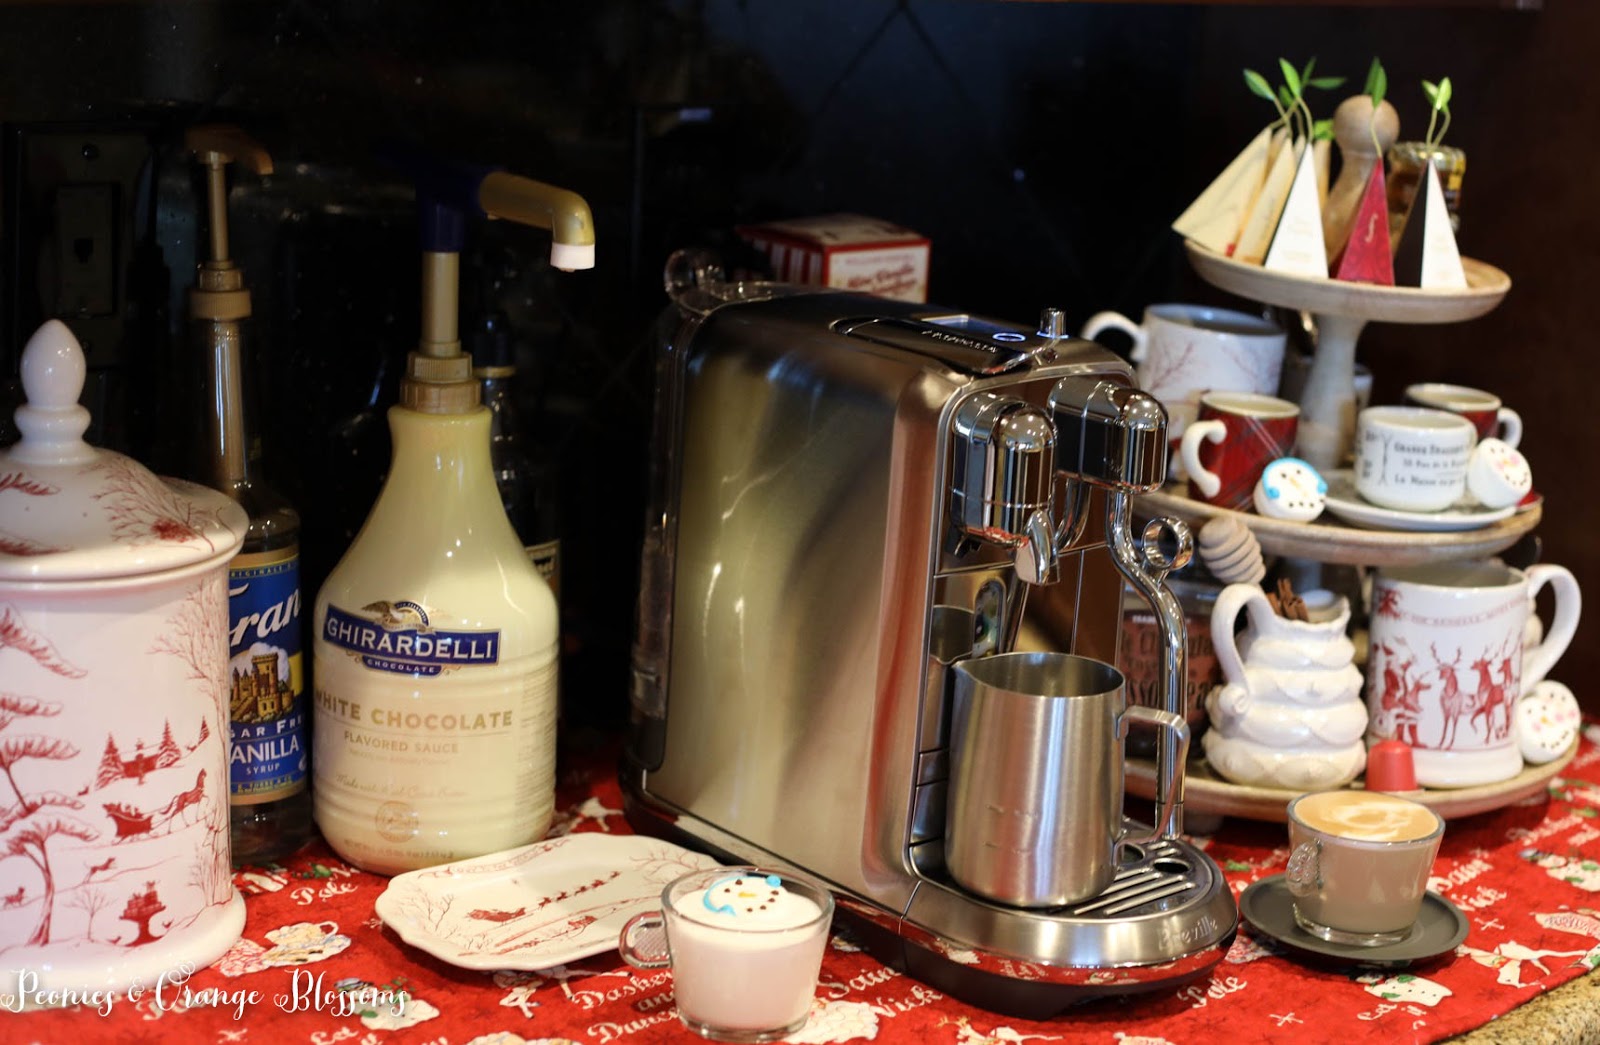
Third, I have a selection of various coffee flavors, both decaf and regular.  We use Nespresso at home as our preferred coffee and we love it.  (Side note – used to have a Keurig, it broke, we switched to nepresso and have been in love with it for 4 years. We just got this new machine which steams the milk and we love it. Like seriously – no more Starbucks).

How to Get your Coffee Bar Ready for the Holidays!


Add a Variety of “Mix-Ins”

We have several different coffee syrups (caramel, sugar-free vanilla, and white chocolate).  

We have different types of honey and marshmallows.  We also have cinnamon sticks, granulated sugar, Splenda, raw sugar, and agave syrup.  

Don’t know where to find those extra mix ins? Well, some of the extra sugars/agave syrup are from when we ordered things to go at various restaurants and didn’t use them, but we didn’t want to waste them, so here they are! 

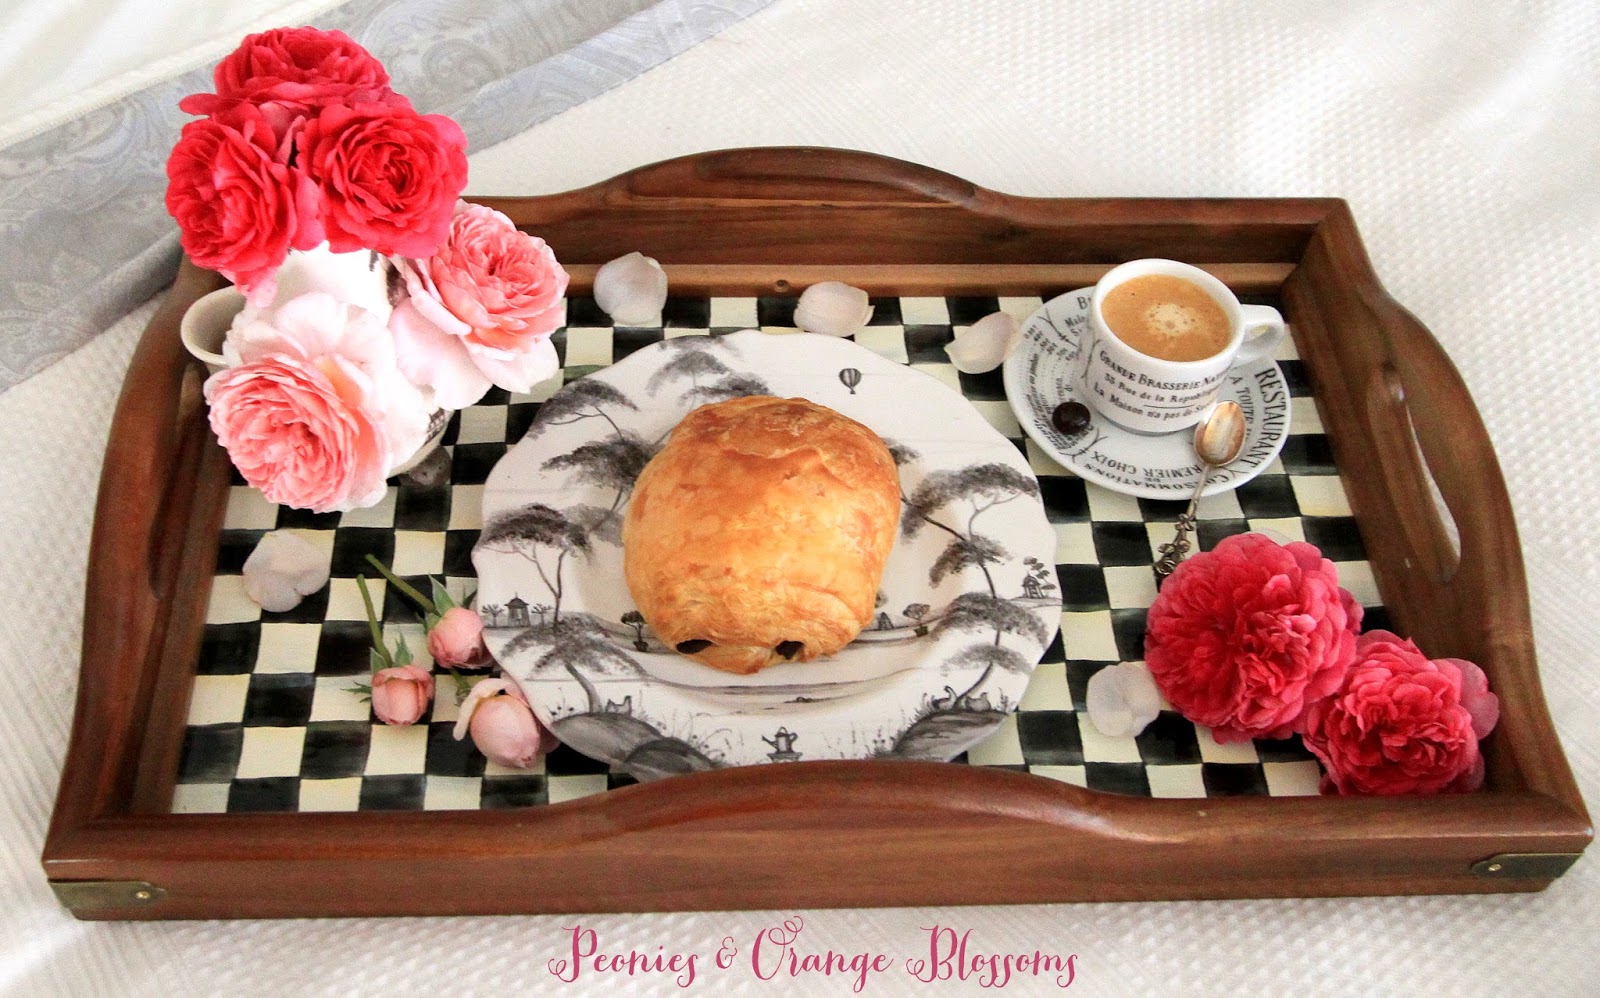
I also like to serve my coffees with an espresso bean on the side.  It makes it seem like a coffee shop!

We also have some biscottis for those that like their coffee and biscotti.  I buy the espresso beans at Trader Joe’s and biscotti at Costco.

How to Get your Coffee Bar Ready for the Holidays!
A “Vanilla Steamer” for the kids topped with a marshmallow

Below, various syrups are seen! There is hot chocolate hiding in the cookie jar (for now… Will someone make some cookies??) 

How to Get your Coffee Bar Ready for the Holidays!

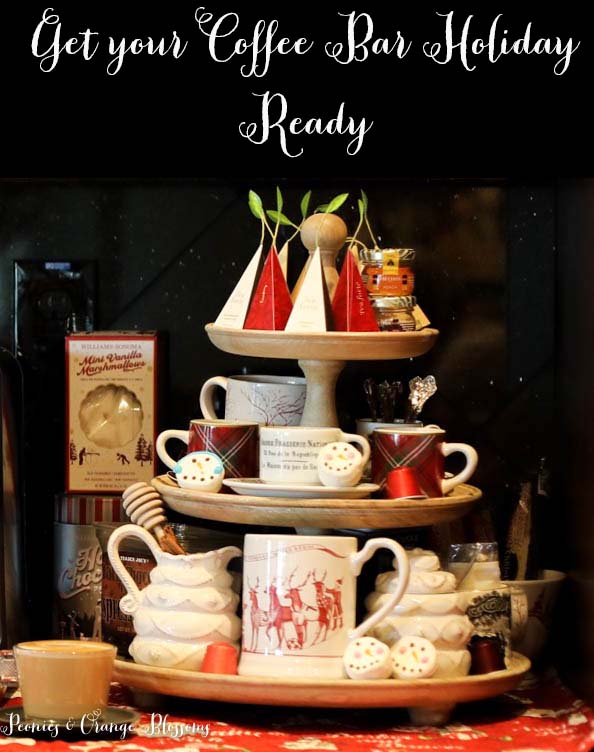
Provide a Selection of Mugs and Stirring Spoons

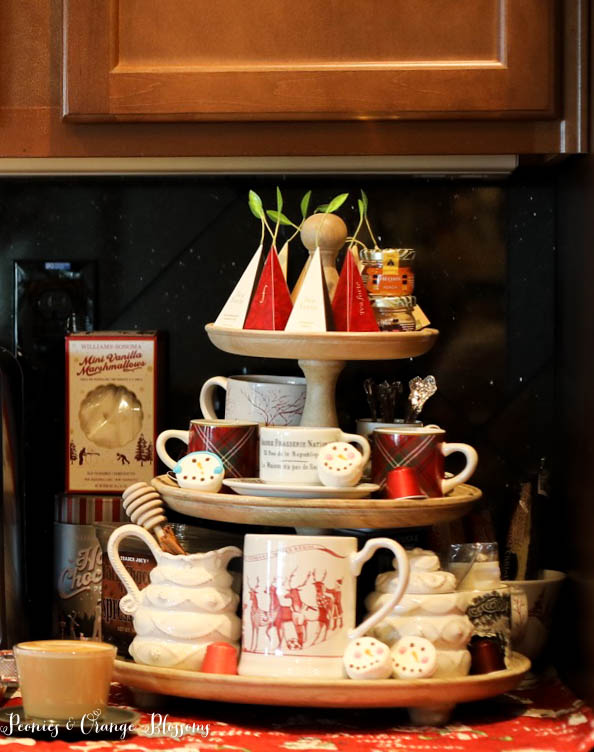
 I have several different types of holiday mugs to choose from that accommodate different types of drinks! Big one is for drip coffee, one in the middle back is for lattes and latte macchiatos, little French one in the front is for cappuccinos, and the tartan ones are for espresso!

Additionally, you can see some spoons in an espresso cup in the middle shelf on the right.  Those are antique sterling spoons. The spoons are all mismatched from different patterns that we’ve collected here and there. What’s funny is that people pick through that cup looking at all of the different spoons until they settle on one they like! It’s funny because almost everyone does it!  I mean, I still do it! 

How to Get your Coffee Bar Ready for the Holidays!

Other Tips

A three-tiered tray makes a great display for your coffee bar!  You can store a whole bunch of different items on it and you can turn it around to get to the back!

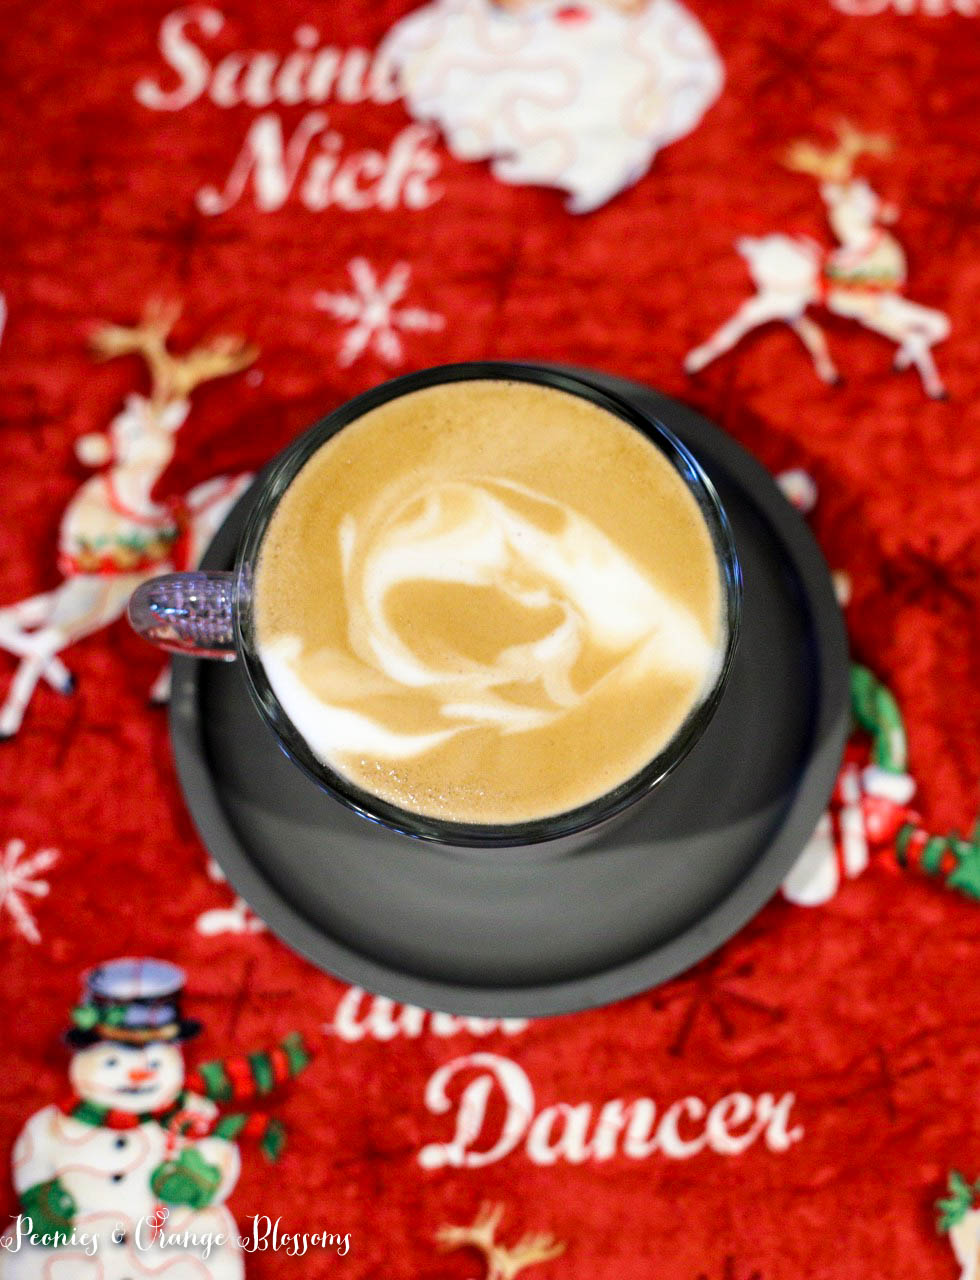
a cappuccino and my attempt at latte art! ha!

I hope you find my tips helpful!  We host Thanksgiving and frequently have people over during Christmas and this is a great way to entertain guests! Oh, plus we also use it everyday and like it too!! 

How to Get your Coffee Bar Ready for the Holidays!

Shop the Post:

Rustic Three Tiered Tray (or this cute holiday Red three tier tray)
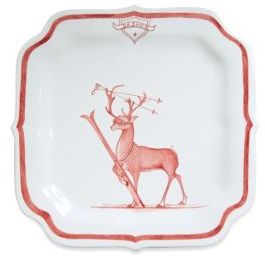
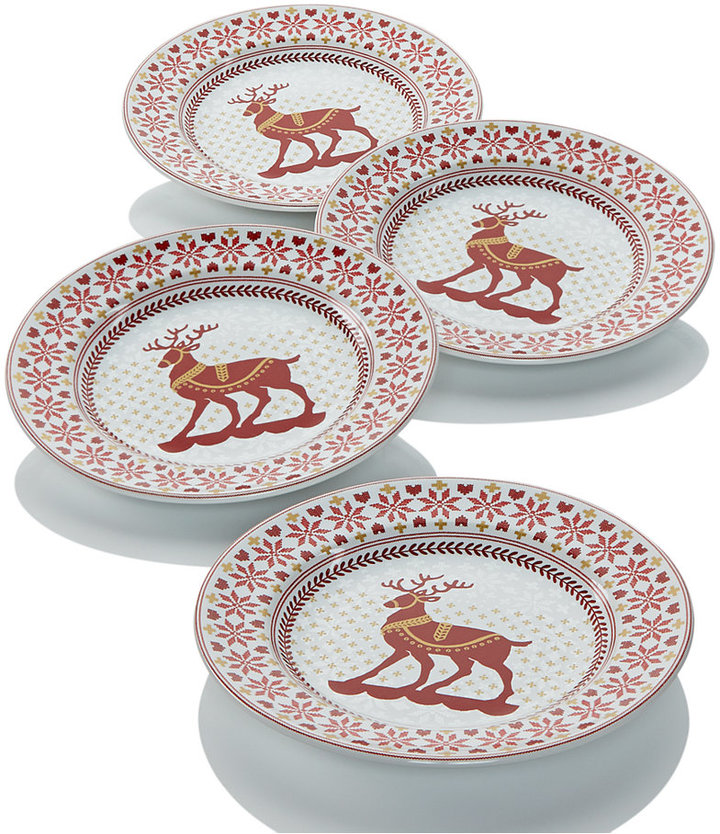
Reindeer Games Mug

 Tartan Coffee cups in red (white tartan version here

Tartan Espresso Cups in Red

French Brasserie Espresso mug 

Snowman Marshmallows

Browse Nespresso Machines


Follow Peonies and Orange Blossoms on social media:

pinterest || instagram |Facebook || bloglovin || tumblr || twitter || google plus


linking up at: amaze me monday The Scoop! Make it Pretty Monday BNOTP Mon Inspire Me Tuesday  Wow us Wednesdays!Share Your Style Thursday Favorite ThingsCreative CircleThoughts of Home Home Sweet Home Feathered Nest Fridays Craftberry Bush Foodie Friday & Everything Else Best of the Weekend Dishing and Digging It


Written at http://peoniesandorangeblossoms.blogspot.com

This post may contain affiliate links.

Follow:

Thanksgiving Dinner Plate Selections!

We use affiliate links in our posts and our site. This means if you make a purchase using these links, we may earn a small commission. You don’t pay a cent more than you would otherwise! Our full disclosure is available under About.

My Christmas China post from several years ago continues to be very popular, so I thought I would do a Thanksgiving china round-up this year!

Thanksgiving Dinner Plate and China Round Up!


Update October 2017- most of the plates they still make today but some have been discontinued. I have added new plates to the line up this year!

#1 – Juliska Forest Walk Leaf Plates aren’t they cute??

#2 – Herend Rust Bouquet Dinner Plate – a classic style

#3 – Harvest Dinner Salad Plate – add some color to your table!

#4 – “Oro Bello” Dinner Plates, I love the gold trim here!

#5 – Glen Lodge  I just love the tartan pattern, don’t you??

#6 – Woodland Bird Salad Plates – I confess I love animal plates!

#7 – Gilded Woods  – these a more simple and are perfect for more contemporary settings!

#8 – Juliska Forest Walk Dinner Plate, these were inspired by a walk in the woods! The owner’s children went for a walk in the woods and like to pick up things along the way and this is what they found!

#9 – Spode Woodland – Pheasant set and the Turkey Set. I just love the Woodland Spode for Thanksgiving and this is what I use too! You can also get the Moose Dinner plate or Woodland Rabbit.

#10 – Give Thanks Plate – for those of you that love plates with words on them!


#11 – Plymouth Pumpkin Dinner Plates, Set of 4 these are pretty cute!

#12 – Berry Dinner Plates – These are great if you are looking for a pattern that can be used for Thanksgiving and Christmas!

#13 – Acorn Dinner Plates with matching pumpkin salad plates – perfect for Fall decor.


#14 – Squirrel Plates  are pretty dang cute, aren’t they???

#15 – Gilded Forest Dinner and Salad Plates – I love these beautiful gilded plates!


#16 – Embossed White Turkey Dinner Plate – Great for Neutral Decor!

#17 – Metallic Lace Dinner Plate – This plate can take you from Thanksgiving through New Years!

#18 – Turkey Dinner Plate – another great Turkey plate for you traditionalists!


#19 – Colorful Turkey Paper Dinner Plate – Can you believe that these plates are made out of PAPER?! Talk about stylish!  These are the prettiest paper Thanksgiving dinner plates I’ve seen – perfect for those of you who do not want to spend their post-turkey coma doing the dishes!


Did you find some Thanksgiving china that you liked? What pattern do you use? Do you break out the fancy formal wear???


Follow:

How to Dry Lavender and DIY Lavender Decorating Ideas

We use affiliate links in our posts and our site. This means if you make a purchase using these links, we may earn a small commission. You don’t pay a cent more than you would otherwise! Our full disclosure is available under About.

I have been busy drying lavender this past month!  Do you grow your own lavender? If you do, I highly recommend harvesting it and using it around the house!  It so beautiful both alive and dried.

Drying your own lavender is easy to do.  It is easier than drying other flowers!

Here are the simple steps:

1. Harvest your lavender just before it’s fully in bloom.  Cut the lavender flowers just above the leaves. If you get some of the leaves, just pick them off.  Don’t cut the woody part of the plant. I harvest at dusk after the bees have gone home for the night.

2. Gather the lavender into a hand-size bunch.  Tie the stems with string, rubber band, etc.

3. Hang the lavender bunch upside down.  I attached my bunches to a hanger.

4. Find a cool dark place to allow the lavender to dry.  I put mine in my closet – it made the closet smell nice and it was cool and dark in there!

5. Allow to completely dry. Drying times vary depending on how big you made your bunches, where you stored them, etc. I let these hang for 2-3 weeks.

Decorating with lavender is one of my favorite things!  I filled my dough bowl this year’s harvest of lavender, as you can see below.  (Sorry for the picture quality, it was very difficult to get a good picture because it is so sunny here!)

Or, you can just wrap them up in a bunch and lay them on a table, like below…

You can make your own lavender sachets, like below.  This sachet I happened to receive as a party favor from my relatives… they have their own lavender farm!  It is very easy to make…. just dry your lavender as above. Then, once dry, you just pick off the flowers.

DIY lavender sachet - perfect for wedding favor or party favor.

Here, I set up a French country lavender table using our home grown lavender.

Here is another pretty lavender sachet… Antique Style Blog used her antique hankies and turned them into these pretty sachets.  Check out how she did that here.

How to make a burlap wreath blog teaches us how to make a dried lavender wreath! I love it!

Below in my centerpiece, you can see a dried lavender wreath too. I did not make it! Bought it at my favorite store in Napa!

This past Winter I trimmed the lavender so far back into the woody part all you could see was the woody party! I was afraid it wouldn’t grow back! But it DID! Do you grow your own lavender?

Here is a French farmhouse lavender tablescape I did!

SaveSave

SaveSaveSaveSave

Follow:

A French Country Evening and a Secret to Living a Glamorous Life

We use affiliate links in our posts and our site. This means if you make a purchase using these links, we may earn a small commission. You don’t pay a cent more than you would otherwise! Our full disclosure is available under About.

Hello! I’m here today sharing with you a little French country evening!  I have prepared a French raspberry tart for us to enjoy (some of us will enjoy it with our eyes, other with our mouths!)

I made the raspberry tart… the recipe will be coming soon.


Want to know a secret to living a glamorous life?


Make the ordinary… extraordinary!

What do I mean by that?  So, here for instance, we are having dessert. Yes, I know it is a raspberry tart, but really it could be any dessert!

I am using some sterling forks to eat.  Now, you say, that’s nice, but I can’t do that because of… money or *insert excuse* (too busy, it’s too fragile, that’s too fancy for me)…

Well, except you can!

You don’t have to have own whole sterling set of silverware. (Don’t tell the sterling dealer that).  Just… buy two forks. You can find them in a pattern you like for a decent price either on Ebay or an antique mall that won’t break the bank.  The forks don’t have to be a matching pattern either, honestly!

Pull out your nicer crystal… I know you have at least two nice cups from your wedding!

Dine on some antique plates that are hand painted and beautiful! I pulled these pretty pink and gold ones off of the wall! Just don’t put them in the dishwasher or use a knife on them (otherwise they will scratch or be ruined!).

You say, I don’t have antique plates… well I know for a FACT that you can pick up some pretty hand painted antique plates for a song.

Don’t keep your antiques stored on the wall or your cupboard… use them! We have some friends that are antique dealers that always dine on antique fine china… Why? Because they can, that’s why!

I also picked some roses from the garden. They smelled delightful.   You don’t have to have flowers from the store. Just pick some from your garden!

You see… you don’t have to go out and dine to have a glamorous life… just stay at home!

But pulling out and using some of your nicer things “just cause” can make an ordinary day extraordinary and make you feel special.

You will feel like the Queen of your castle… because you are!

So that’s how I spent my French country evening.  Enjoying a tart, sipping on some sparkling lemonade, and watching the stars appear over the countryside.


Are you following Peonies & Orange Blossoms on social media? Join the community…

pinterest || instagram || Facebook || bloglovin || tumblr || twitter || google plus

linking up at: amaze me monday The Scoop! Make it Pretty Monday BNOTP Mon Inspire Me Tuesday  Wow us Wednesdays!Share Your Style Thursday Favorite ThingsCreative CircleThoughts of Home Home Sweet Home Feathered Nest Fridays Craftberry Bush Foodie Friday & Everything Else Best of the Weekend Share it One More Time Sundays at Home Dishing it and Digging It

Written at http://peoniesandorangeblossoms.blogspot.com/

SaveSave

Follow:

French Breakfast in Bed… Perfect for Sunday Mornings!

We use affiliate links in our posts and our site. This means if you make a purchase using these links, we may earn a small commission. You don’t pay a cent more than you would otherwise! Our full disclosure is available under About.

Good morning!  Today I’m having breakfast in bed.  A French breakfast to be exact!

A French breakfast in bed with a pain au chocolat and espresso! Fit for a Queen!

I think having breakfast in bed from time to time helps your house feel like a hotel… and you feel like a Queen! It makes your life go from ordinary to extraordinary, don’t you think? Bring some fresh flowers in to make it feel even more enchanting! Make your bed! Put on your nice spa robe, Ugg slippers, and enjoy!

A French breakfast in bed with a pain au chocolat and espresso! Fit for a Queen!


On the menu this morning

Freshly baked pain au chocolat

Espresso


Just like a real French breakfast! If I were a real Parisian, a cigarette too! (ha, don’t smoke, but the French certainly do!)

A French breakfast in bed with a pain au chocolat and espresso! Fit for a Queen!

I bought this little espresso cup in the Napa Valley.  It is by Pullivuyt, a French porcelain company. I love it!! You can get a set of four here or one here.  Put a little coffee bean on the side of your espresso, stir in the sugar with a silver demitasse spoon!

A French breakfast in bed with a pain au chocolat and espresso! Pillivuyt espresso cup with a coffee bean!

Want to know a secret about this pain au chocolat (chocolate croissant)?? It is fresh out of the oven!  But… it’s from Trader Joe’s! YES! In the frozen section of TJ’s there is the pain au chocolat in a set of four.  It is super easy to make – just pull how out many you want to bake the night before – let it thaw and rise overnight, and then in the morning just pop them in the oven for 15 minutes or so!

Voila! Instant, freshly baked, chocolate croissants!

If you’re feeling extra brave, you could always make your own plain croissants. Here, I’ll help you out: two of my favorite French food bloggers versions of croissants recipe 1 and recipe 2.

But I’m lazy in the morning, so I’ll stick with the TJs one! TJs also sells mini plain croissants in a set of 8, if the chocolate ones aren’t your thing!

A French breakfast in bed with a pain au chocolat and espresso! Fit for a Queen!

 Well, thanks for stopping by on this wonderful Sunday morning.  I’m off to eat enjoy my breakfast and read my blogs!  I use bloglovin’ to read my blogs, it’s a great app that makes it easy to follow and read all of your blogs.


Post-Breakfast Outtake: After enjoying breakfast, Chloé the cat had to stop by and smell the roses!

SaveSave

SaveSave

Follow:

Oktoberfest Party Decorations – a Table Setting Idea

We use affiliate links in our posts and our site. This means if you make a purchase using these links, we may earn a small commission. You don’t pay a cent more than you would otherwise! Our full disclosure is available under About.

This past weekend I had some family over and we had an Oktoberfest party – lots of great Oktoberfest party decorations here!! For the party, I set up this pretty Oktoberfest table!

Hanging from the chandelier are printouts of Lebkuchen hearts you see everywhere in Bavaria – especially during Oktoberfest time! I simply took the ones from last year and glued them to some cardboard. I then punched a hole in the center and hung them with string! You can print out your own here through my Oktoberfest 2014 table: Oktoberfest 2014 table

I found the printed plates and napkins at Cost plus. The napkin rings are vintage Erzgebirge from Germany that were found on eBay. Aren’t they cute? They are holding plates from the harvest.

For the placemats, I made my own. I couldn’t find any Bavarian looking placemats anywhere! And when I found German placemats, they were black, red, and yellow which are the colors of the German flag. Oktoberfest colors are blue and white – representing Bavaria.

Making them was pretty simple. I used a previous placemat to get the right size. Then added some flannel to the back make it thick. The fabric was a bright blue picnic table fabric!

To finish them, the white ribbon was later sewn around the edges.

A closer look at the individual table settings…

One last look! I just love the hearts hanging from the chandelier!

An Oktoberfest table… pin away!

SaveSave

SaveSave

Follow:

From the Shop

I may earn a small commission if you purchase with these links

Caning Natural Tote Handbag - Universal Thread™
The Hustler High Waist Fray Hem Ankle Bootcut Jeans
Le Panier Pliage Raffia Crossbody Bag
Extra Large Le Pliage Panier Tresse Straw Tote
The Bennet Buttondown Shirt by Maeve
T Monogram Perforated Leather Bucket Bag
Mellow Stud Mule
Le Pliage Marinière Recycled Nylon Canvas Travel Bag
Unseen Sunscreen Broad Spectrum SPF 40 PA+++
Maxine Stripe Cotton Button-Up Shirt
Citizens of Humanity Charlotte High Rise Straight Jeans
Navy Equestrian Traversee M Linen Tote
Cream Carrie Blouse
Ellison Natural
Jolene High Rise Vintage Slim
Citizens of Humanity Blue Jolene Jeans
Charlotte High Rise Straight Jeans
Le Pliage Filet Top Handle Bag
Vintage cotton crewneck T-shirt
Air Heart Sunglasses
Le Pliage Torchon XS Top Handle Bag With Strap
Santorini Raffia Basket Bag
Chuck Taylor® All Star® Lift High Top Platform Sneaker
Please note that I use ShopSense, LIKETOKNOW.it, Shareasale and Amazon affiliate links on this site. This means using them for purchases won’t cost you extra but may earn me a small commission.  Our full disclosure is available for viewing under About in the disclosure policy.
All rights reserved. Our graphics, images and text are all subject to copyright protection.